In this video, we'll walk through how to set up and use variable logic in your Engage study. Variables are a powerful tool that let you store information about each participant as they move through your survey — and use that information to personalize their experience, route them to the right questions, and even give your AI interviewer more context. Let's get started!
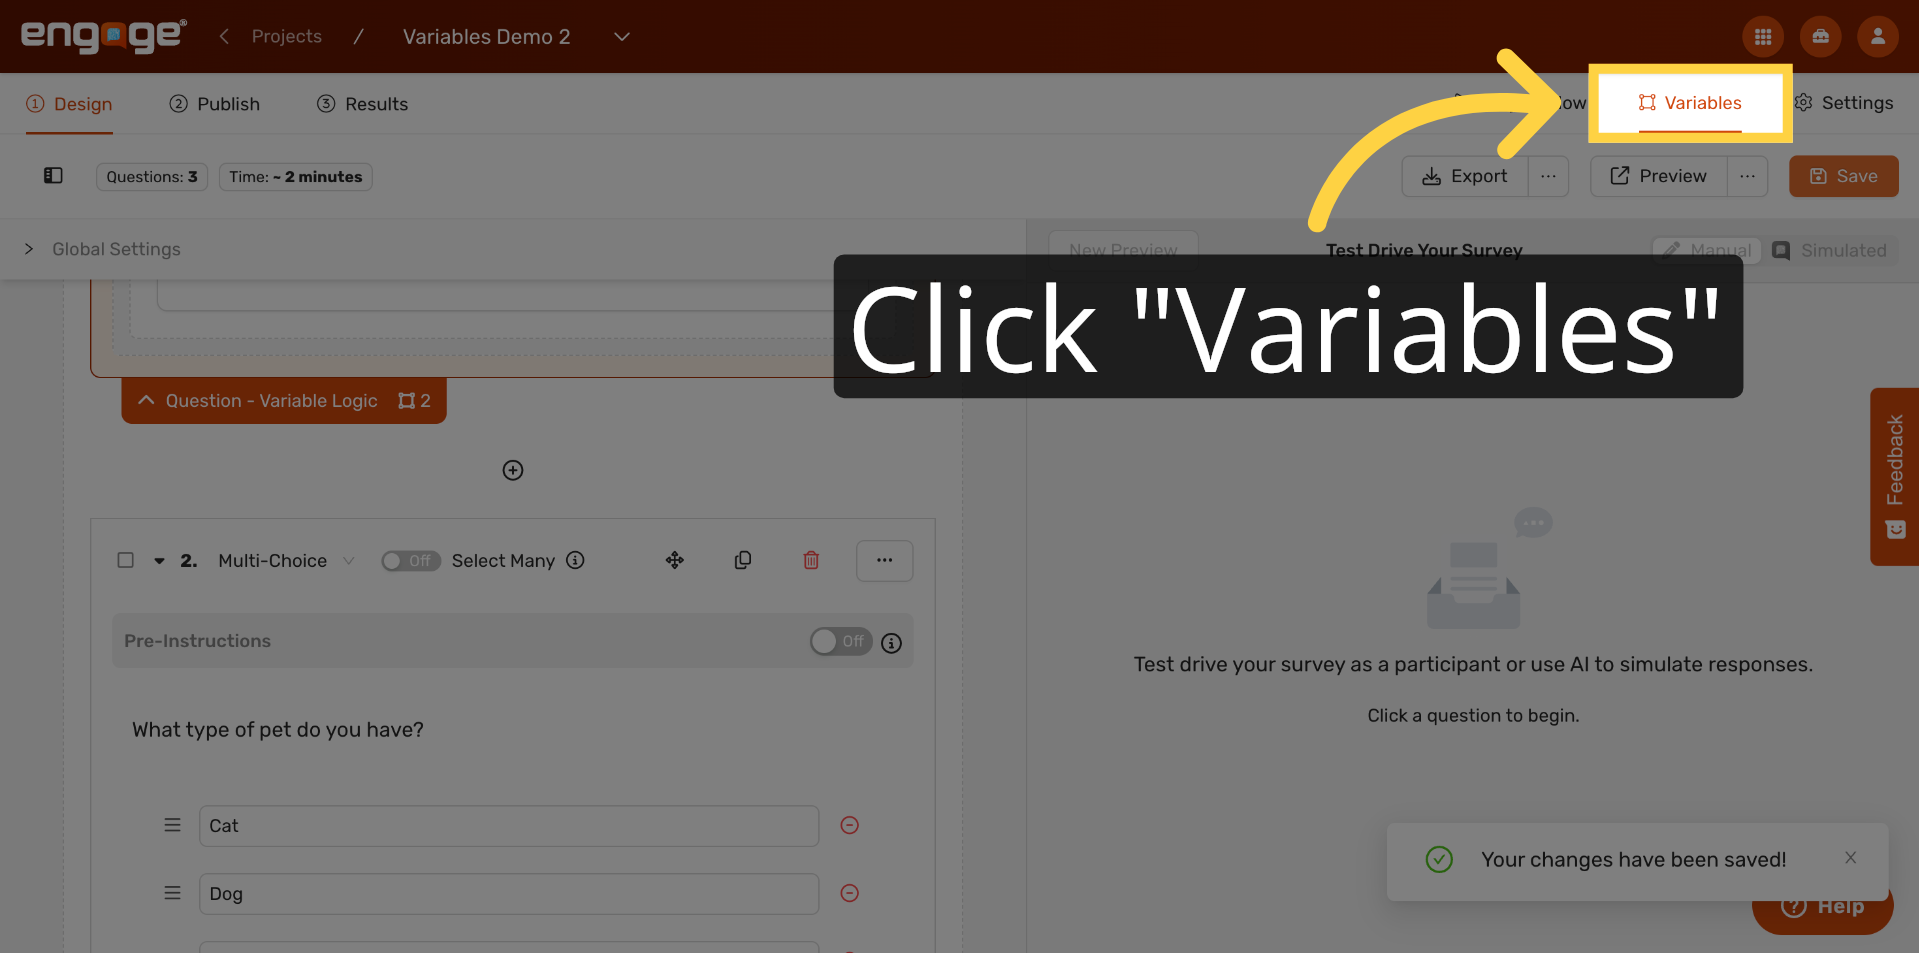
1. Open Variables Tab
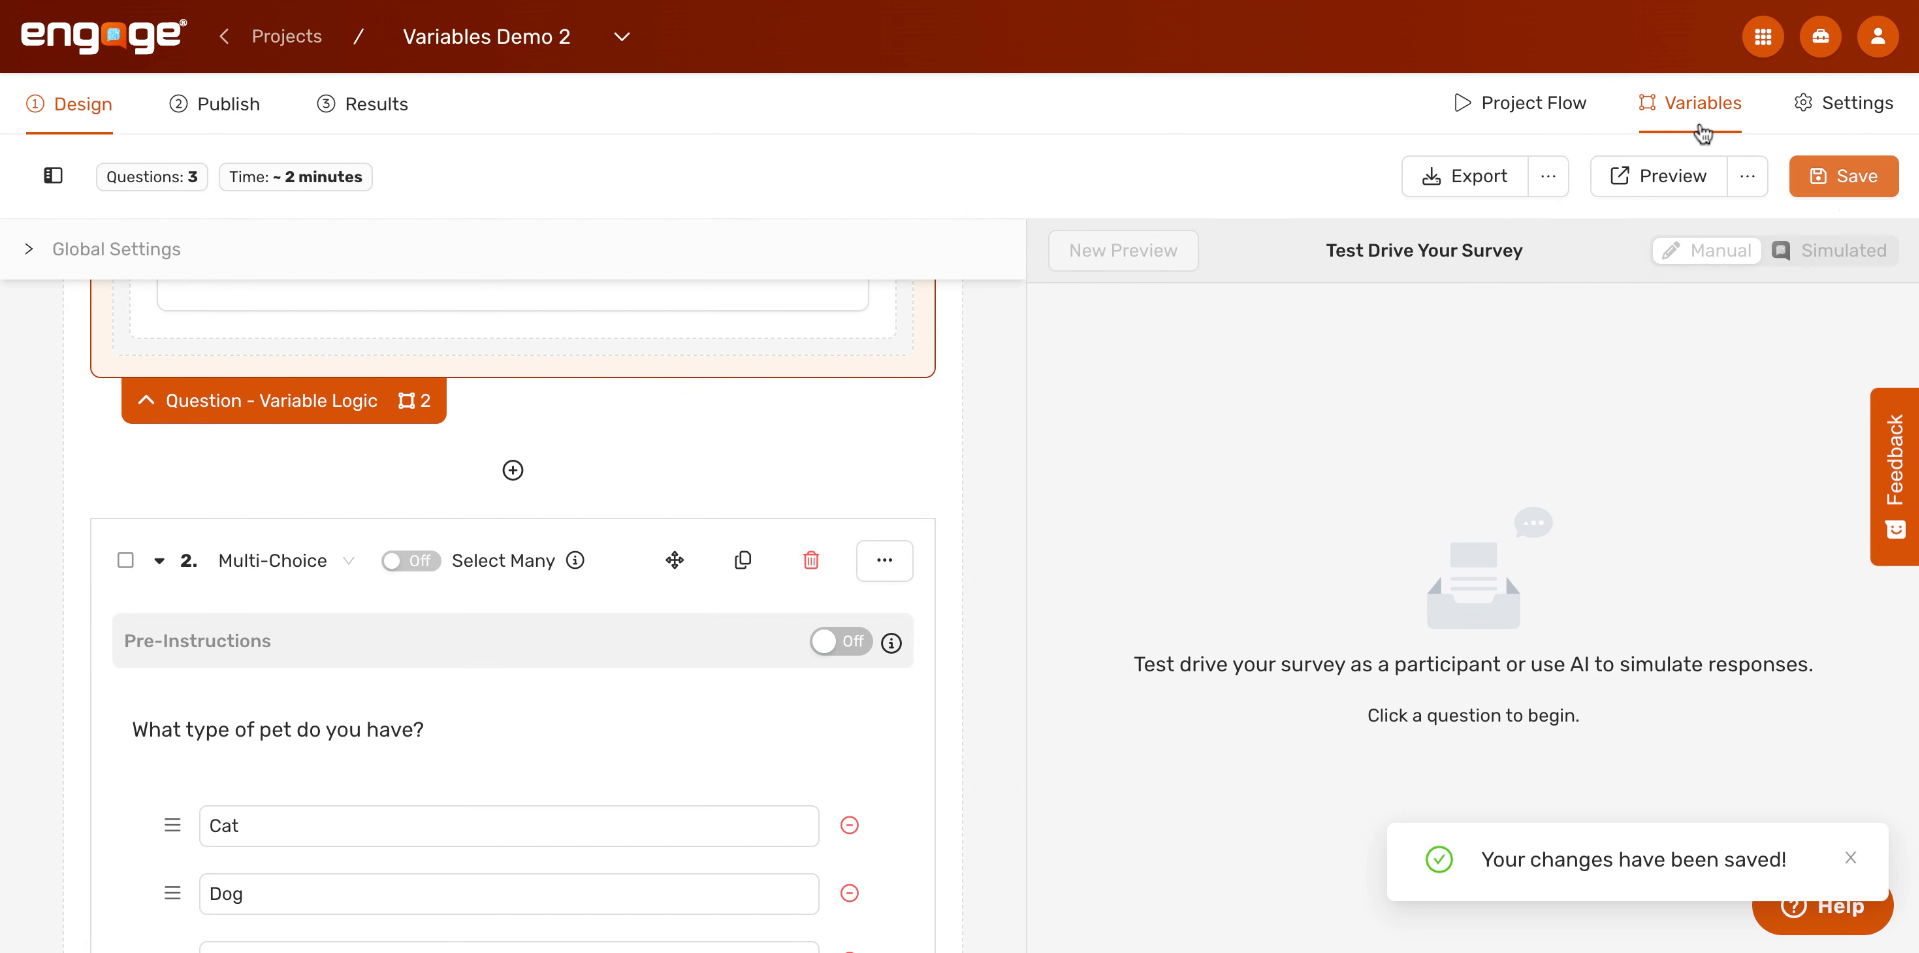
Once you're inside your project, you'll notice the Variables button in the top toolbar. Click it to open the Variables panel, where you can create and manage all the variables for your project.
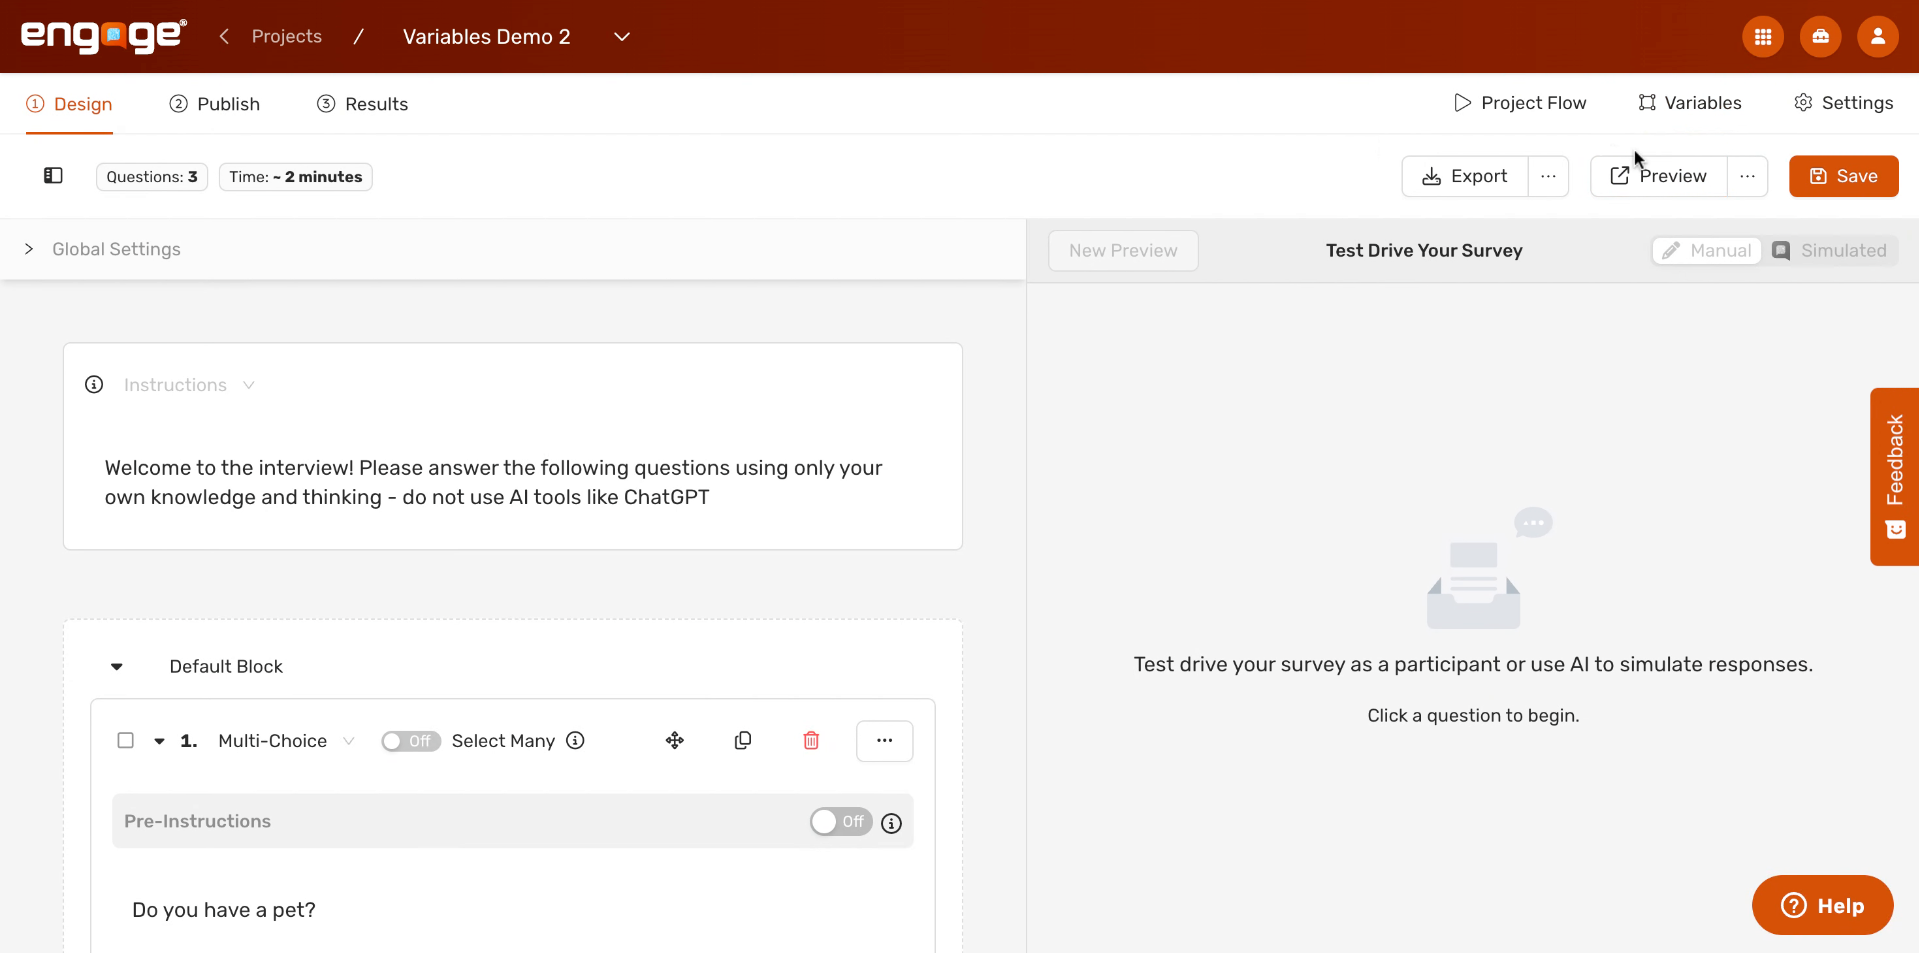
2. Select Variable Name Field
A dialog box will appear. Start by clicking into the Variable Name field — this is where you'll give your variable a clear, descriptive name that you'll recognize later when building logic.
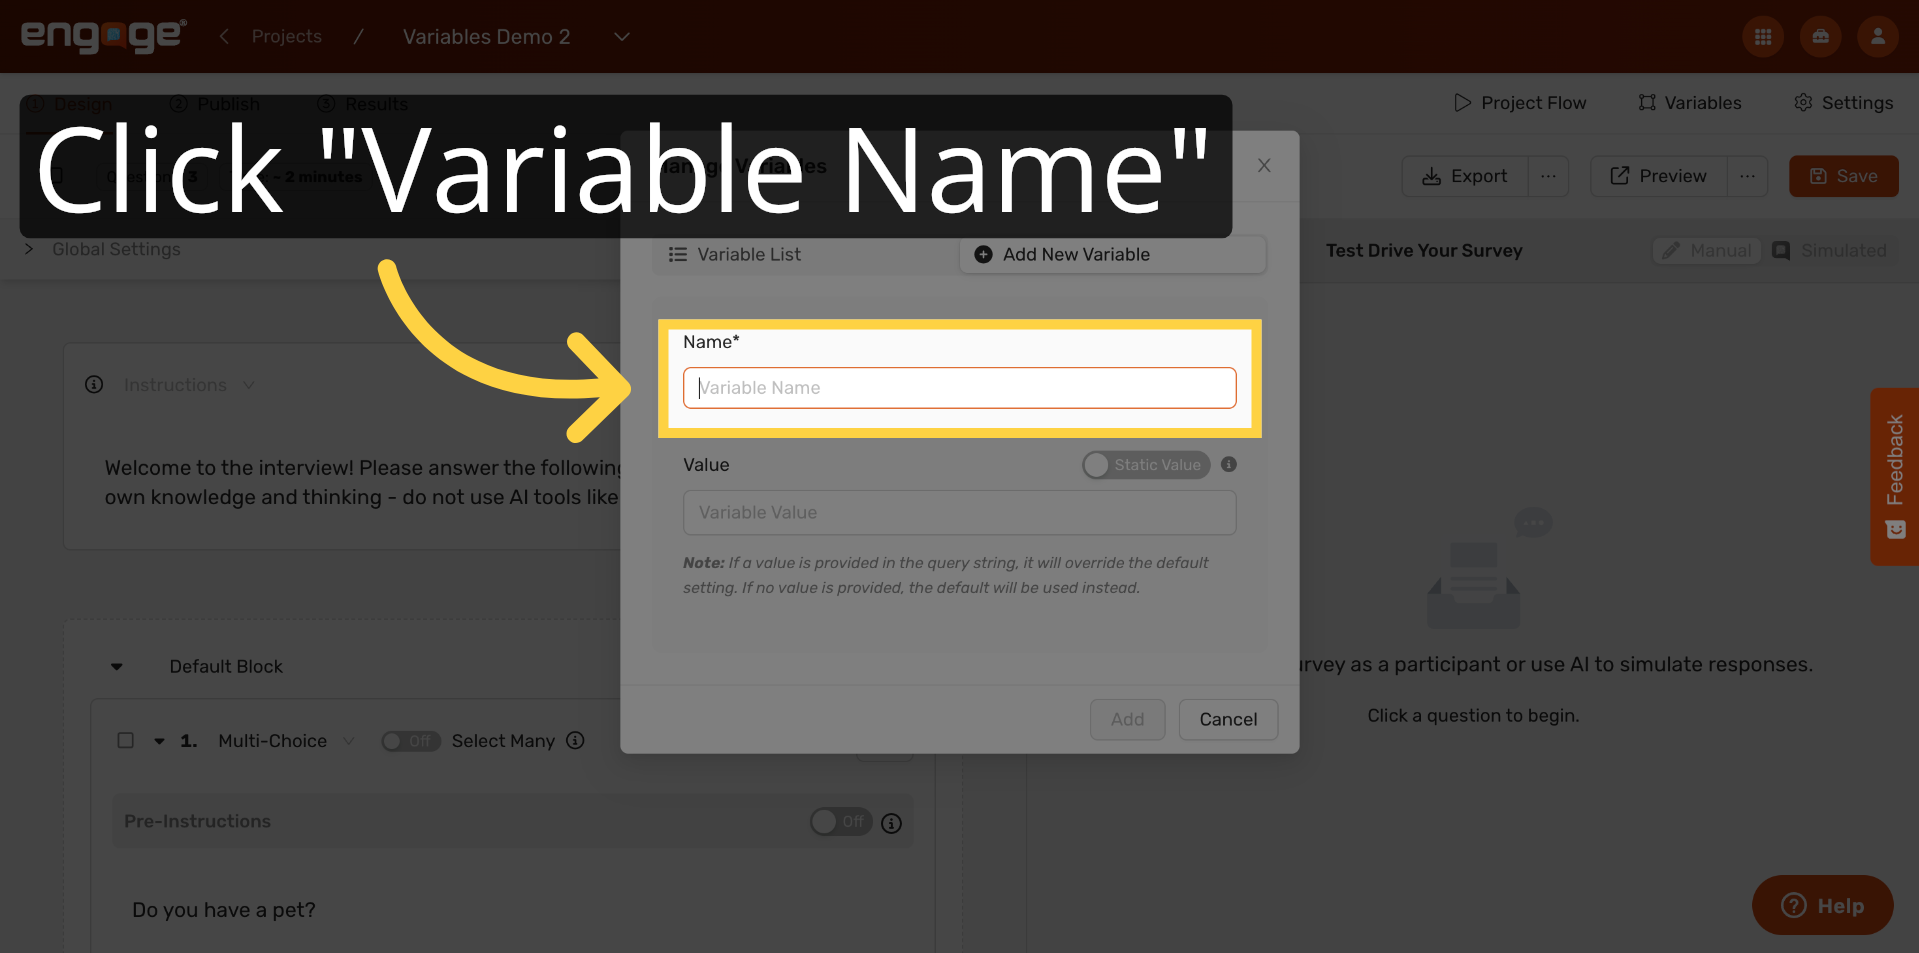
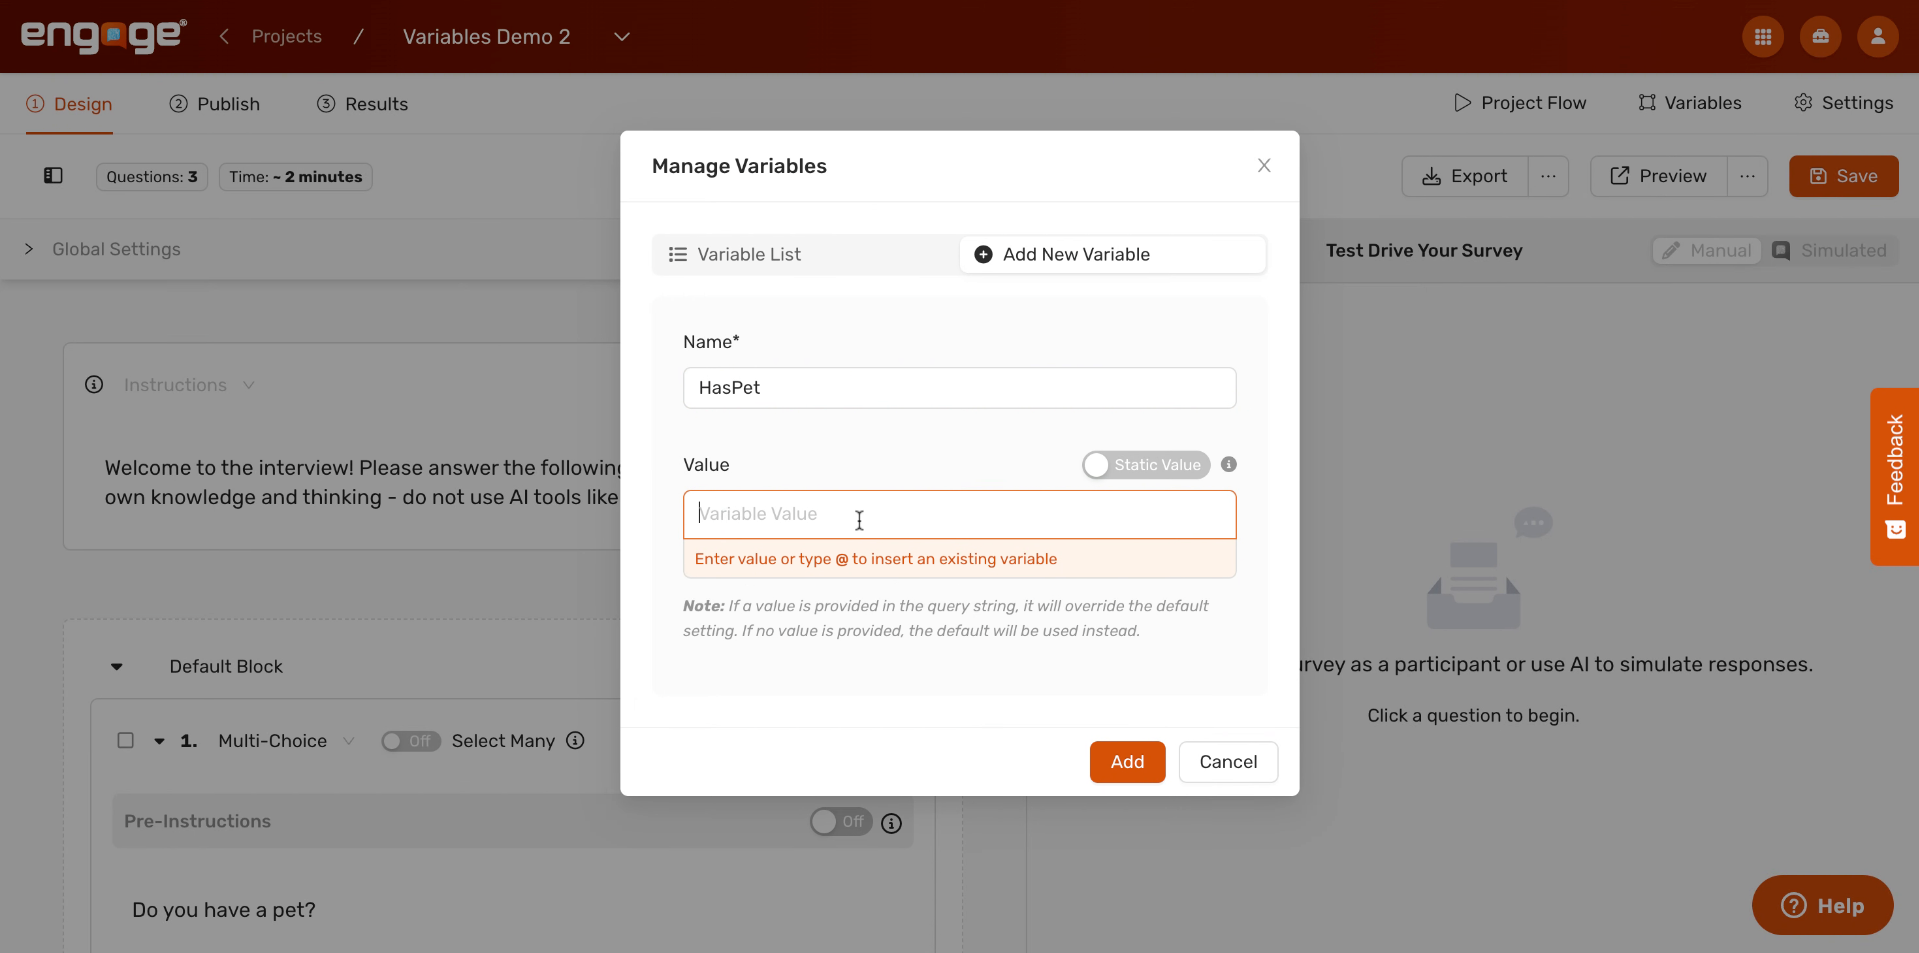
3. Name Your Variable
Type a name for your variable. In this example, we're creating a variable called "HasPet." Choose names that are easy to understand at a glance, especially if you plan to build complex logic later.
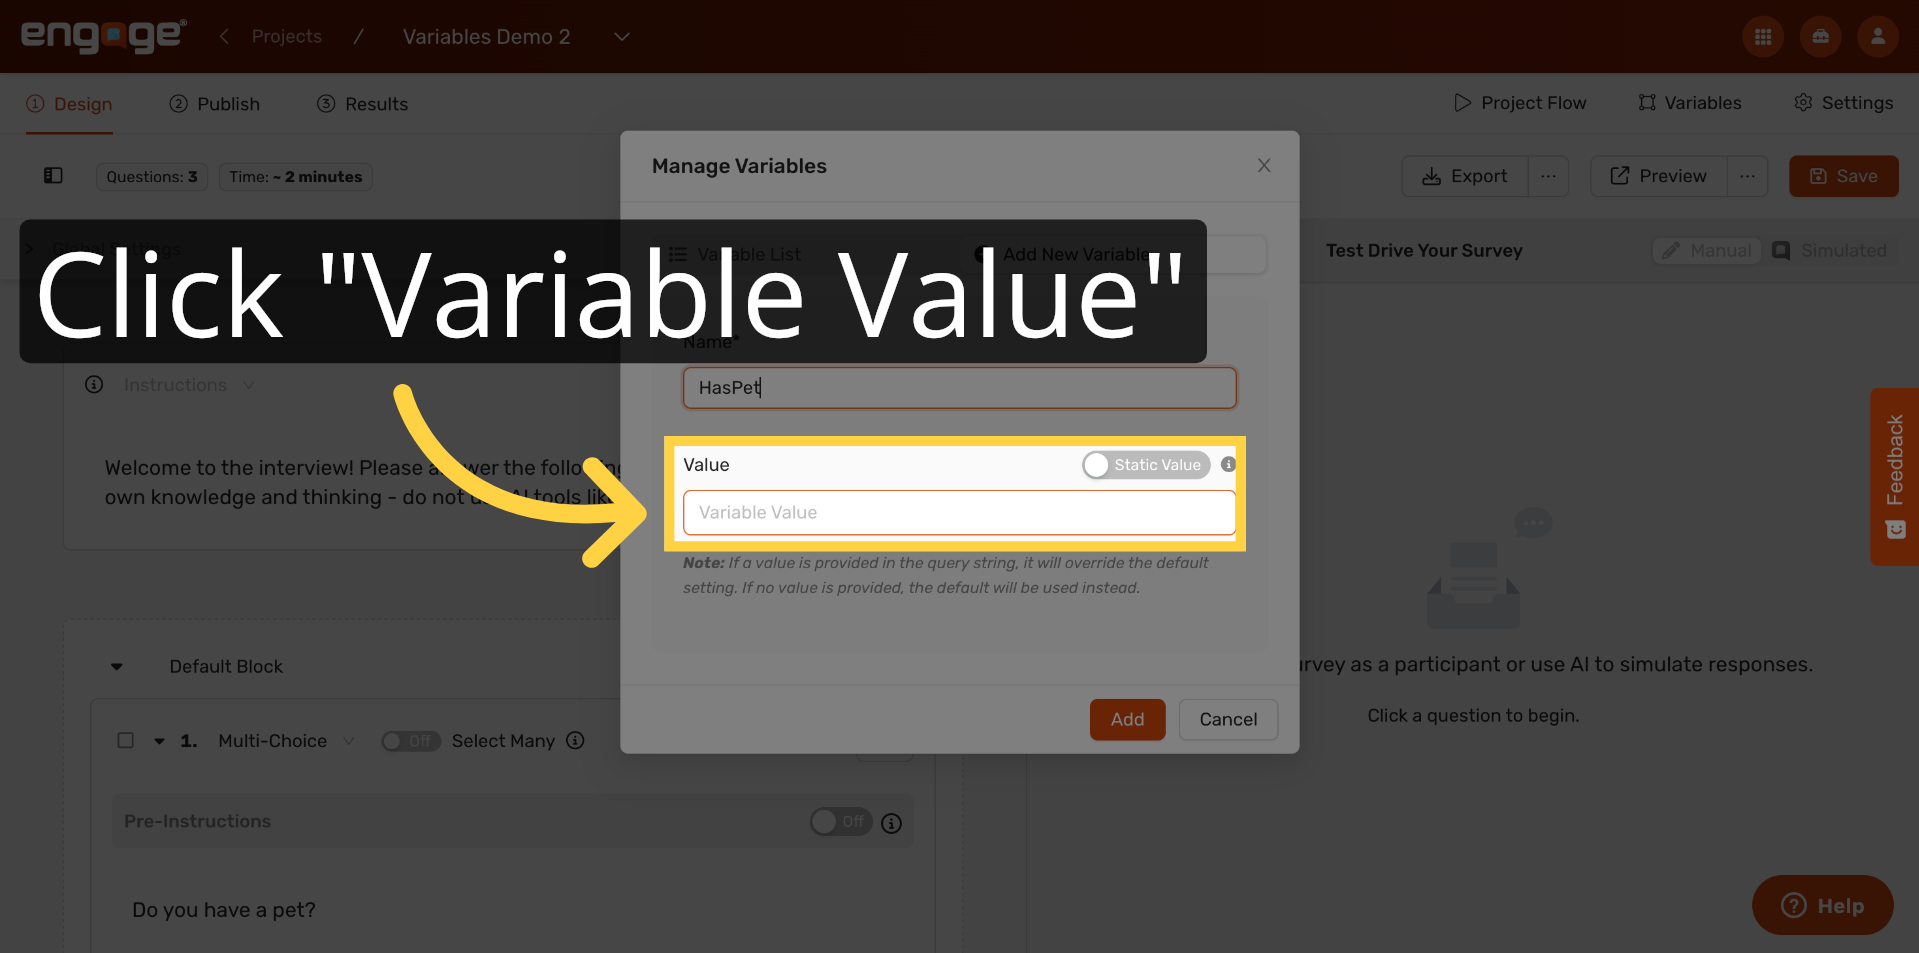
4. Select Variable Value Field
Next, click into the Variable Value field. This is where you'll set the default value — the value the variable will hold at the start of every session, before any logic has run.
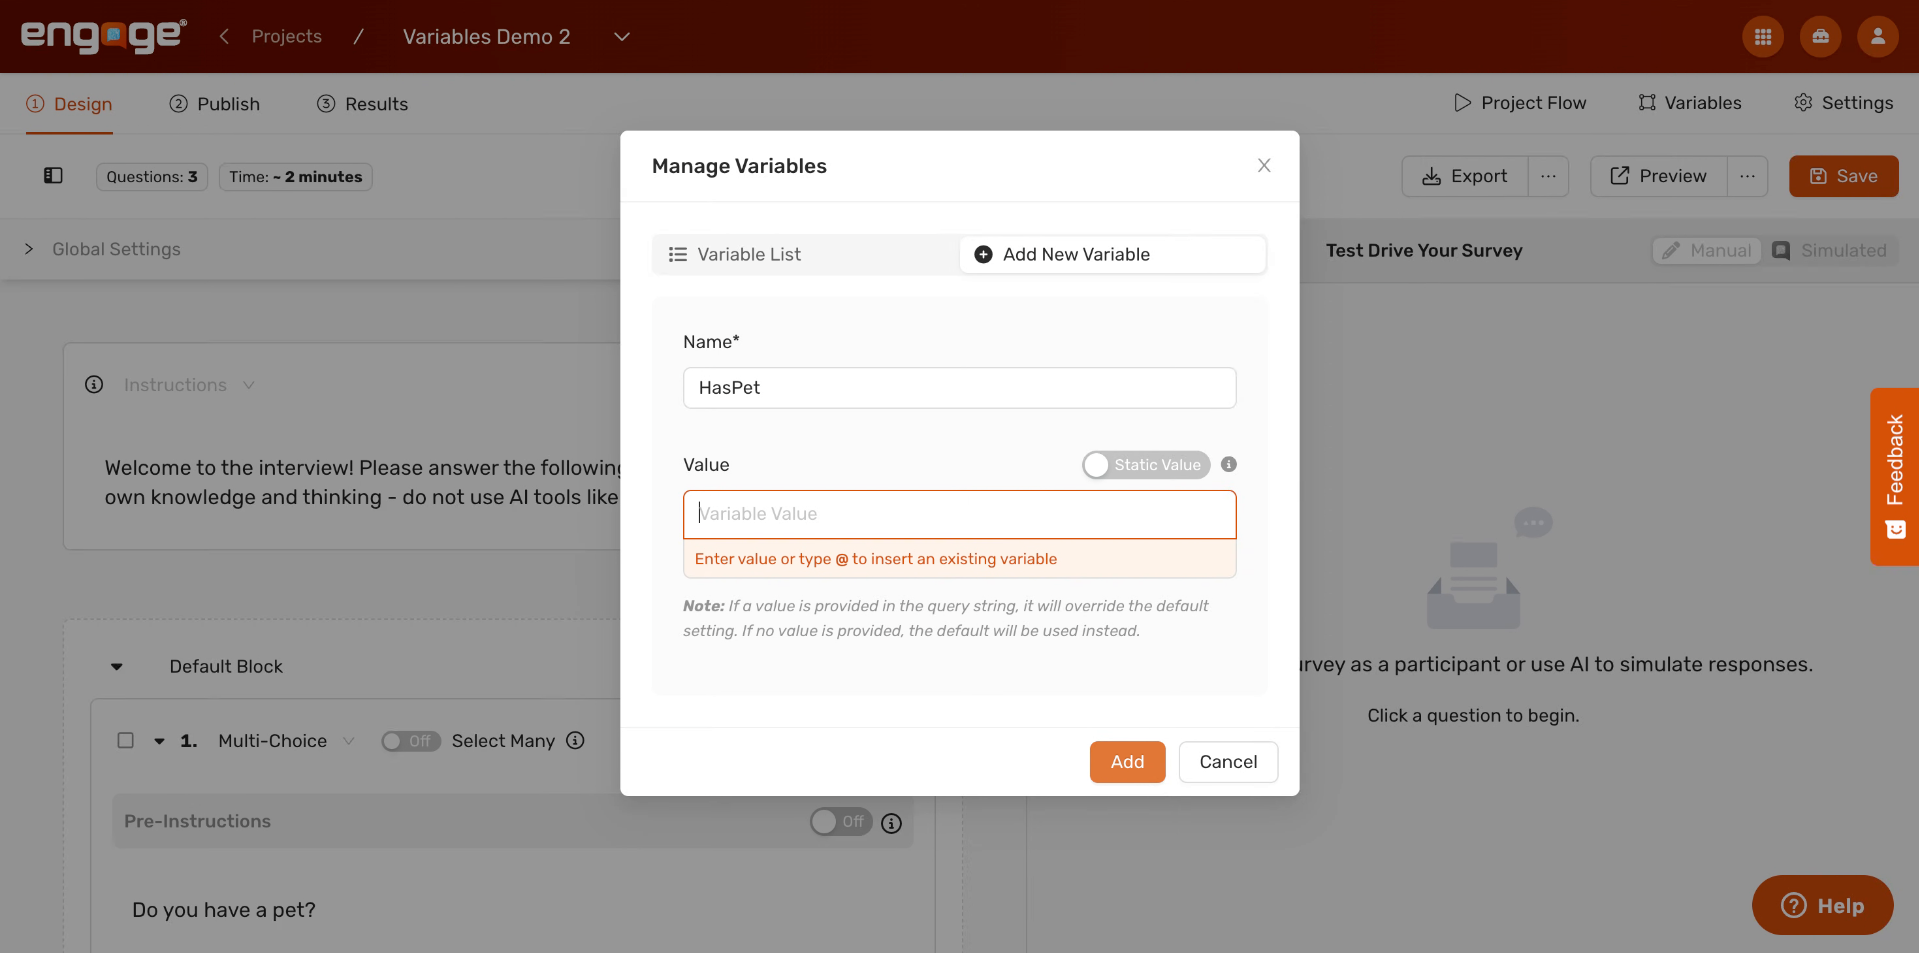
5. Set Default Variable Value
Enter a default value for your variable. For example, you could enter "dog" as a starting value, or leave it blank. The default is used as a fallback whenever no logic rule has updated the variable for a given participant.
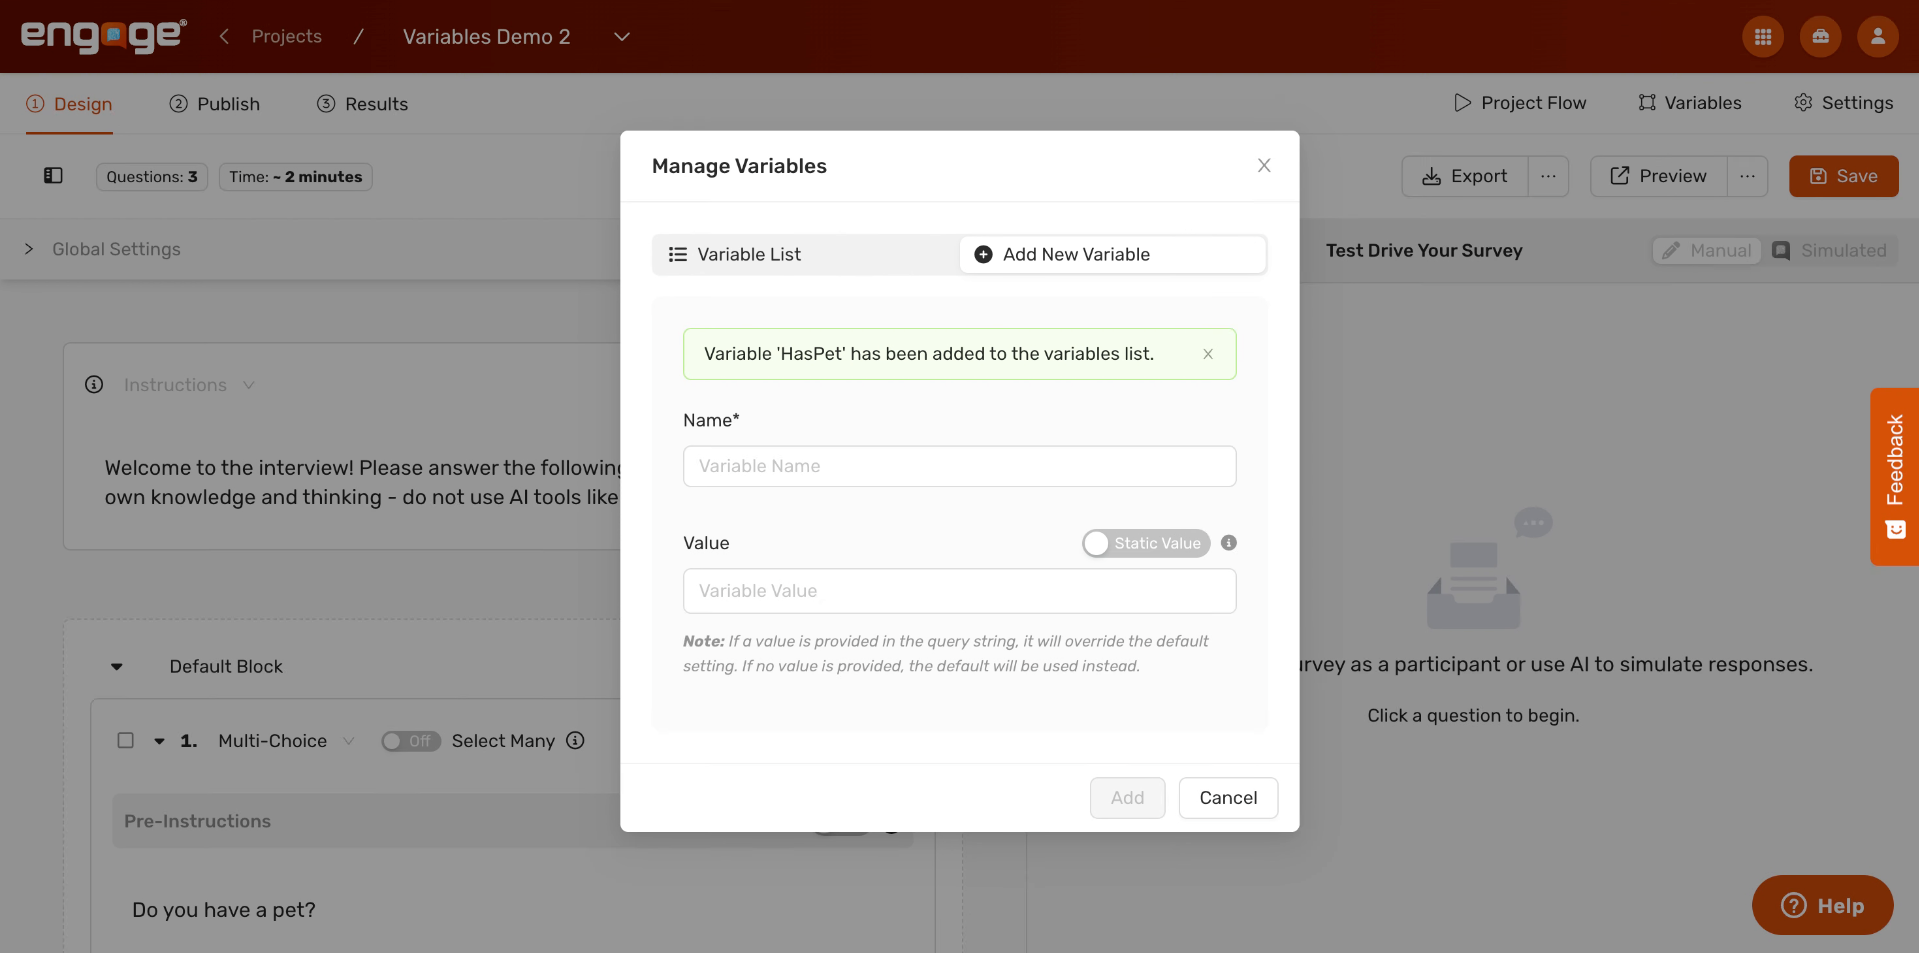
6. Add Variable To List
When you're ready, click Add to save the variable.
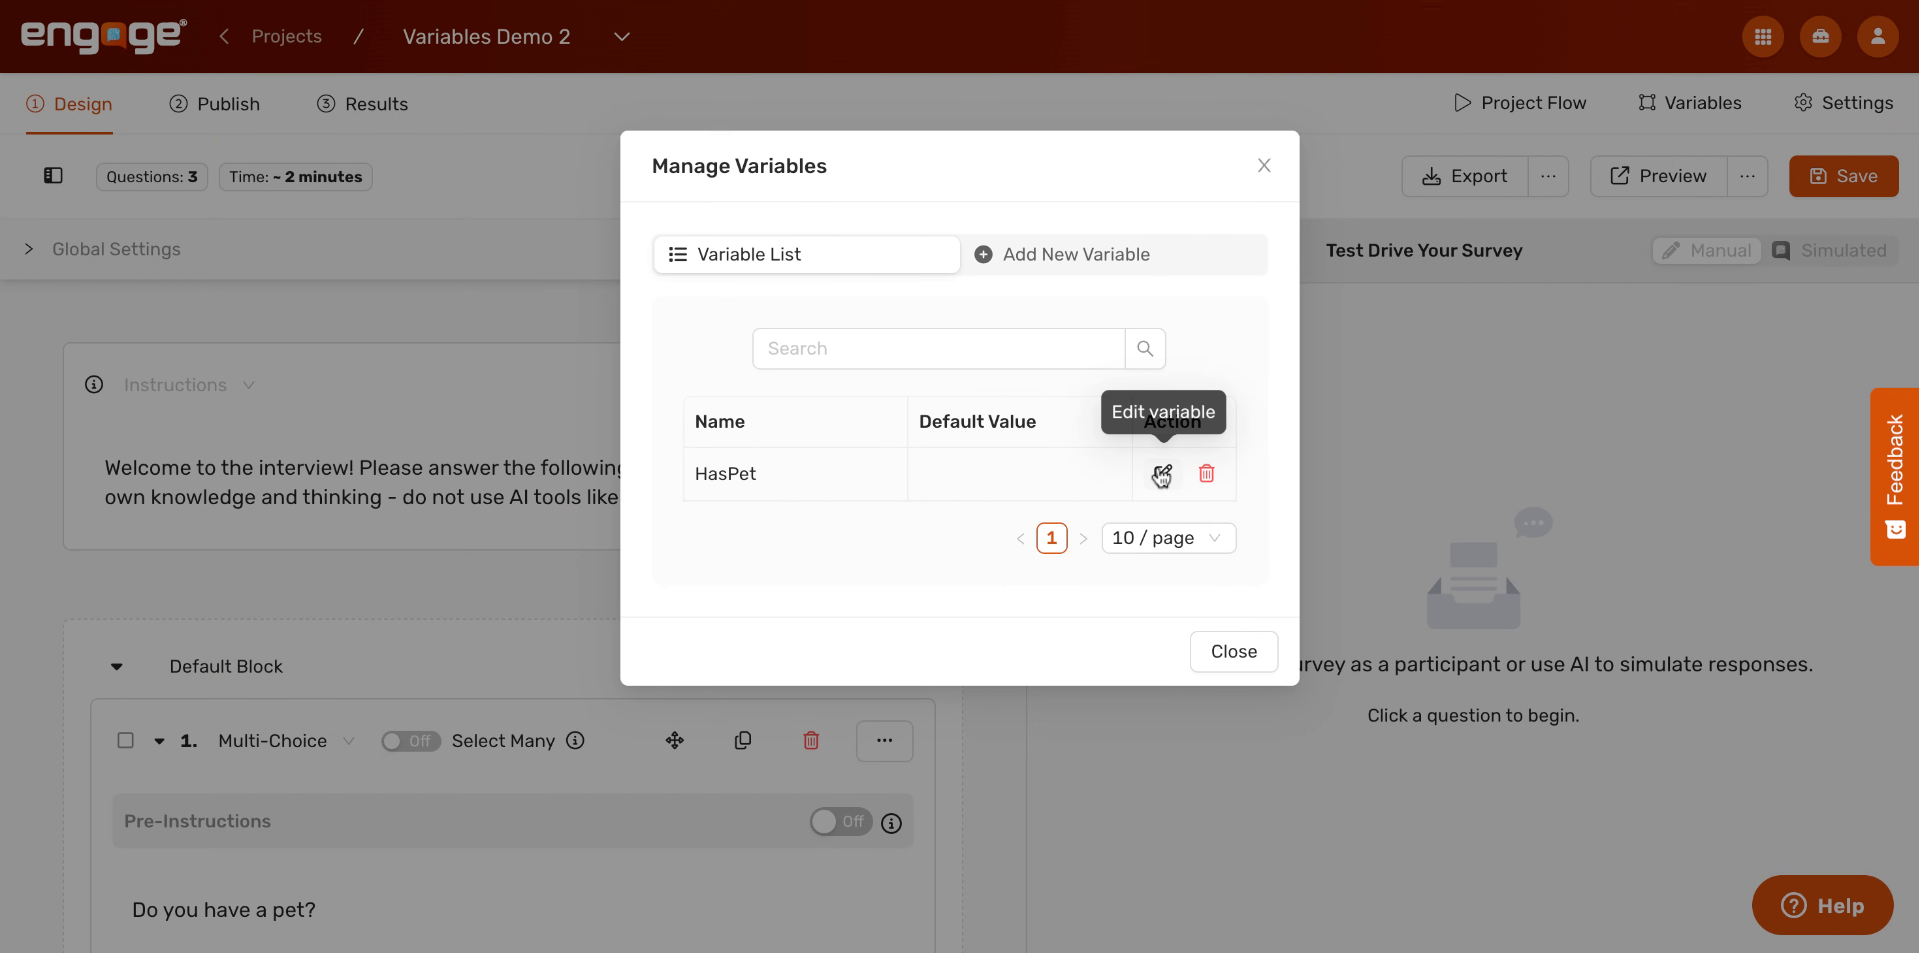
7. Variable To List
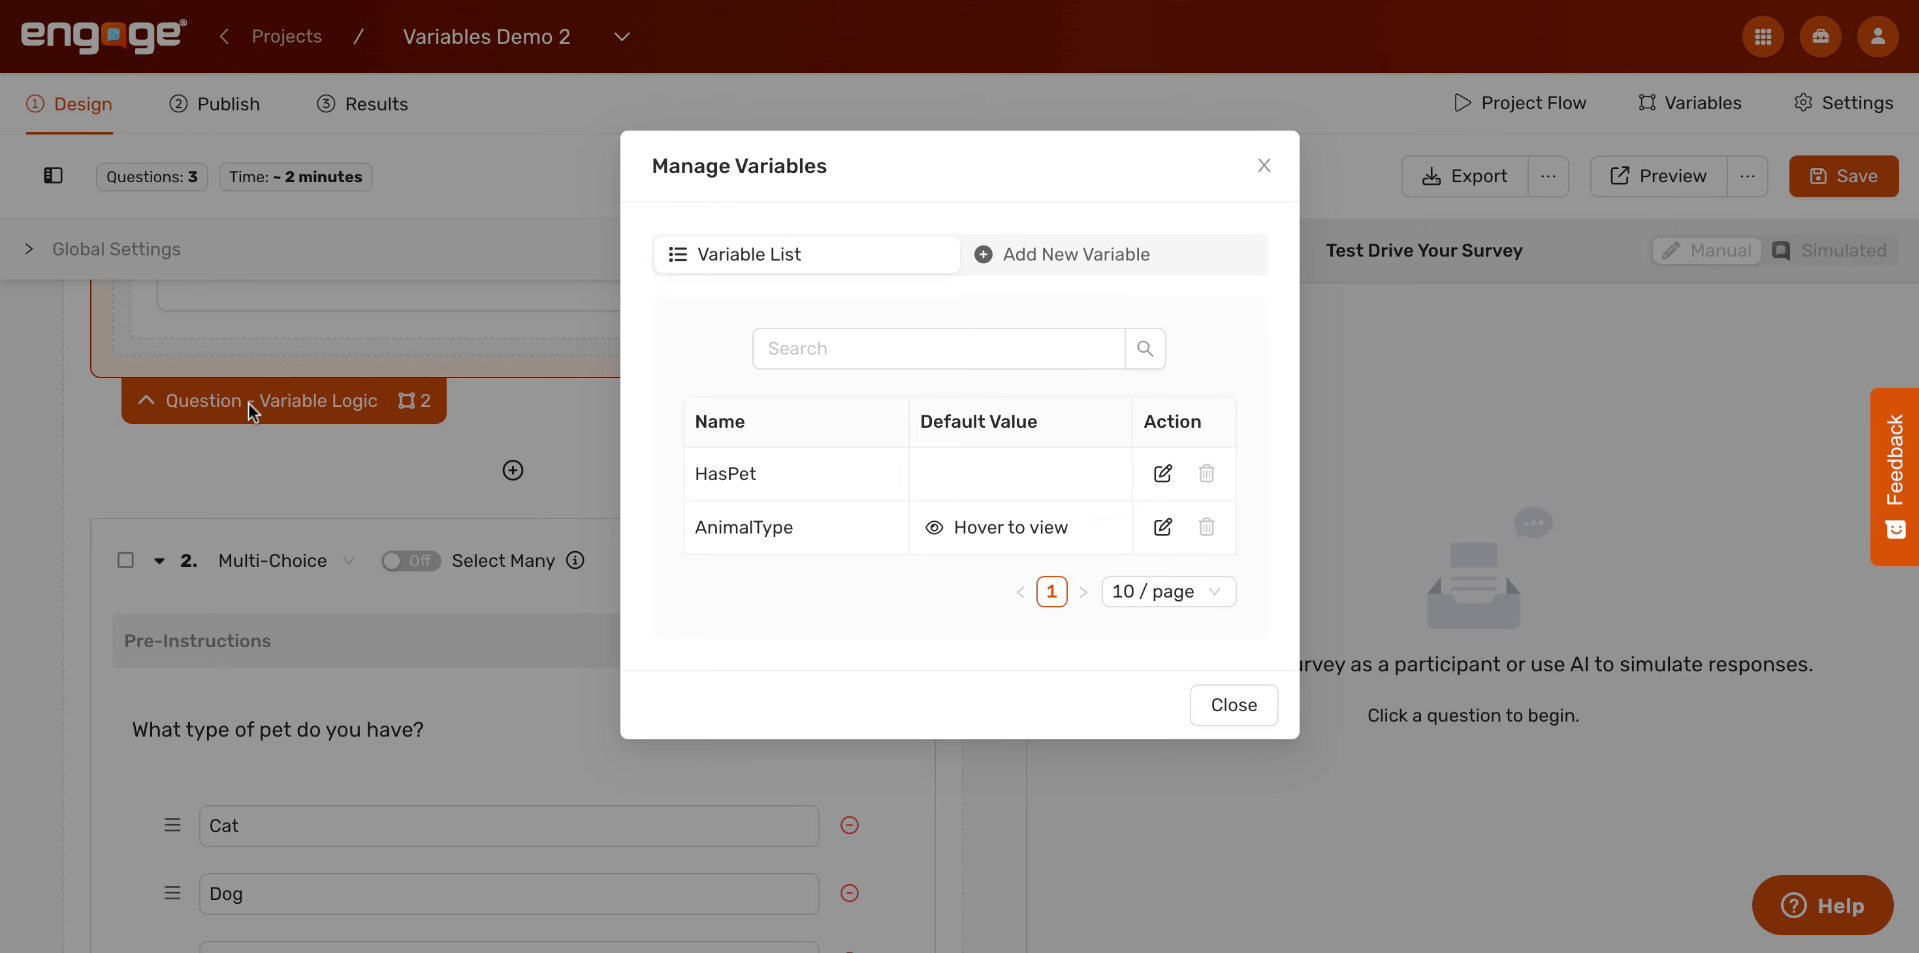
It will now appear in your Variable List, where you can manage it going forward
8. Edit Or Delete Variable
From the Variable List, you can edit or delete any variable at any time using the icons on the right.
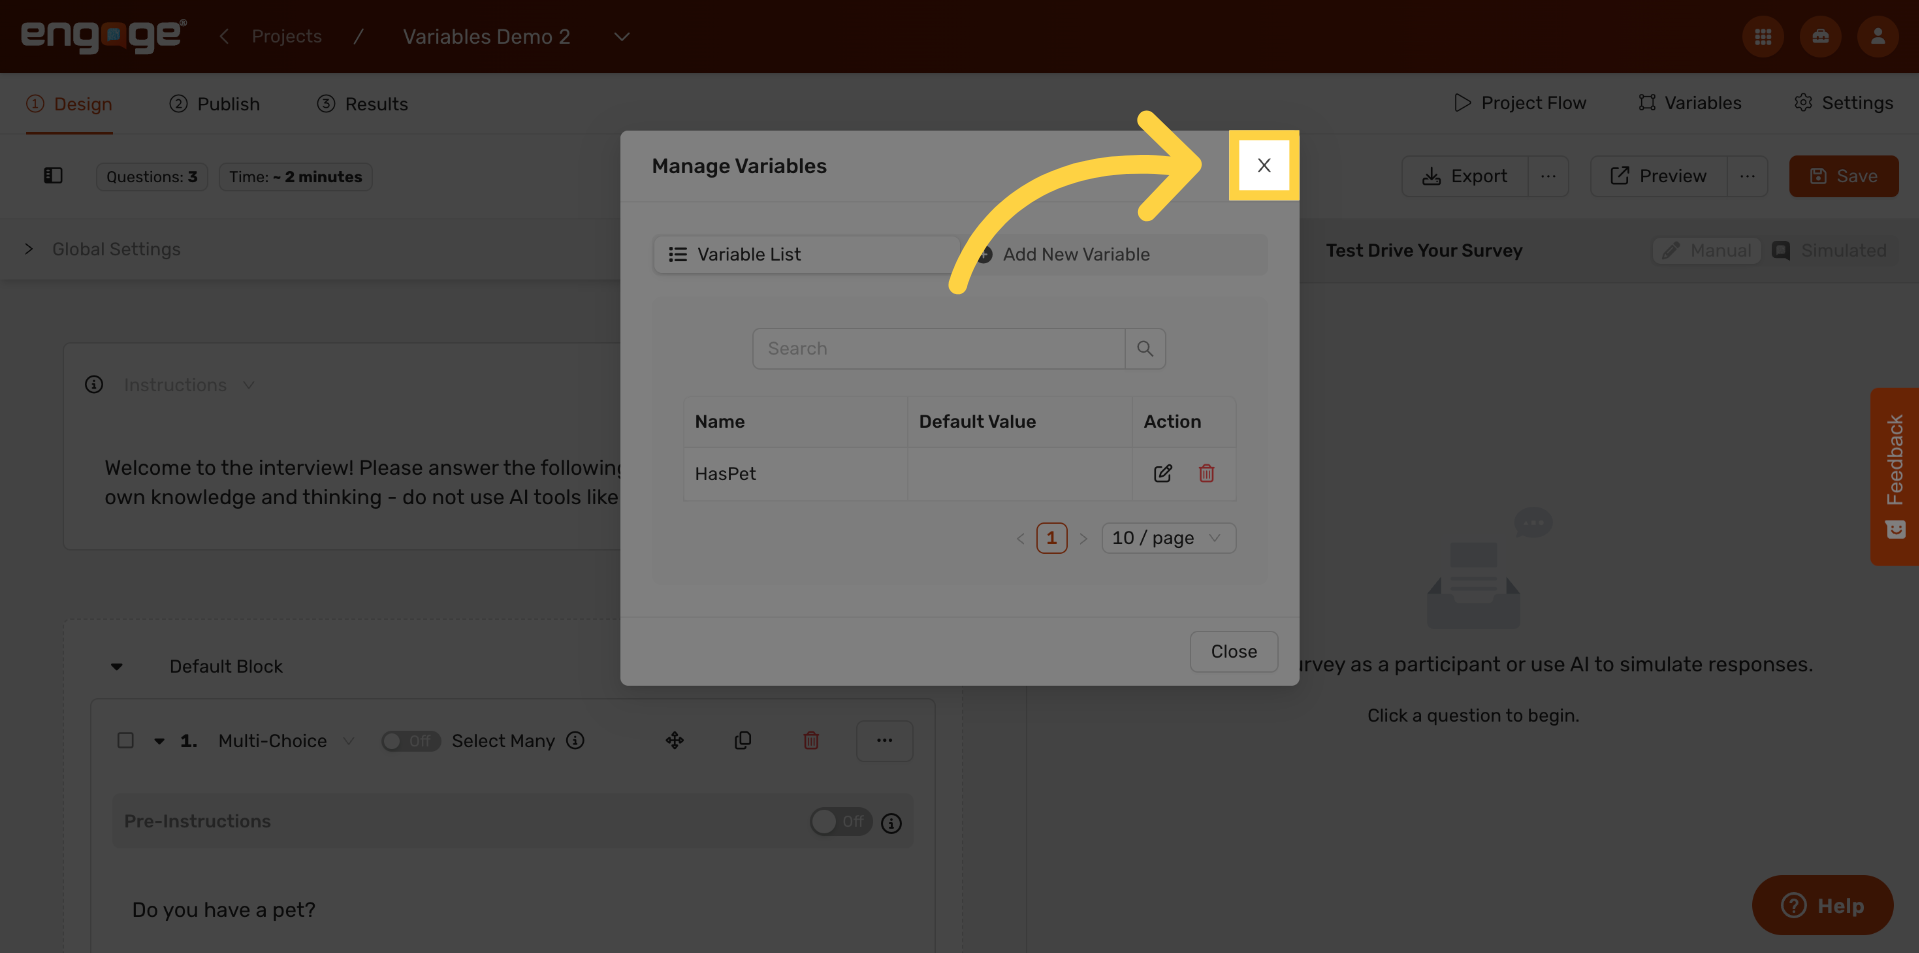
9. Click To Proceed
Now that our variable is created, let's set up the logic that will update it based on how participants answer your questions. Close the Variables panel and return to your survey design to continue.
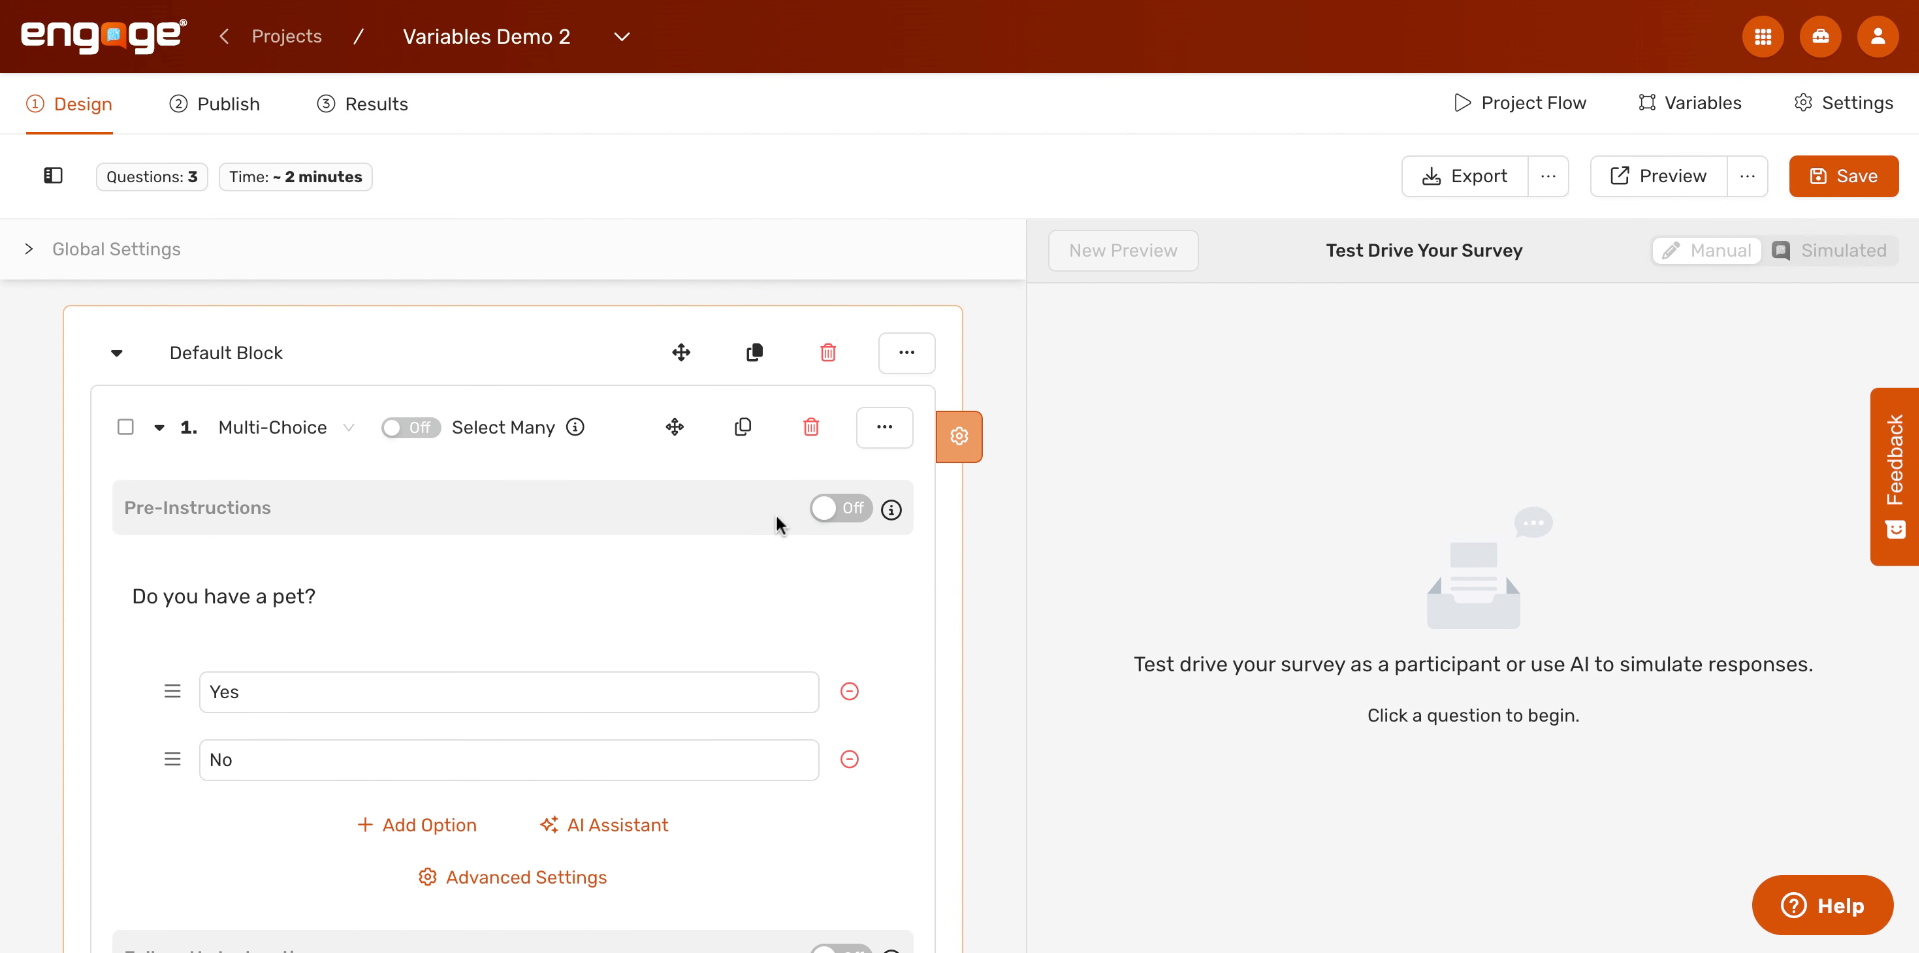
10. Add Variable Logic To Project
Back in your survey design, find the question where you want logic to trigger. In this example, we're working with Question 1: "Do you have a pet?" Click the variable logic icon associated with this question to begin adding logic.
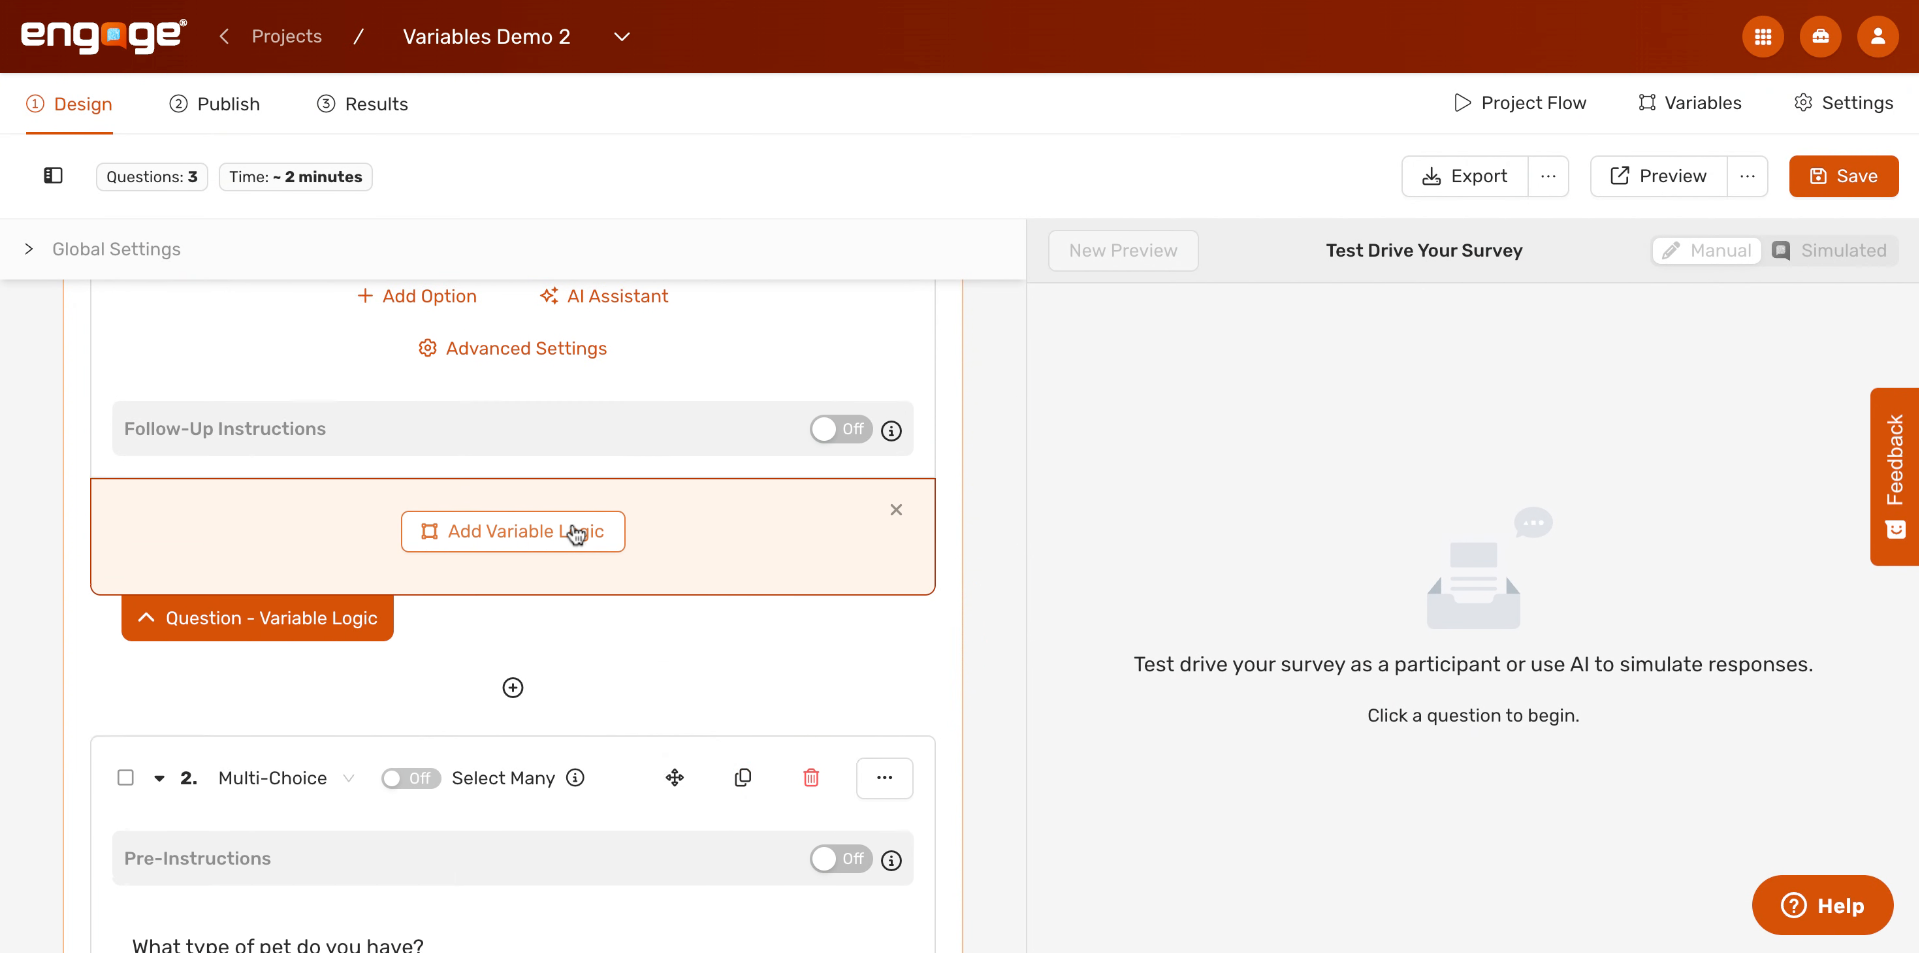
11. Select Variable To Set
A Variable Logic panel will appear beneath the question. Click "Add Variable Logic" to create your first rule. Then select the variable you want to update — in this case, "HasPet."
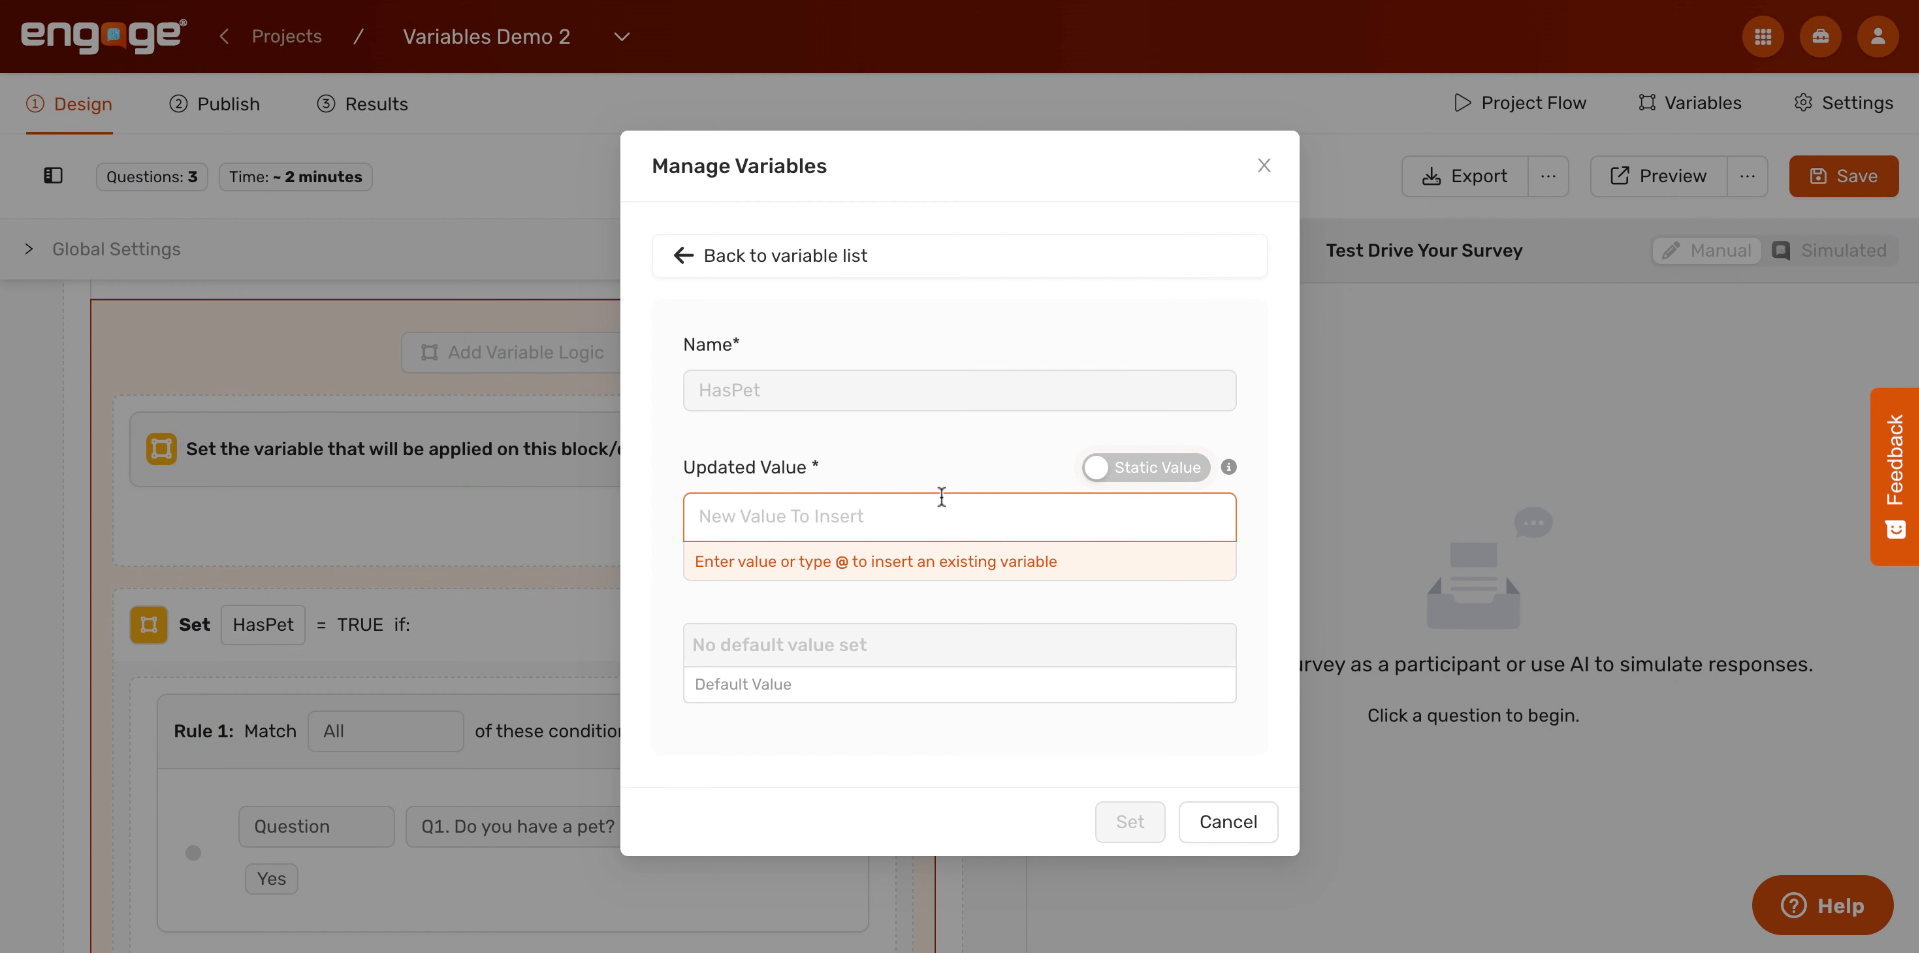
12. Update Variable Based On Response
A dialog will open asking you to define the new value for the variable. This is where you tell Engage: when a participant answers this question in a certain way, update the variable to this value.
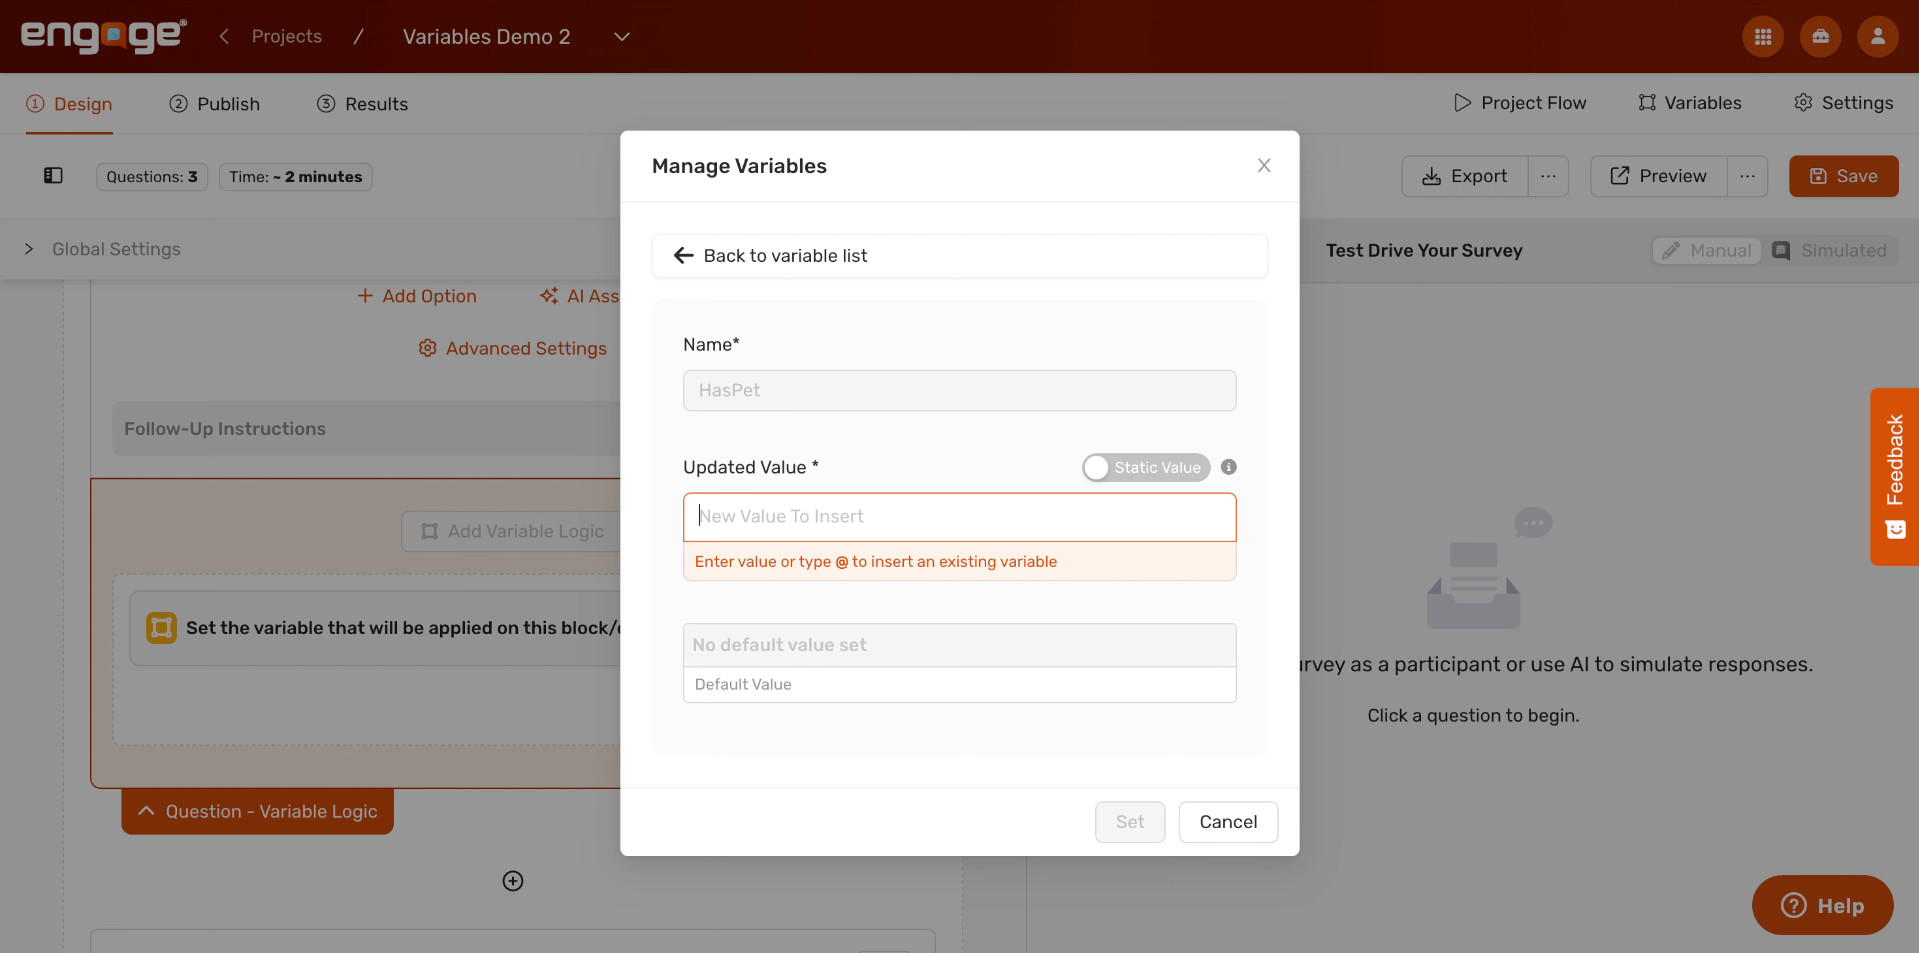
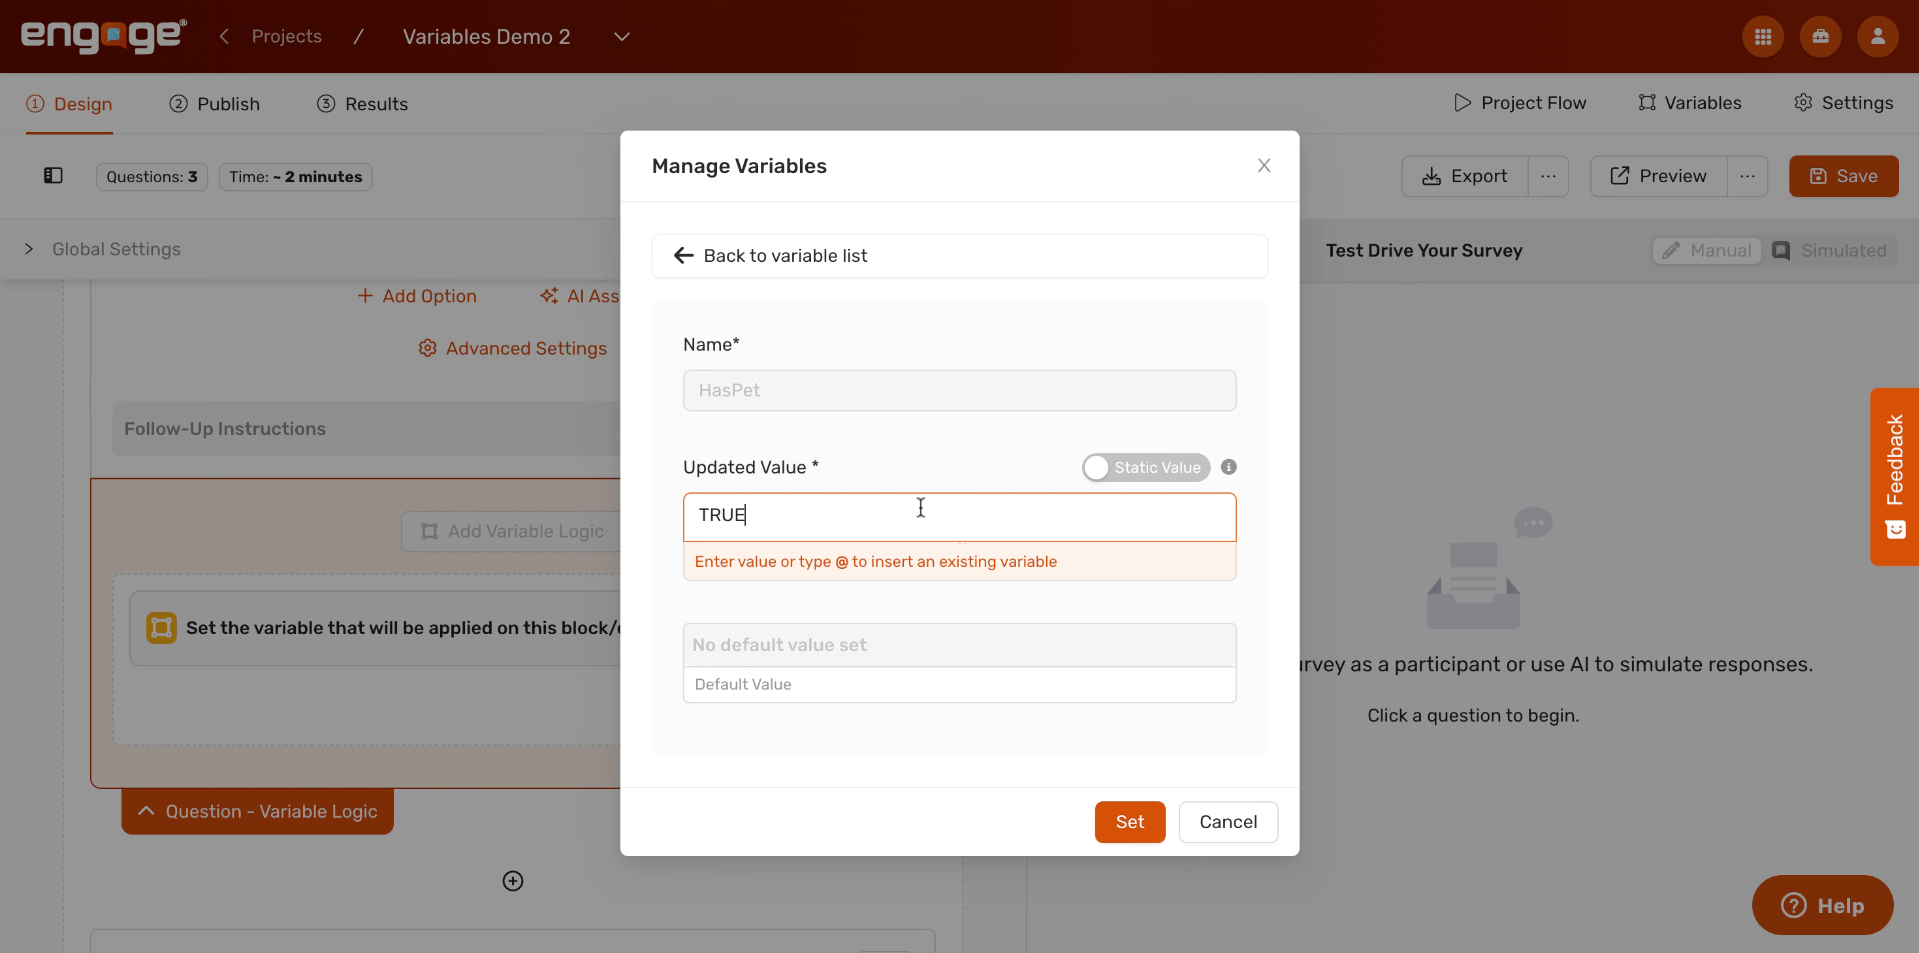
13. Set Variable Value To True
Type the updated value that you wish for this variable to be set at. For the previous example, type "TRUE" in the Updated Value field. This means: when the condition we define is met, set the HasPet variable to TRUE. Click Set to confirm.
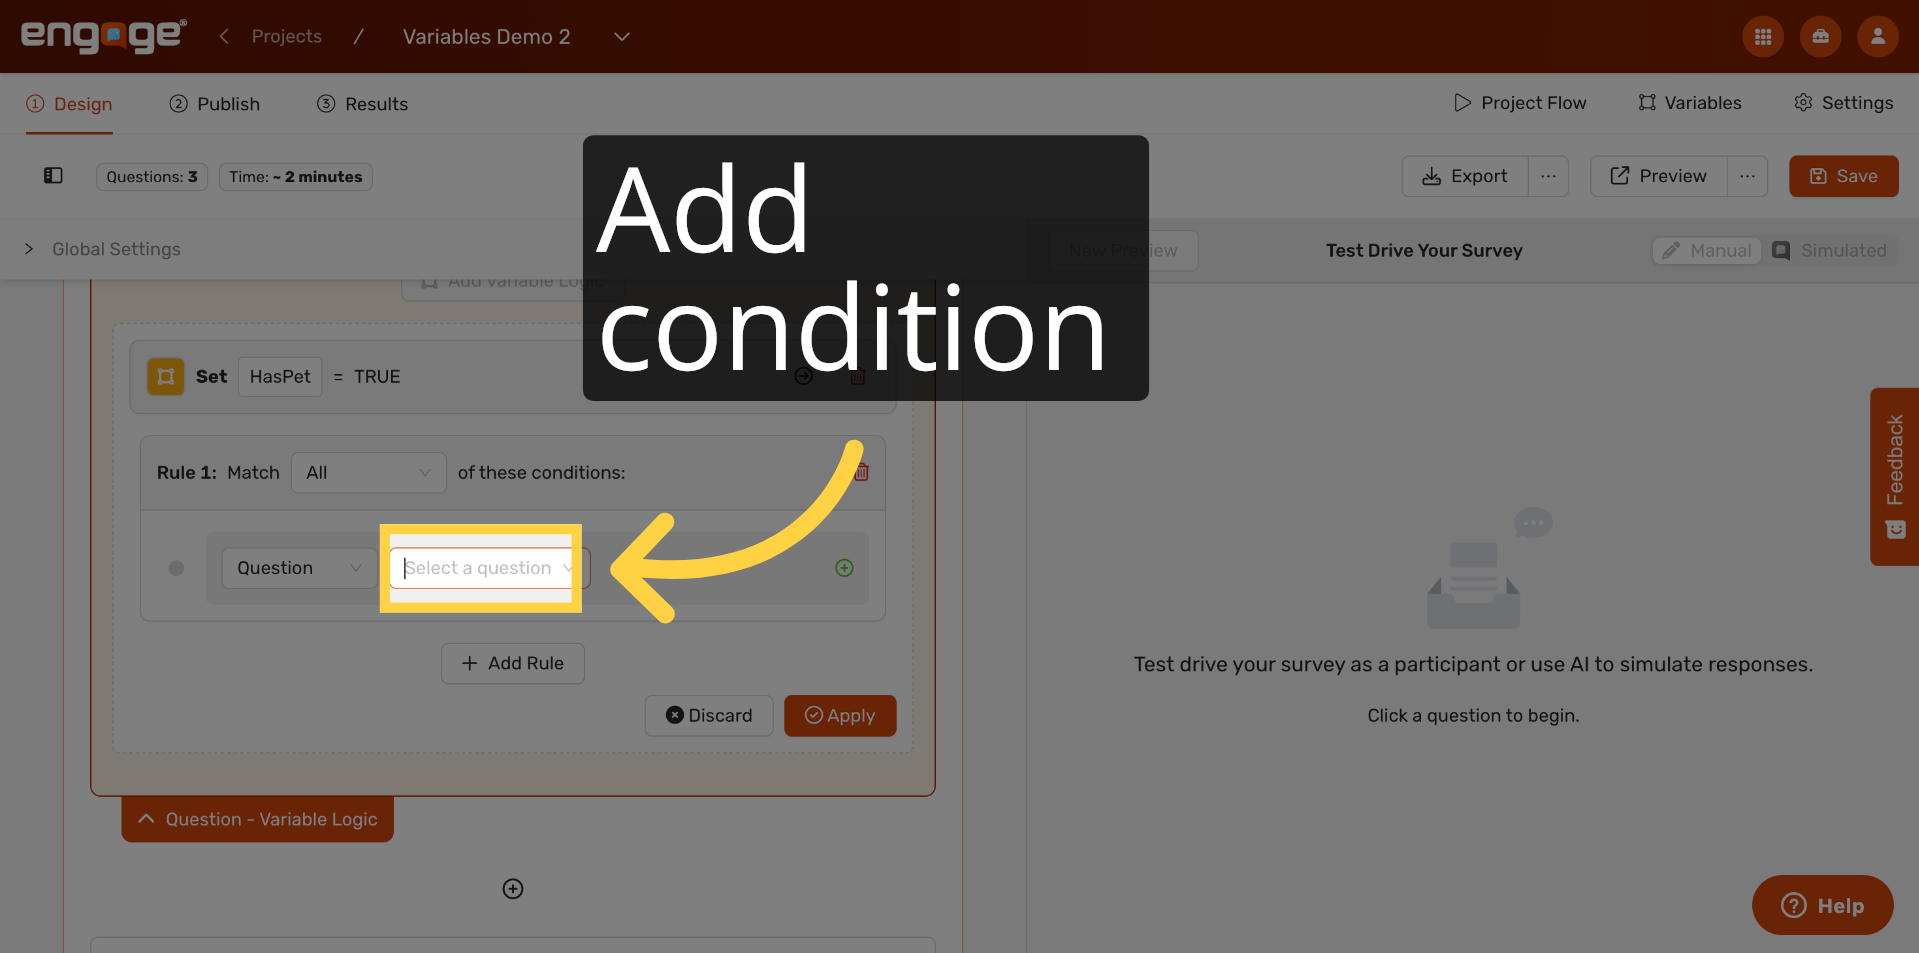
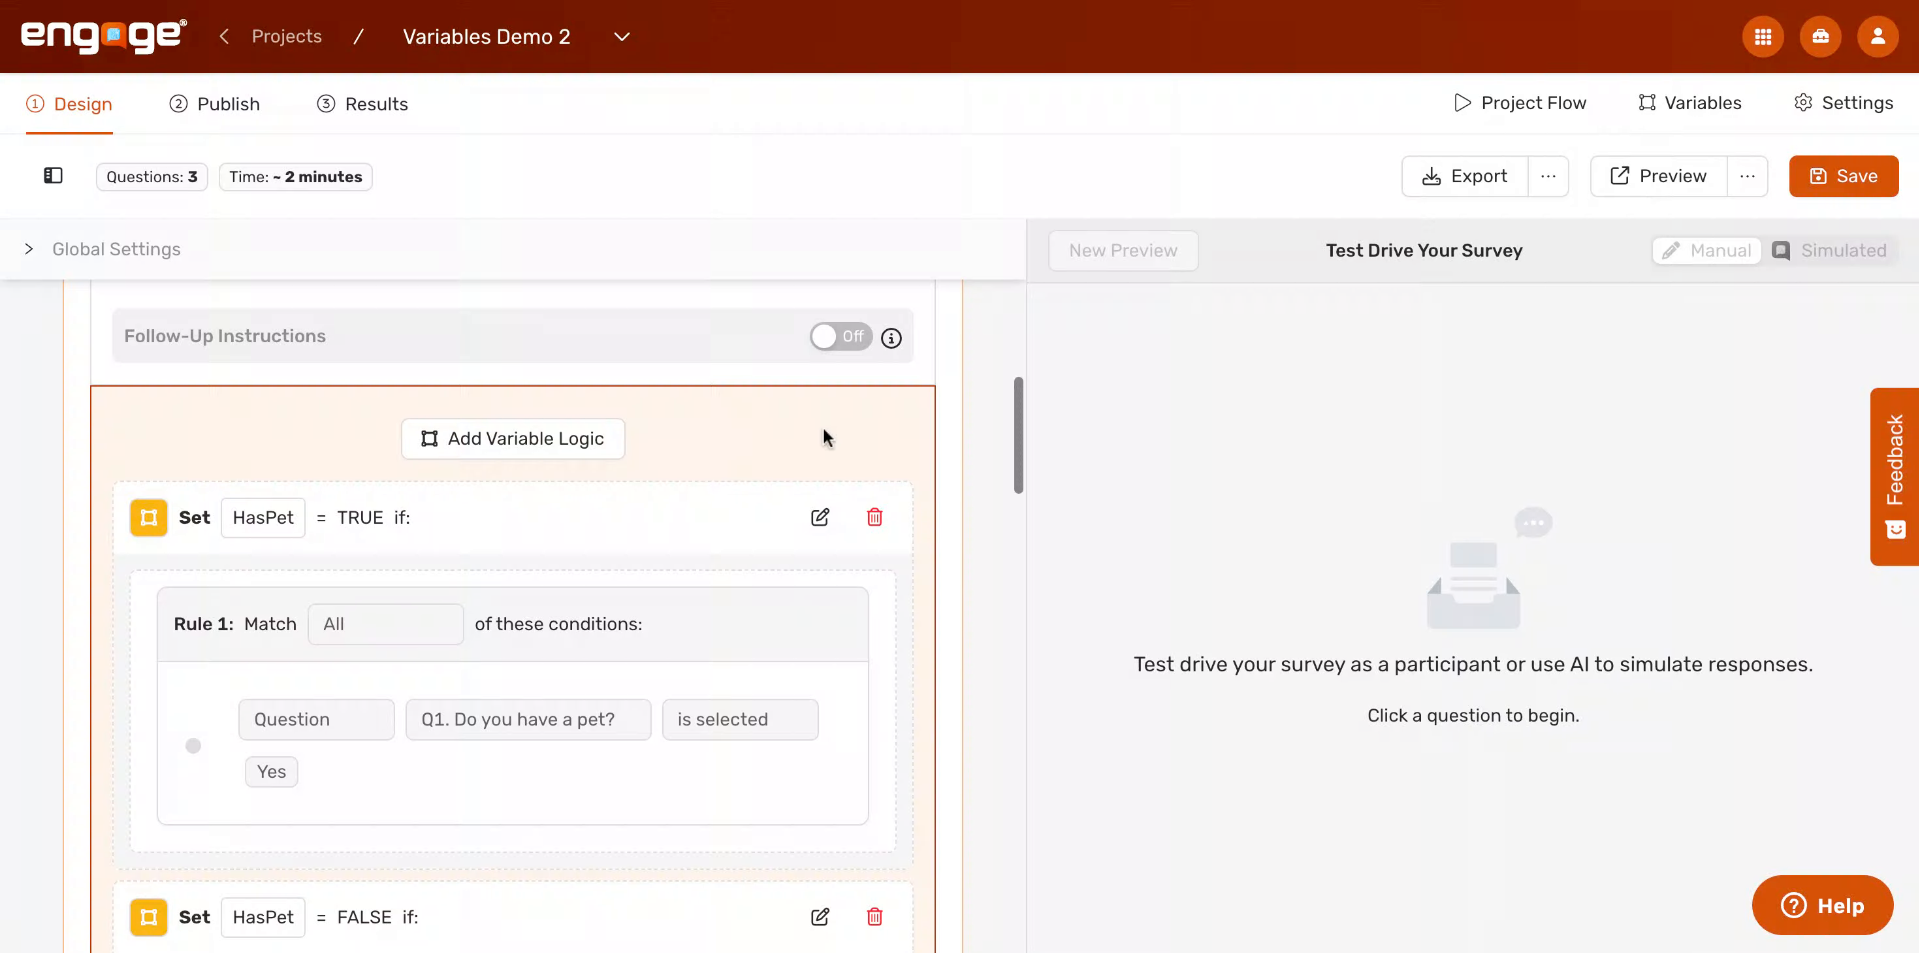
14. Add Conditions To Variable
You'll now see your rule displayed: "Set HasPet = TRUE." But we need to tell Engage when this should happen. Click the condition area to define which participant response should trigger this rule.

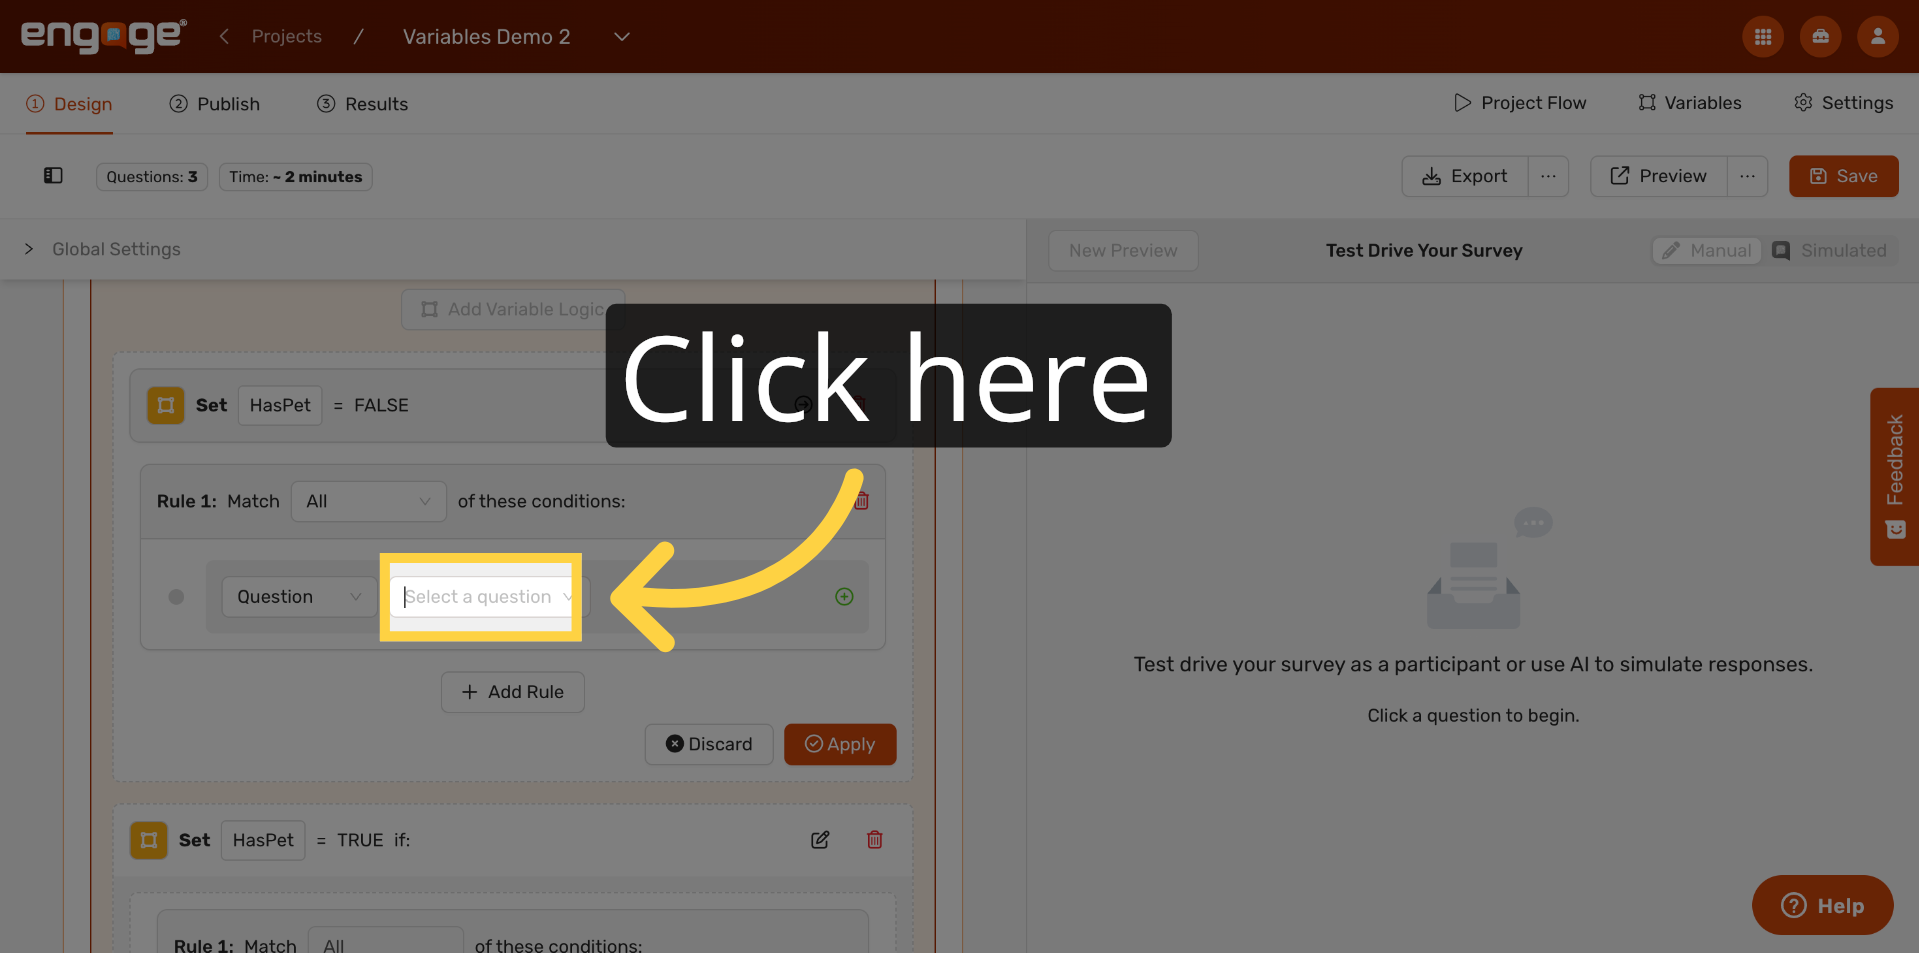
15. Click To Add Condition
Click the "Select a question" field inside Rule 1 to choose which question this condition is based on.
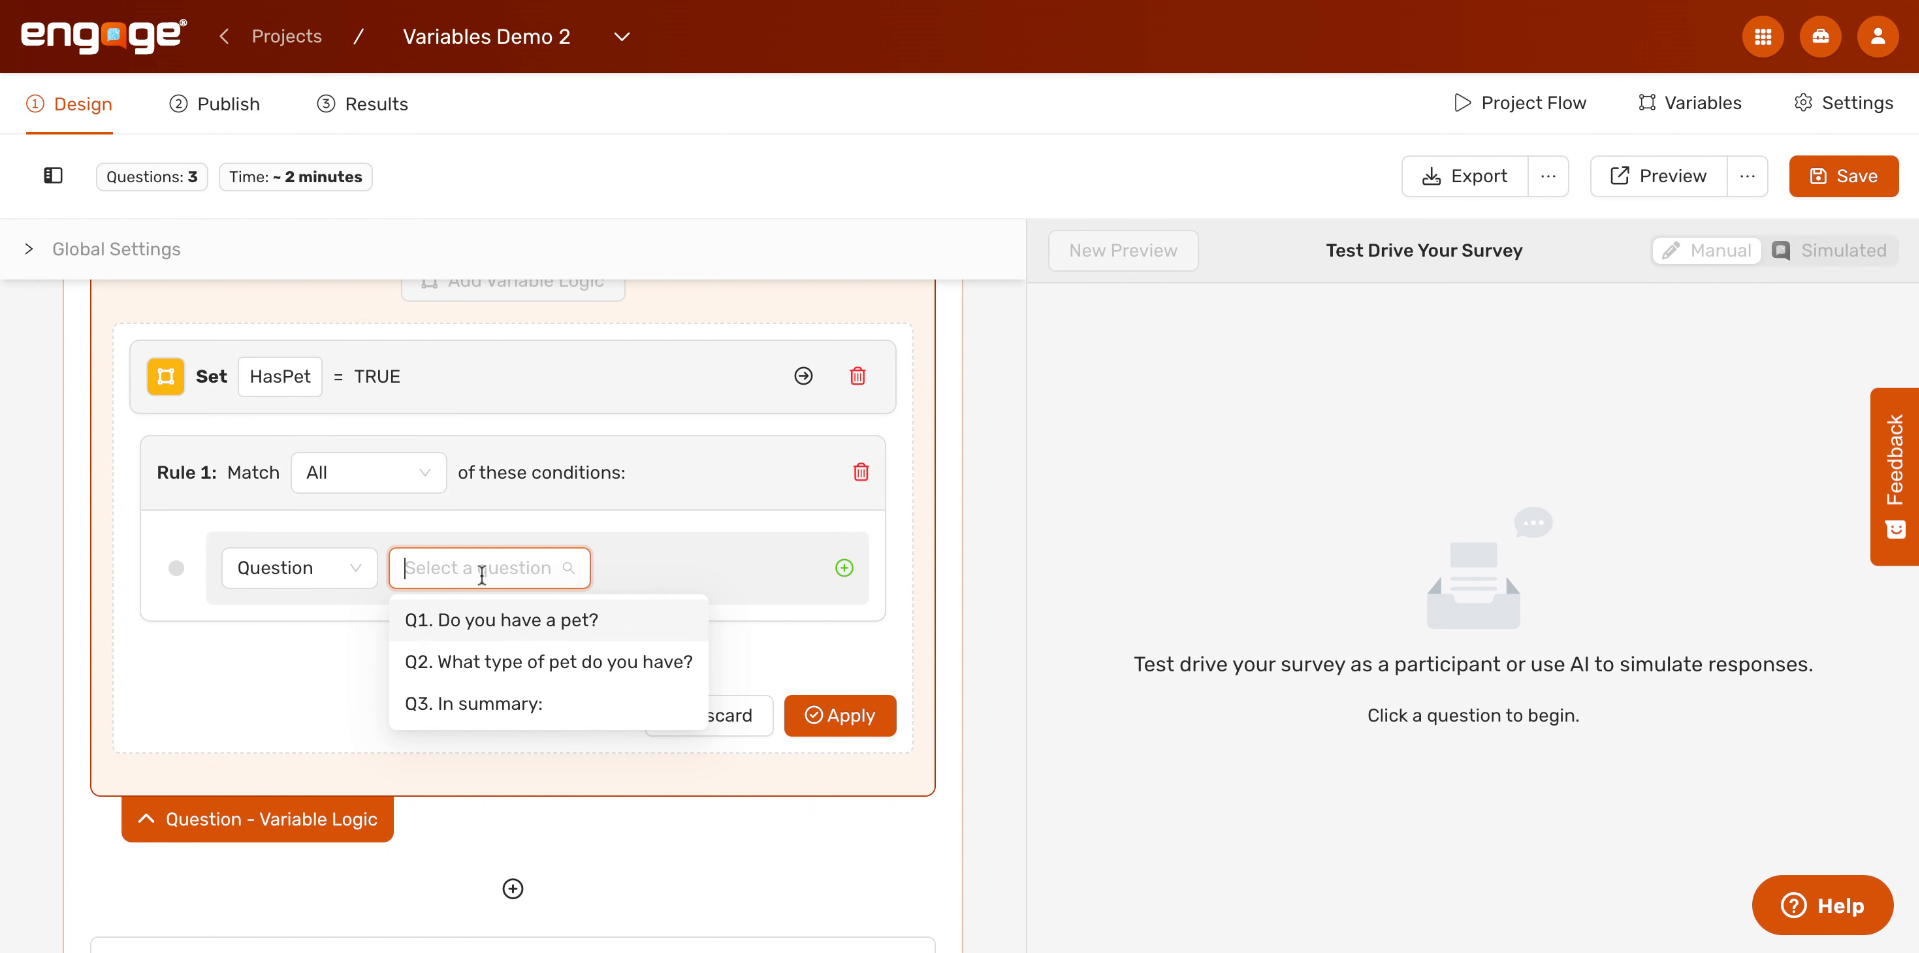
16. Define Condition For True Variable
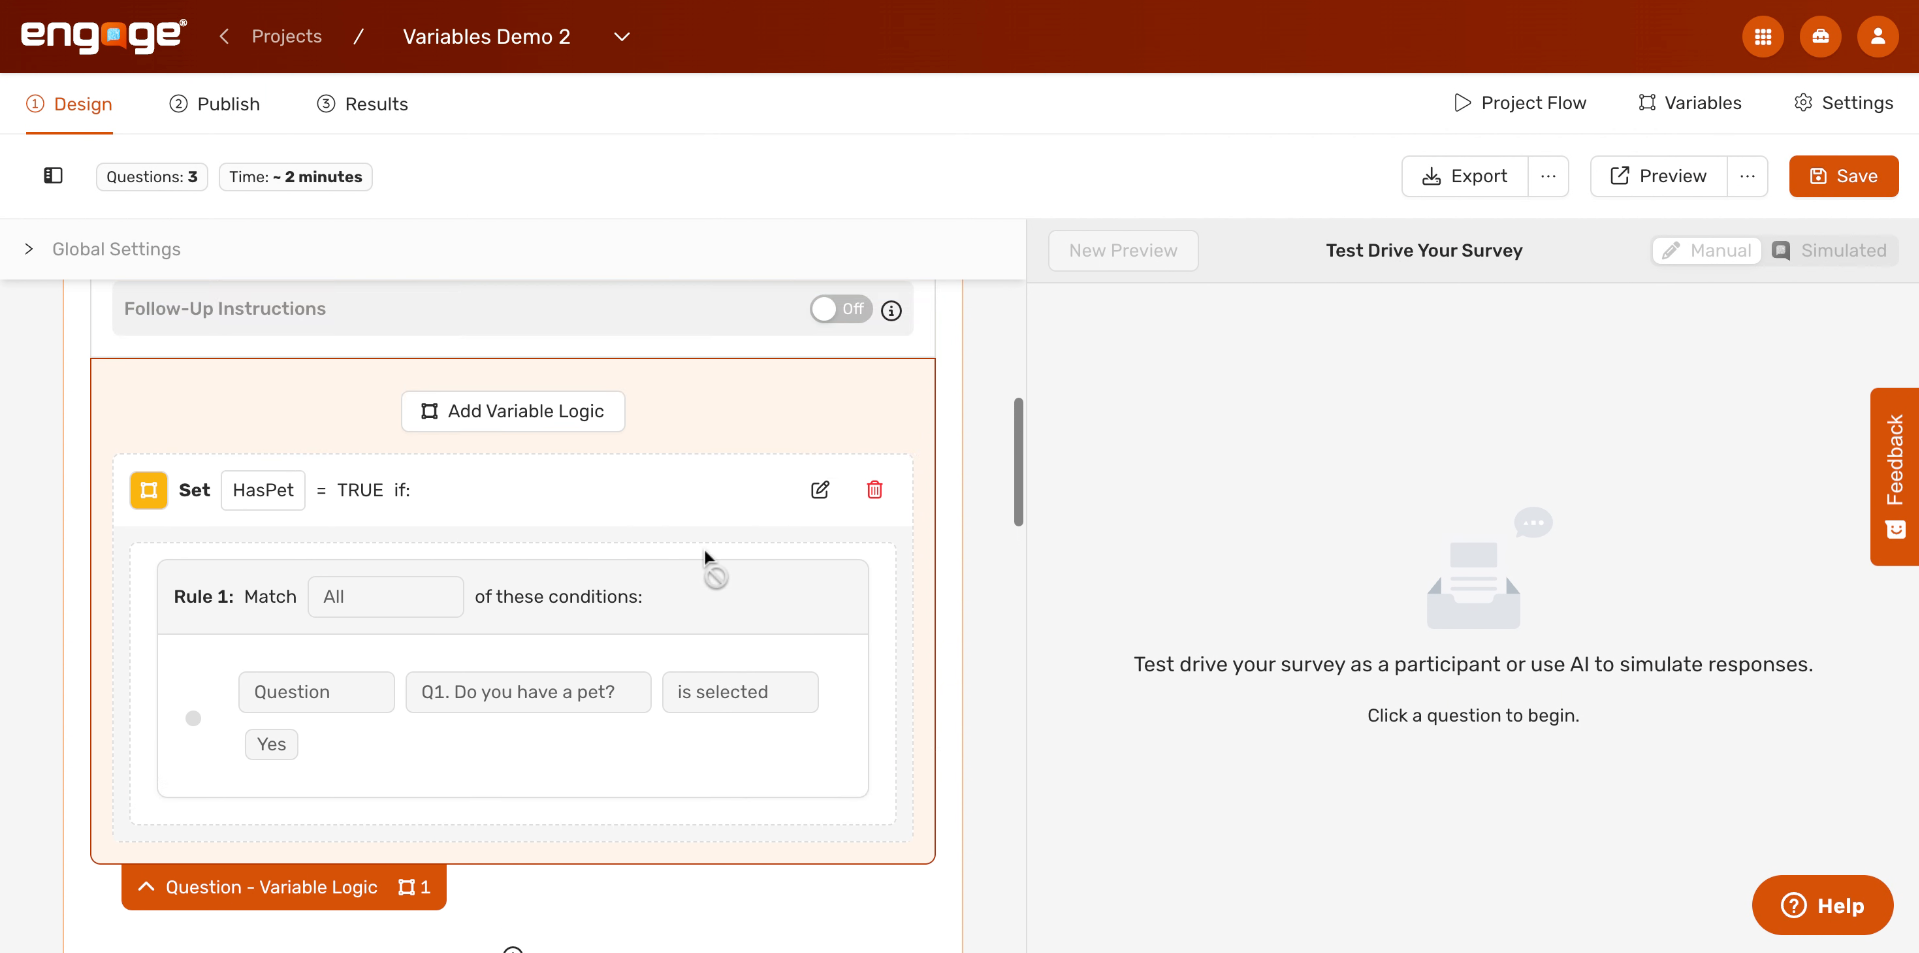
A dropdown will appear showing all the rule logic options in your survey. If you'd like to set a rule based on a questions response, select "Do you have a pet?" — this links the rule to that specific question. You can then choose which options that were selected would trigger this variable to be assigned as true. In this case, it is anyone who responded "yes".
17. Define Condition For FALSE Variable
Now let's add a second rule to handle the opposite case. We'll create a new rule that sets HasPet to "FALSE" — so that participants who answer "No" are also captured correctly.
18. Click To Continue
After selecting add variable logic, you'll be taken back to the variable modal where you can select the HasPet variable to be updated.
19. Enter False Value
With "FALSE" entered in the Updated Value field, click the Set button to confirm this variable evaluation.
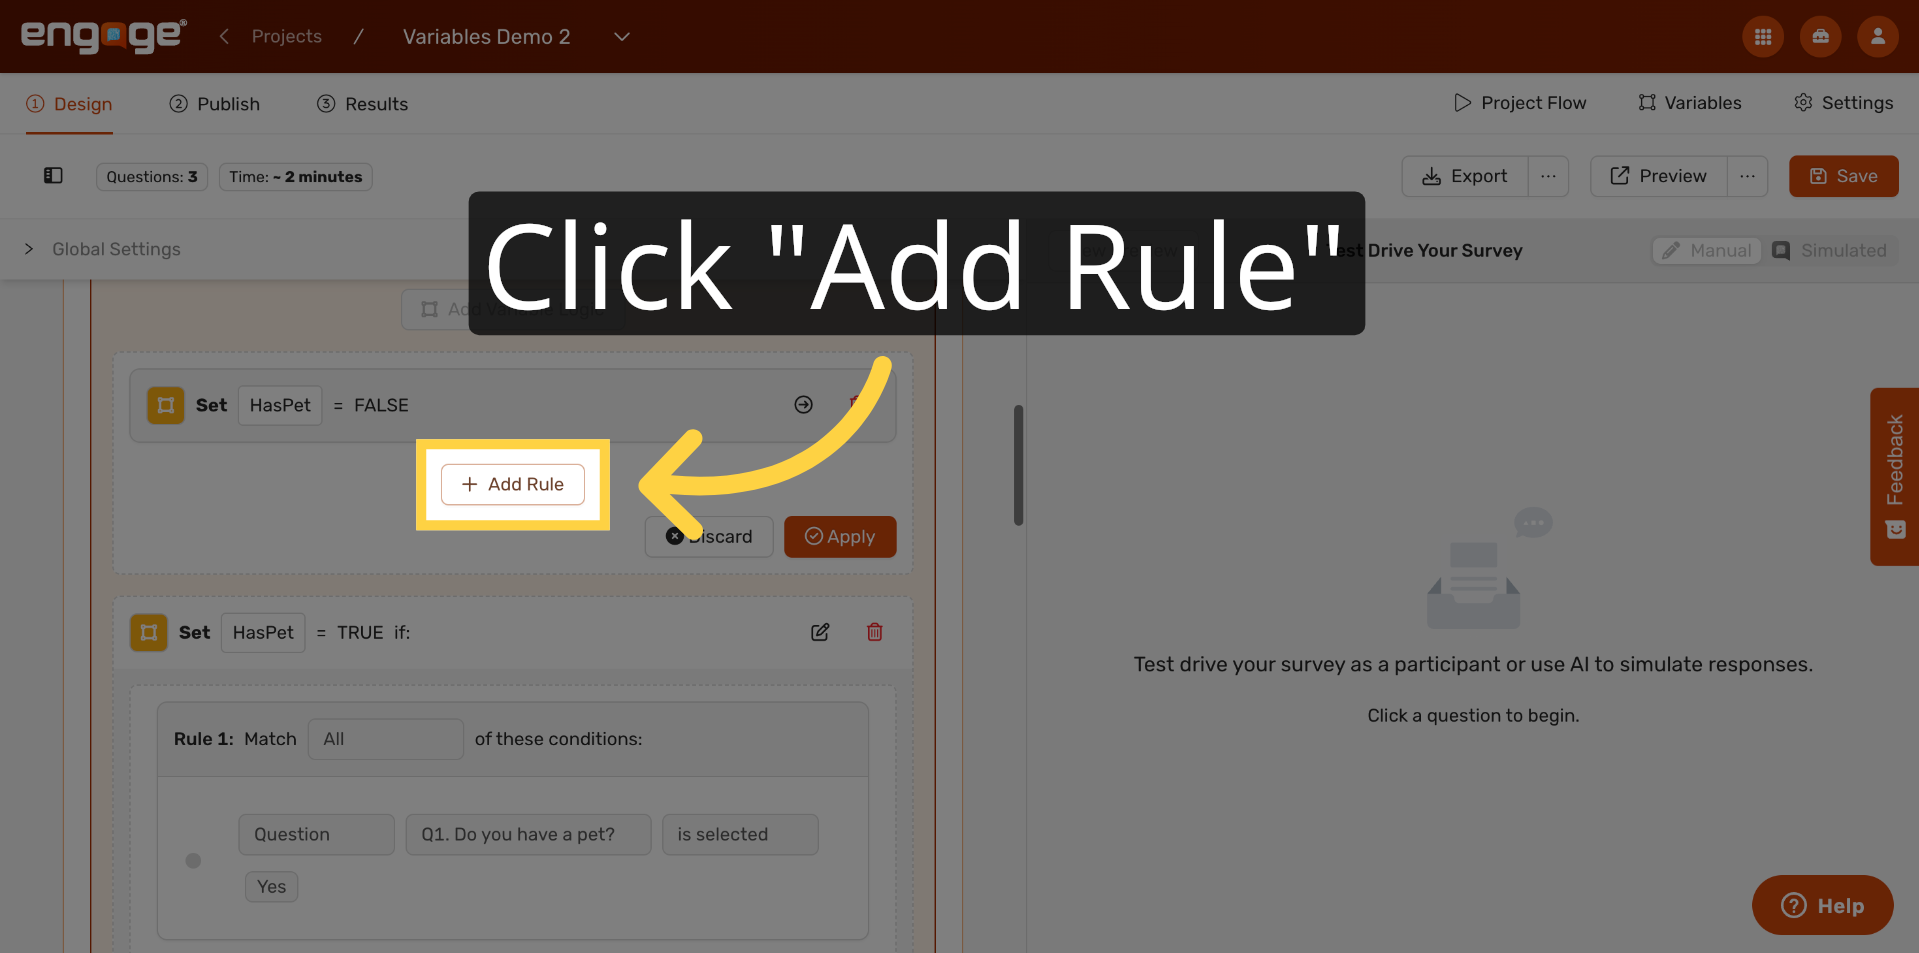
20. Add New Rule
Click "Add Rule" to create the condition. This will be the rule that fires when a participant answers "No" to the pet question.
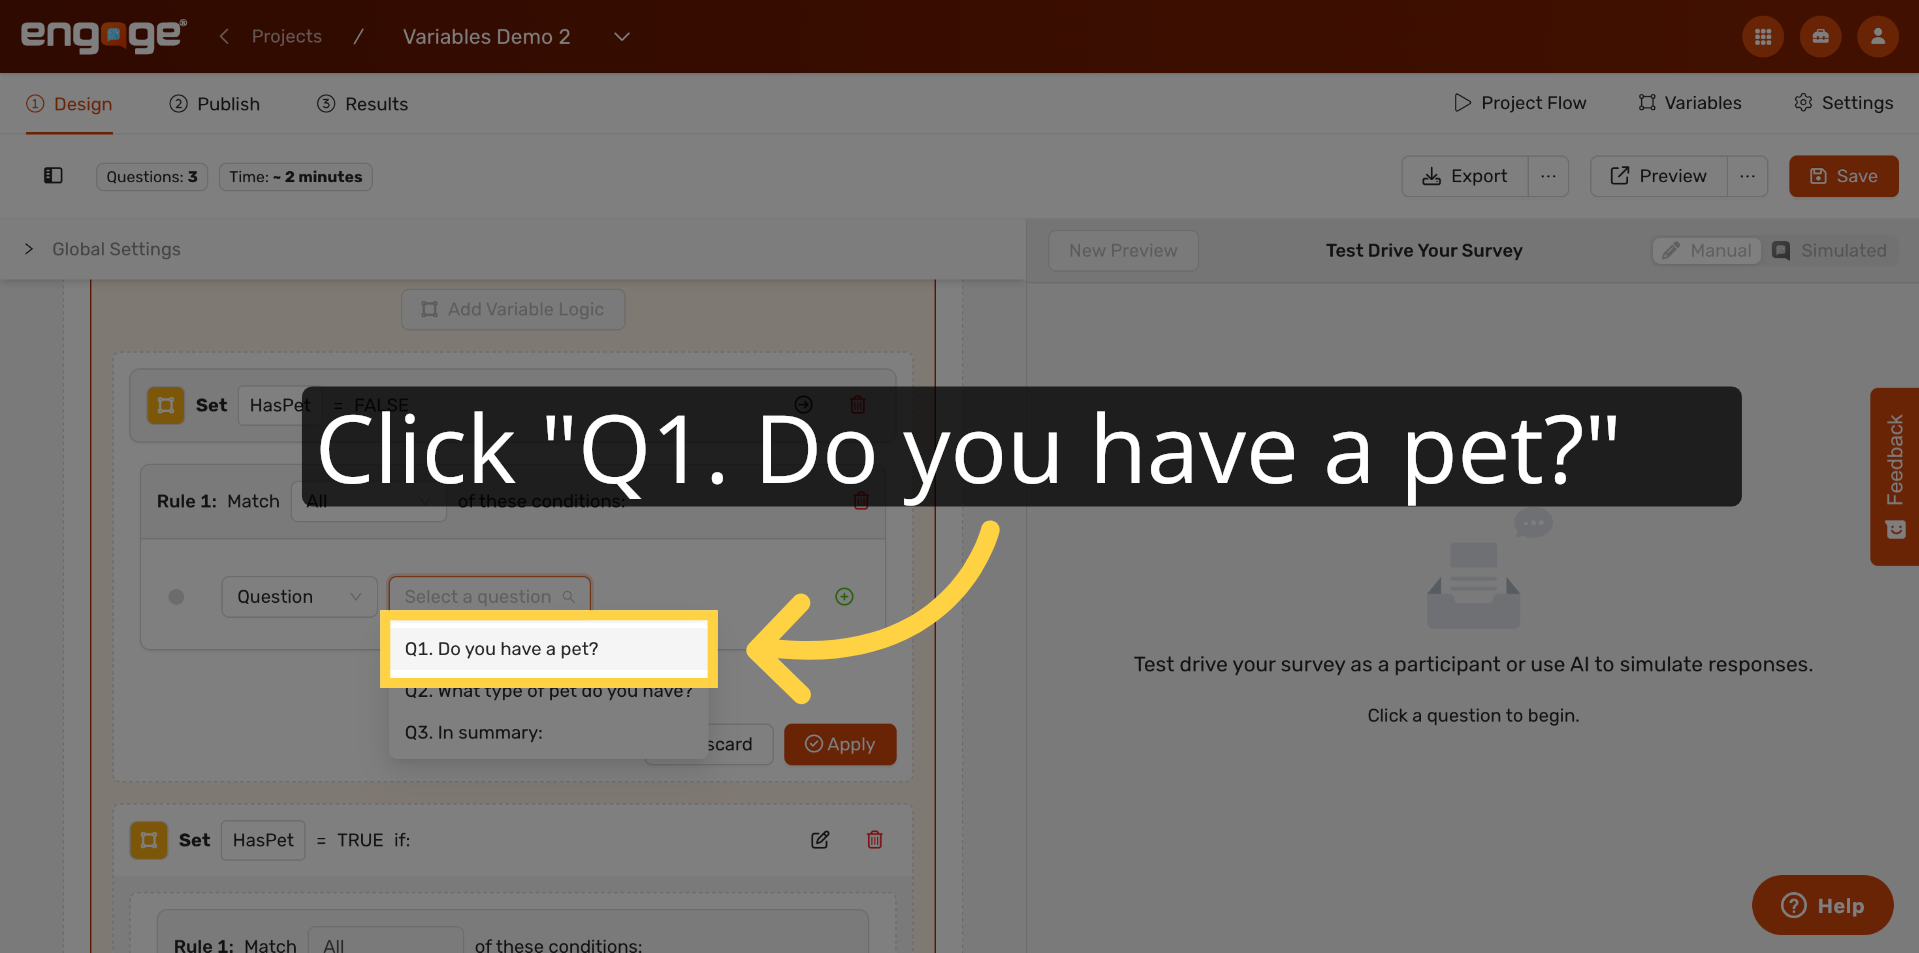
21. Click To Select Question
Just like before, click the "Select a question" field inside the new rule to choose the question you want to base the condition on.
22. Select Specific Question
For this example, we will choose "Do you have a pet?" from the dropdown to associate it with this rule.
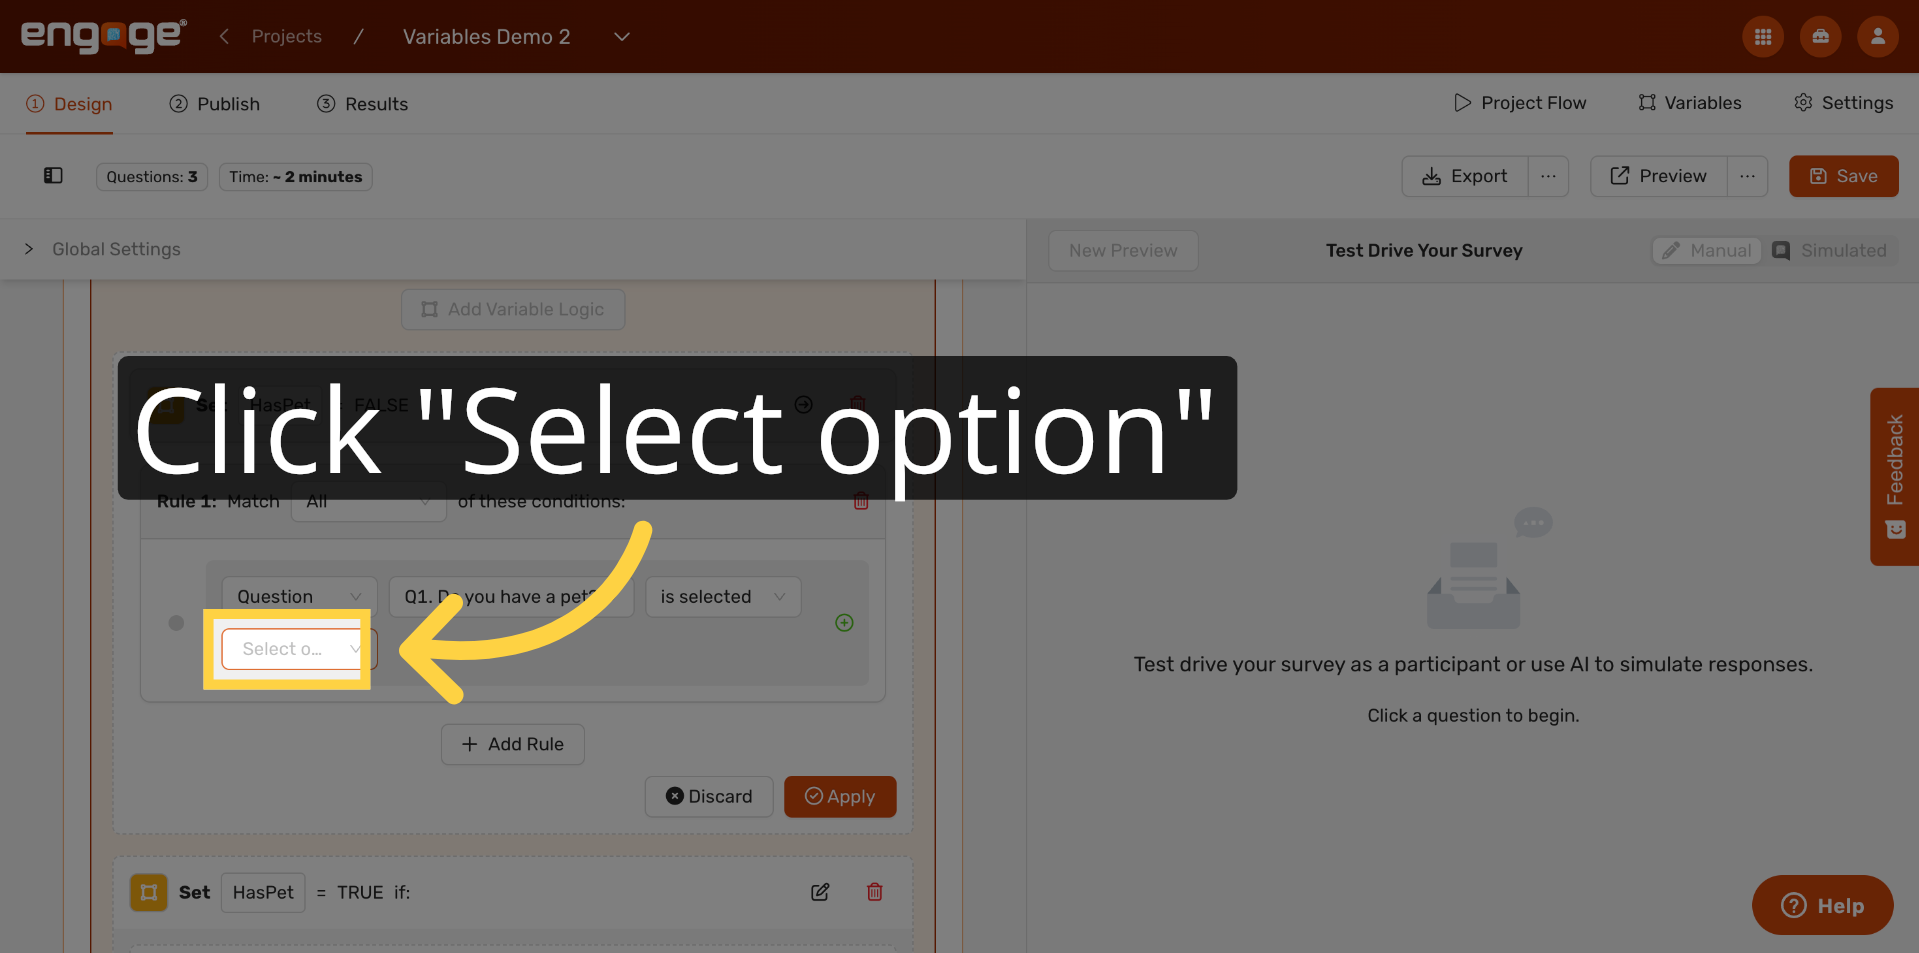
23. Open Option Selection
Click "Select option" to choose which answer choice should trigger this rule.
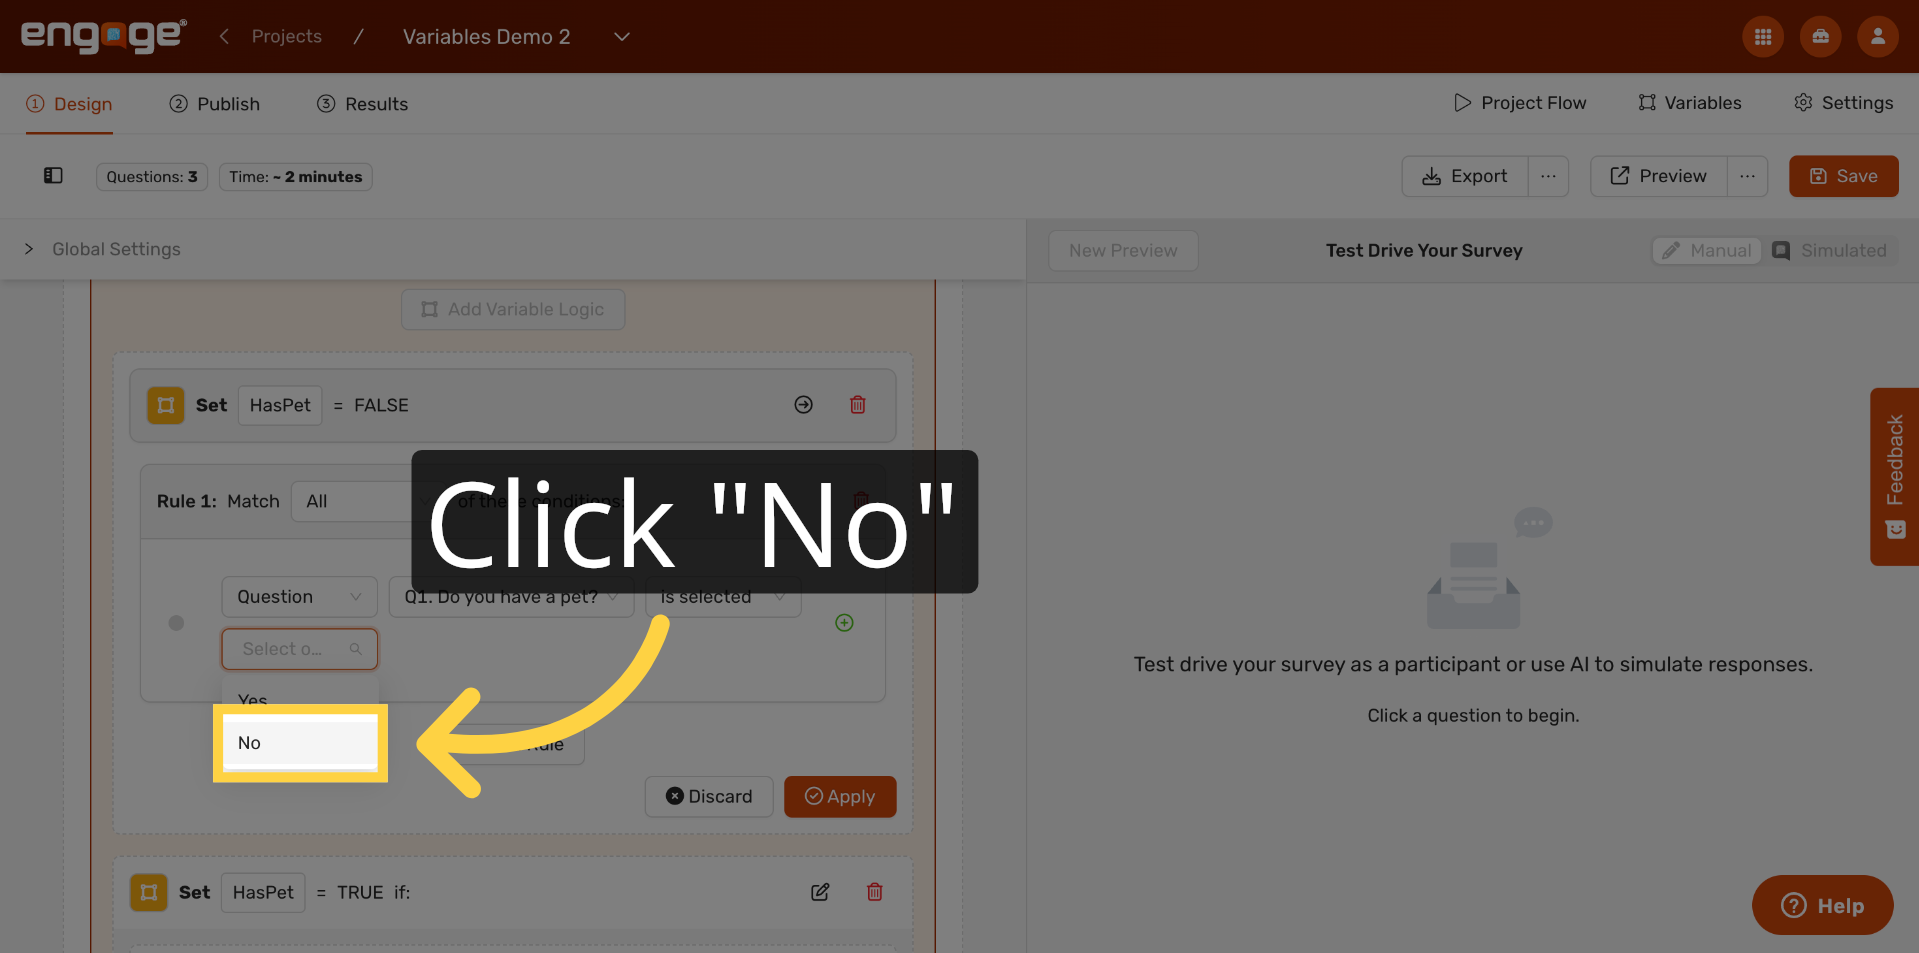
24. Choose No Option
Select "No" from the list of answer choices. This means: when the participant selects "No," the HasPet variable will be set to FALSE.
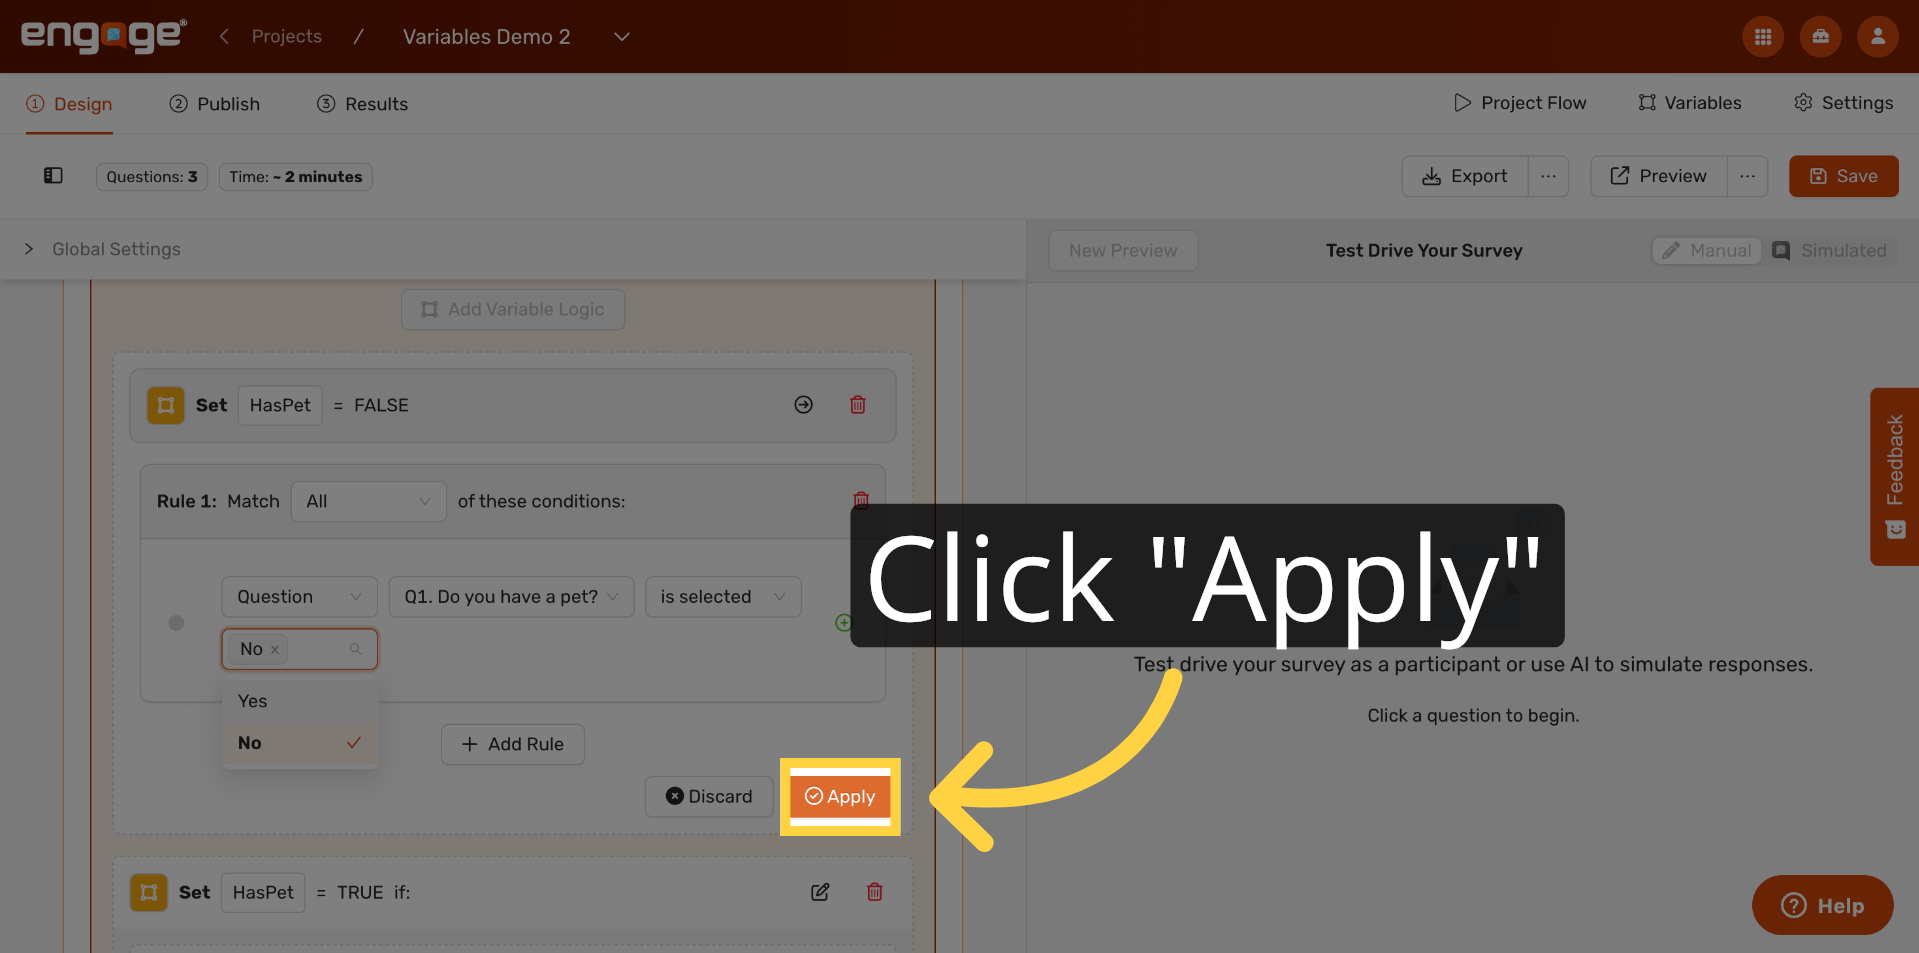
25. Apply Condition
Click Apply to save the condition. Your rule is now complete. You should now see two rules for the HasPet variable — one that sets it to TRUE when the participant selects "Yes," and one that sets it to FALSE when they select "No."
26. Add Variable From Question
You can add as many variable logic rules as you need across your survey. Let's now create a second variable to capture more detail. We'll add logic to a different question to create a variable called "AnimalType."
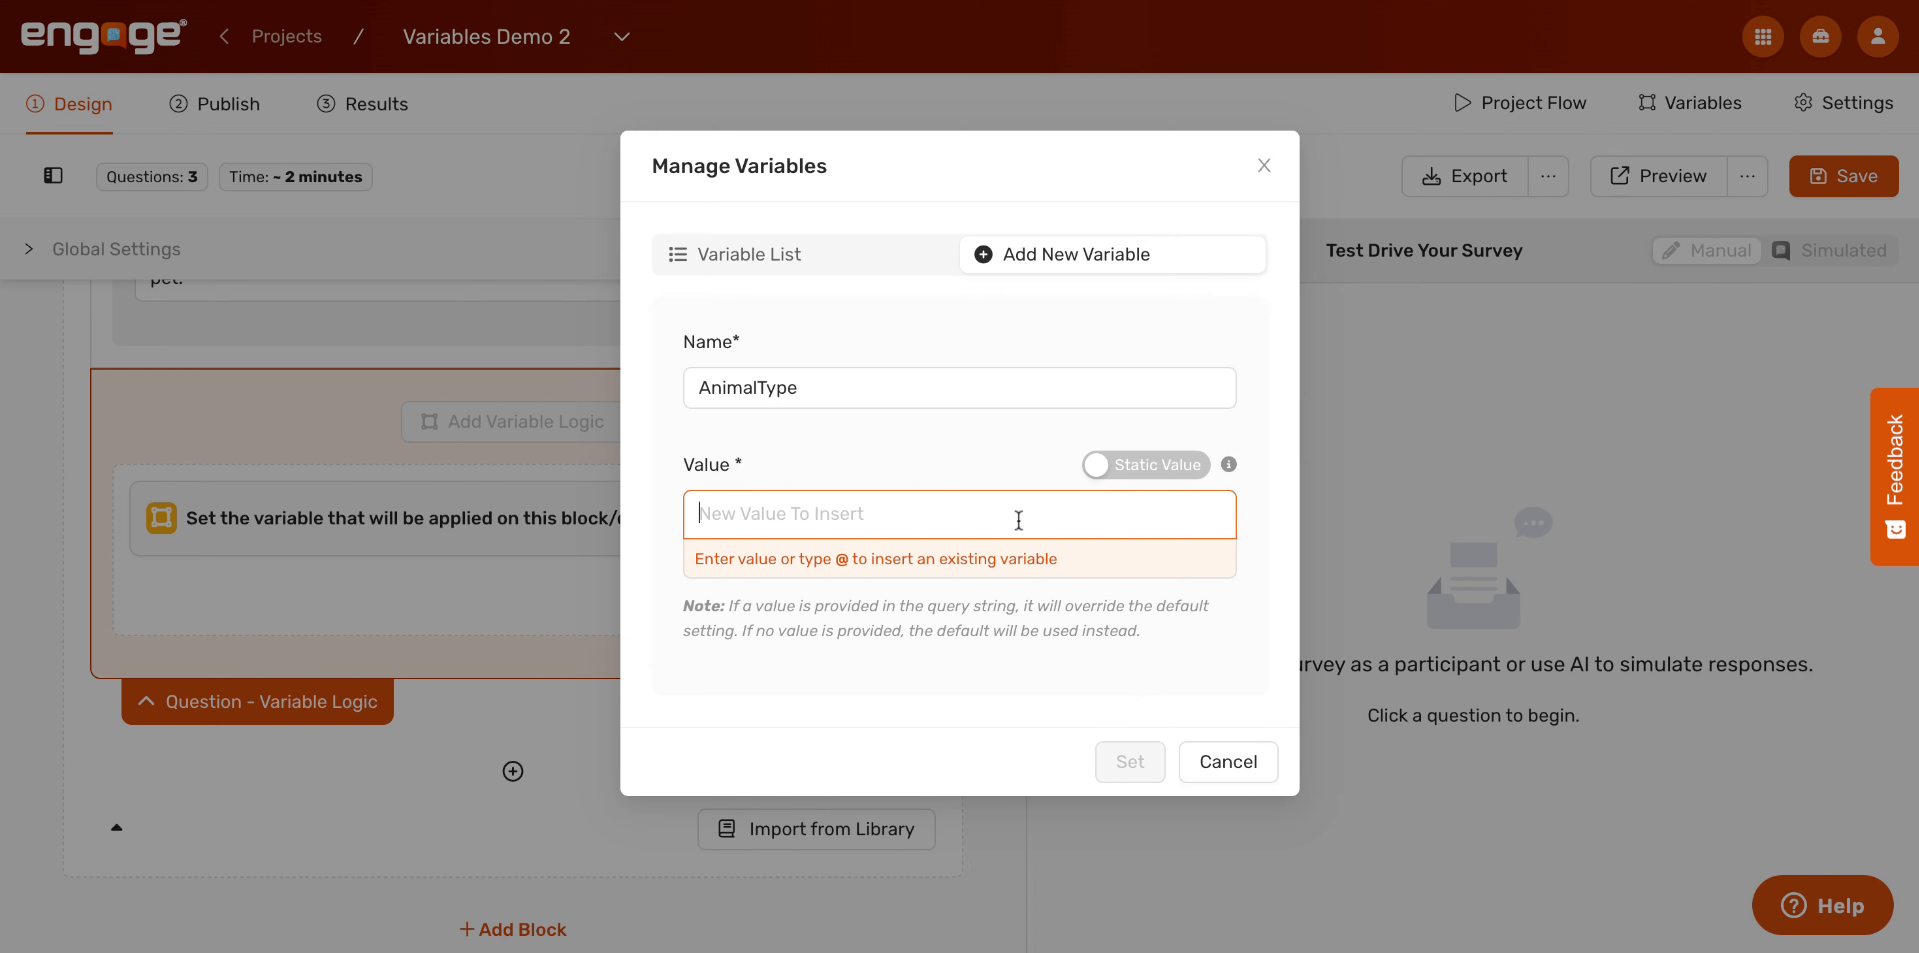
27. Create New Variable AnimalType
Open the Variables panel again and click "Add New Variable." Name this one "AnimalType" — we'll use it to store which kind of pet the participant has.

28. Enter Default Variable Value
In the Value field, you can set a default or leave it blank. This time, instead of typing a fixed value, we'll link it directly to a participant's response. Click into the Value field to see your options.
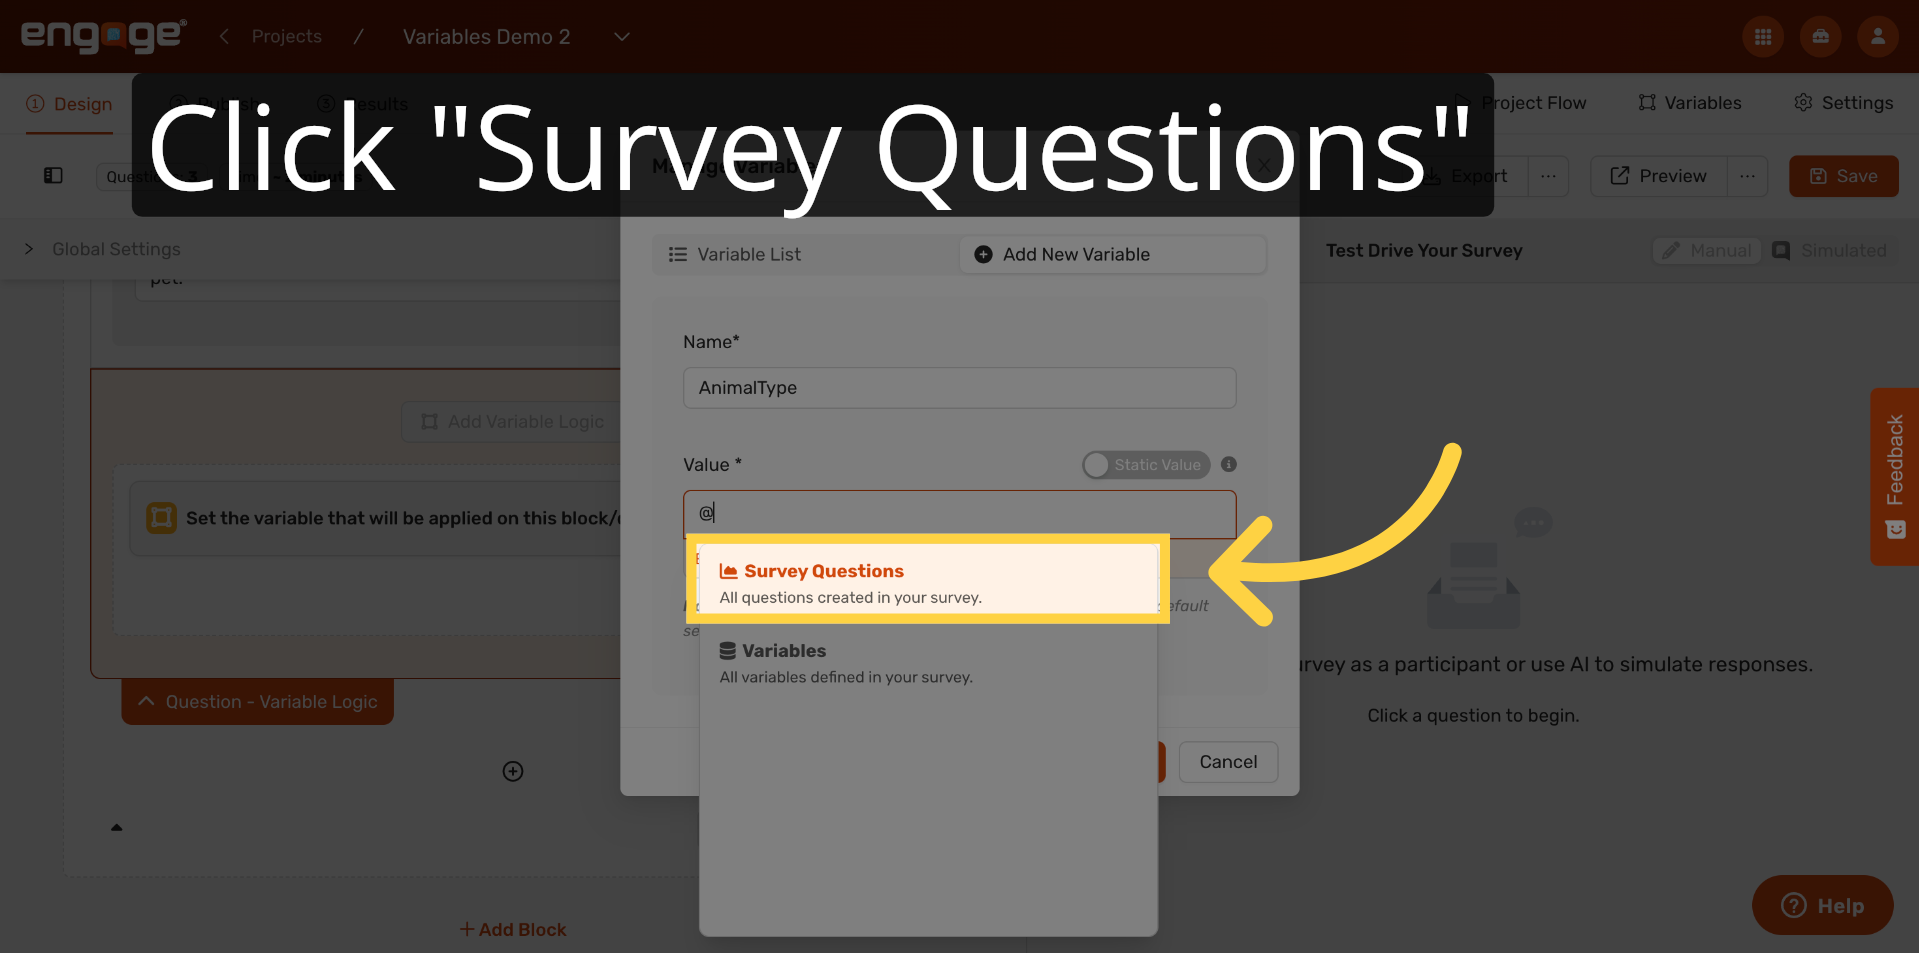
29. Open Survey Questions
A menu will appear giving you two options: Survey Questions and Variables. Click "Survey Questions" to link this variable's value to a participant's actual answer.
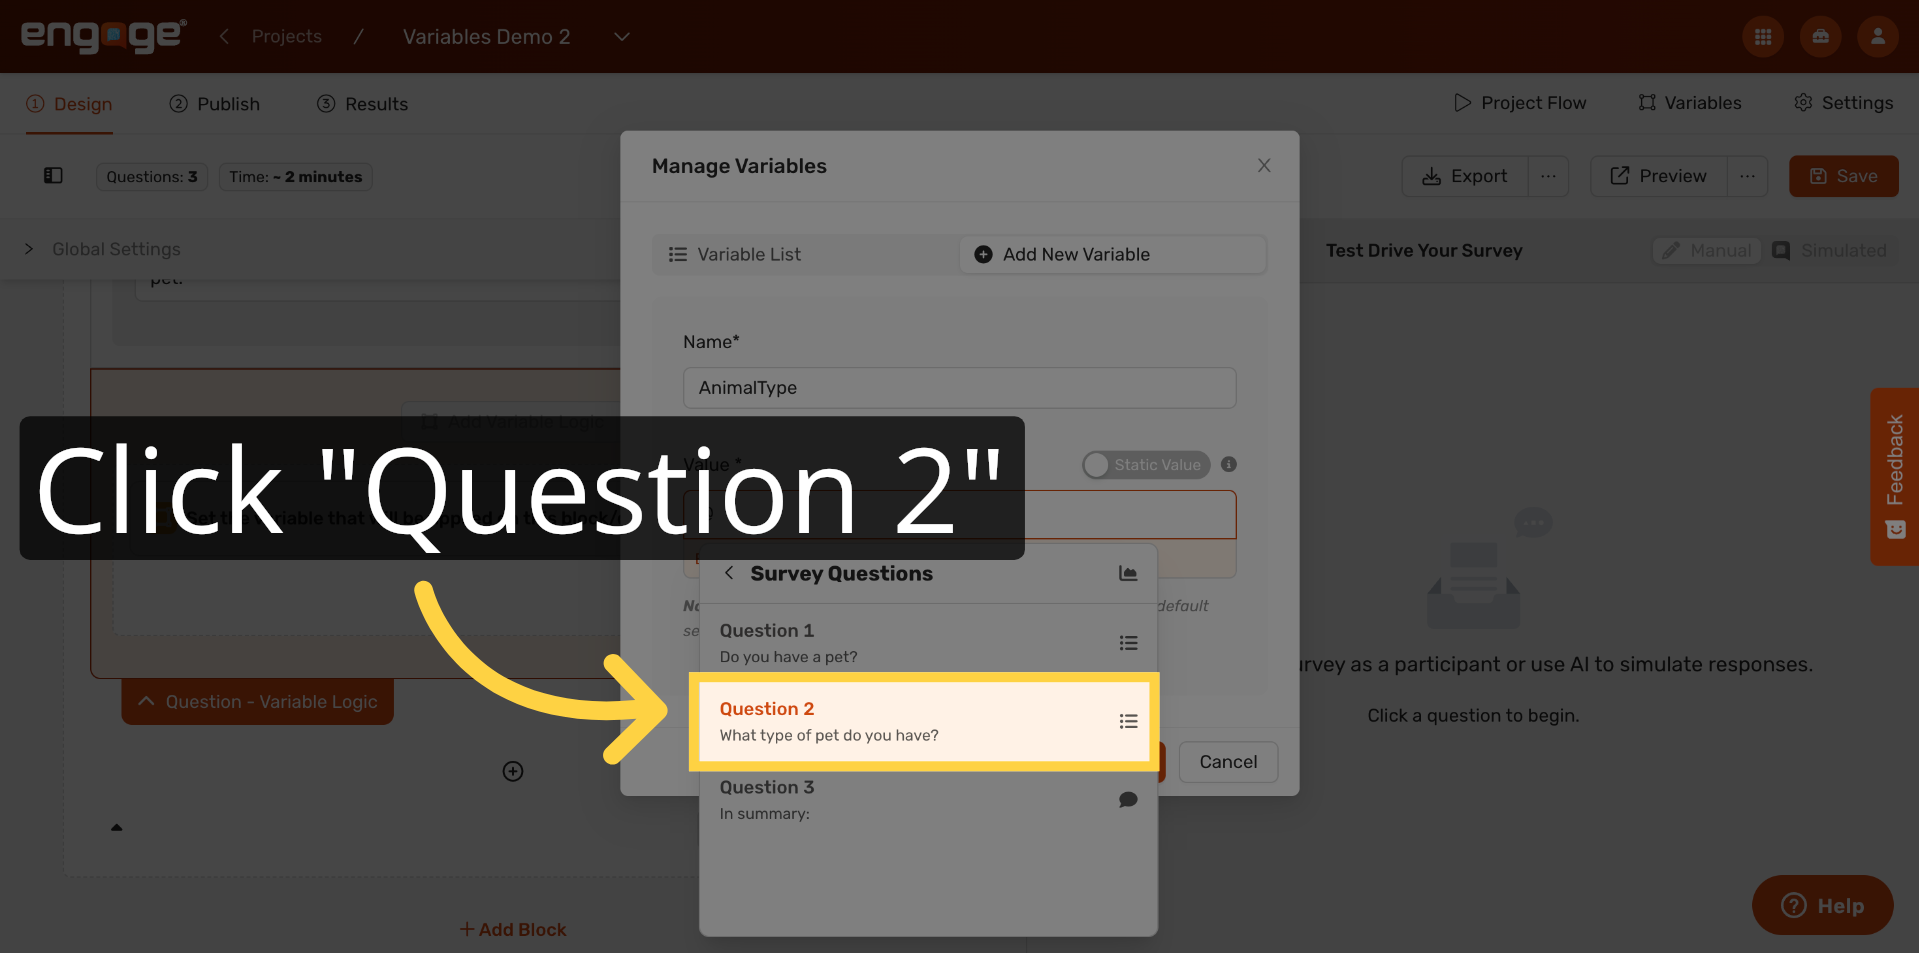
30. Select Question Two
A list of your survey questions will appear. Click "Question 2 – What type of pet do you have?" to use it as the source for this variable.
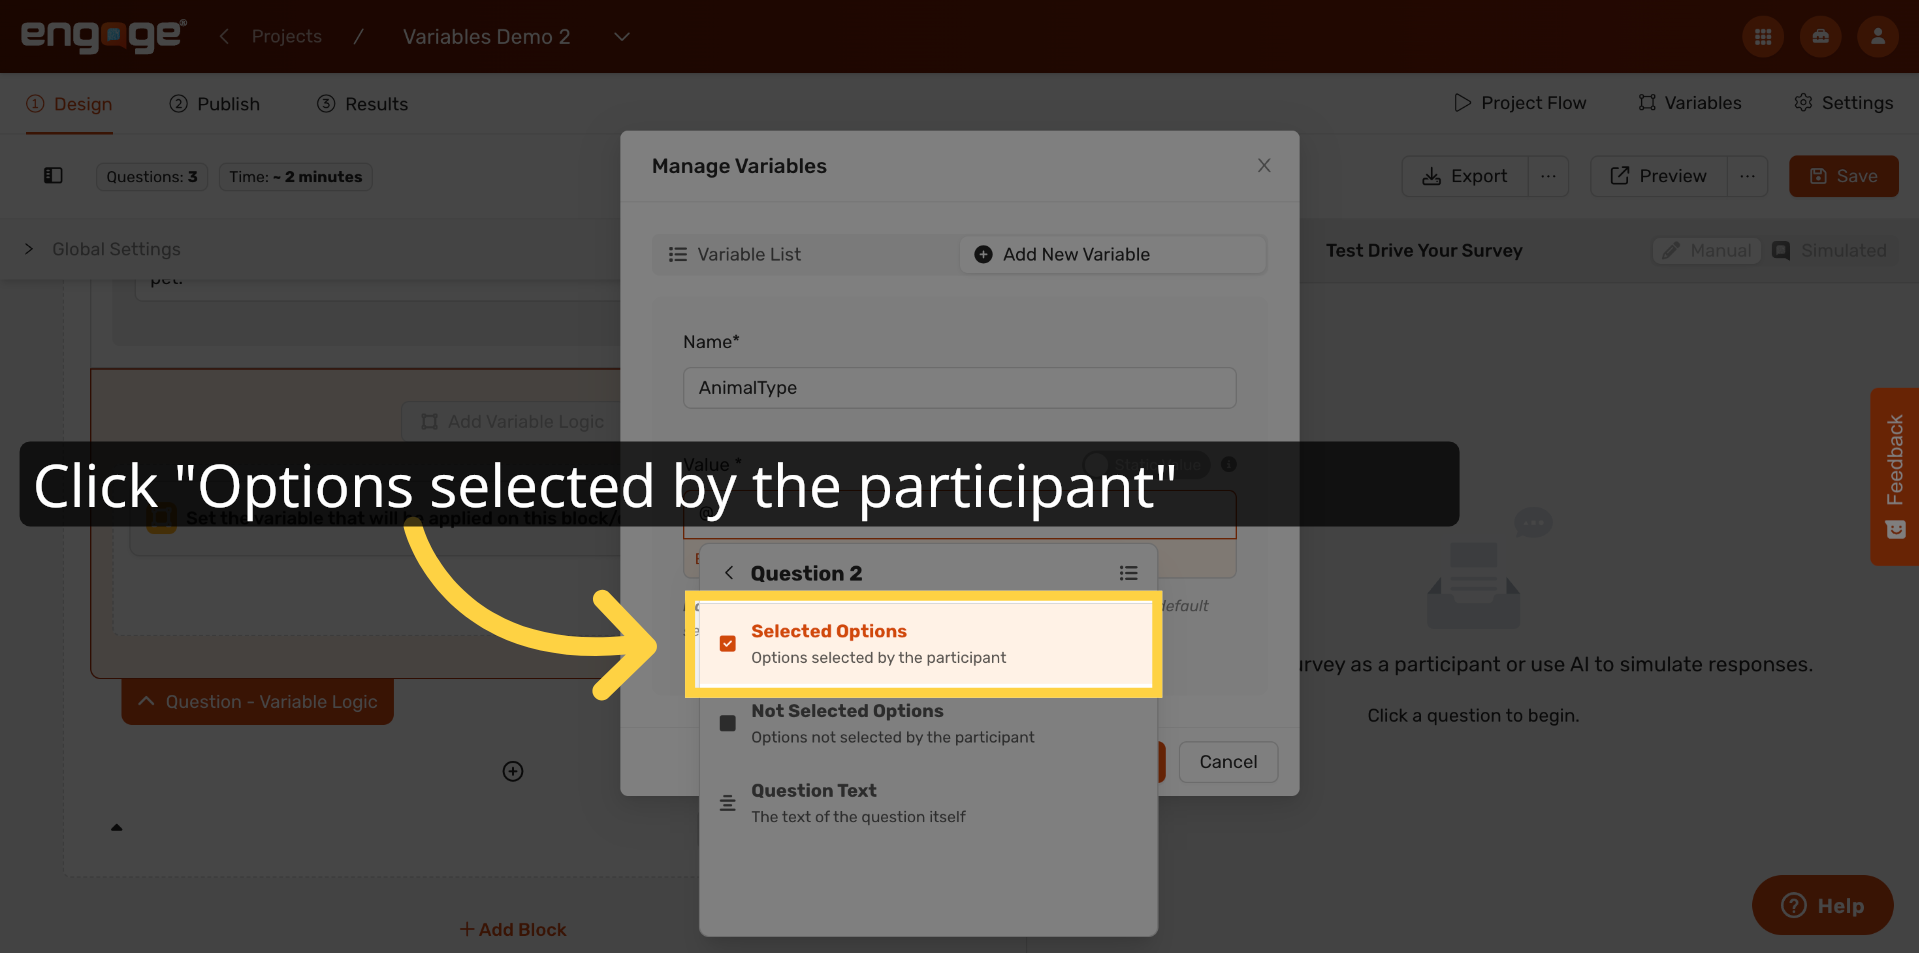
31. Choose Participant's Selected Options
You'll see several options for how to pull the value from the question. Select "Options selected by the participant." This tells Engage to automatically store whatever the participant chose as the variable's value.
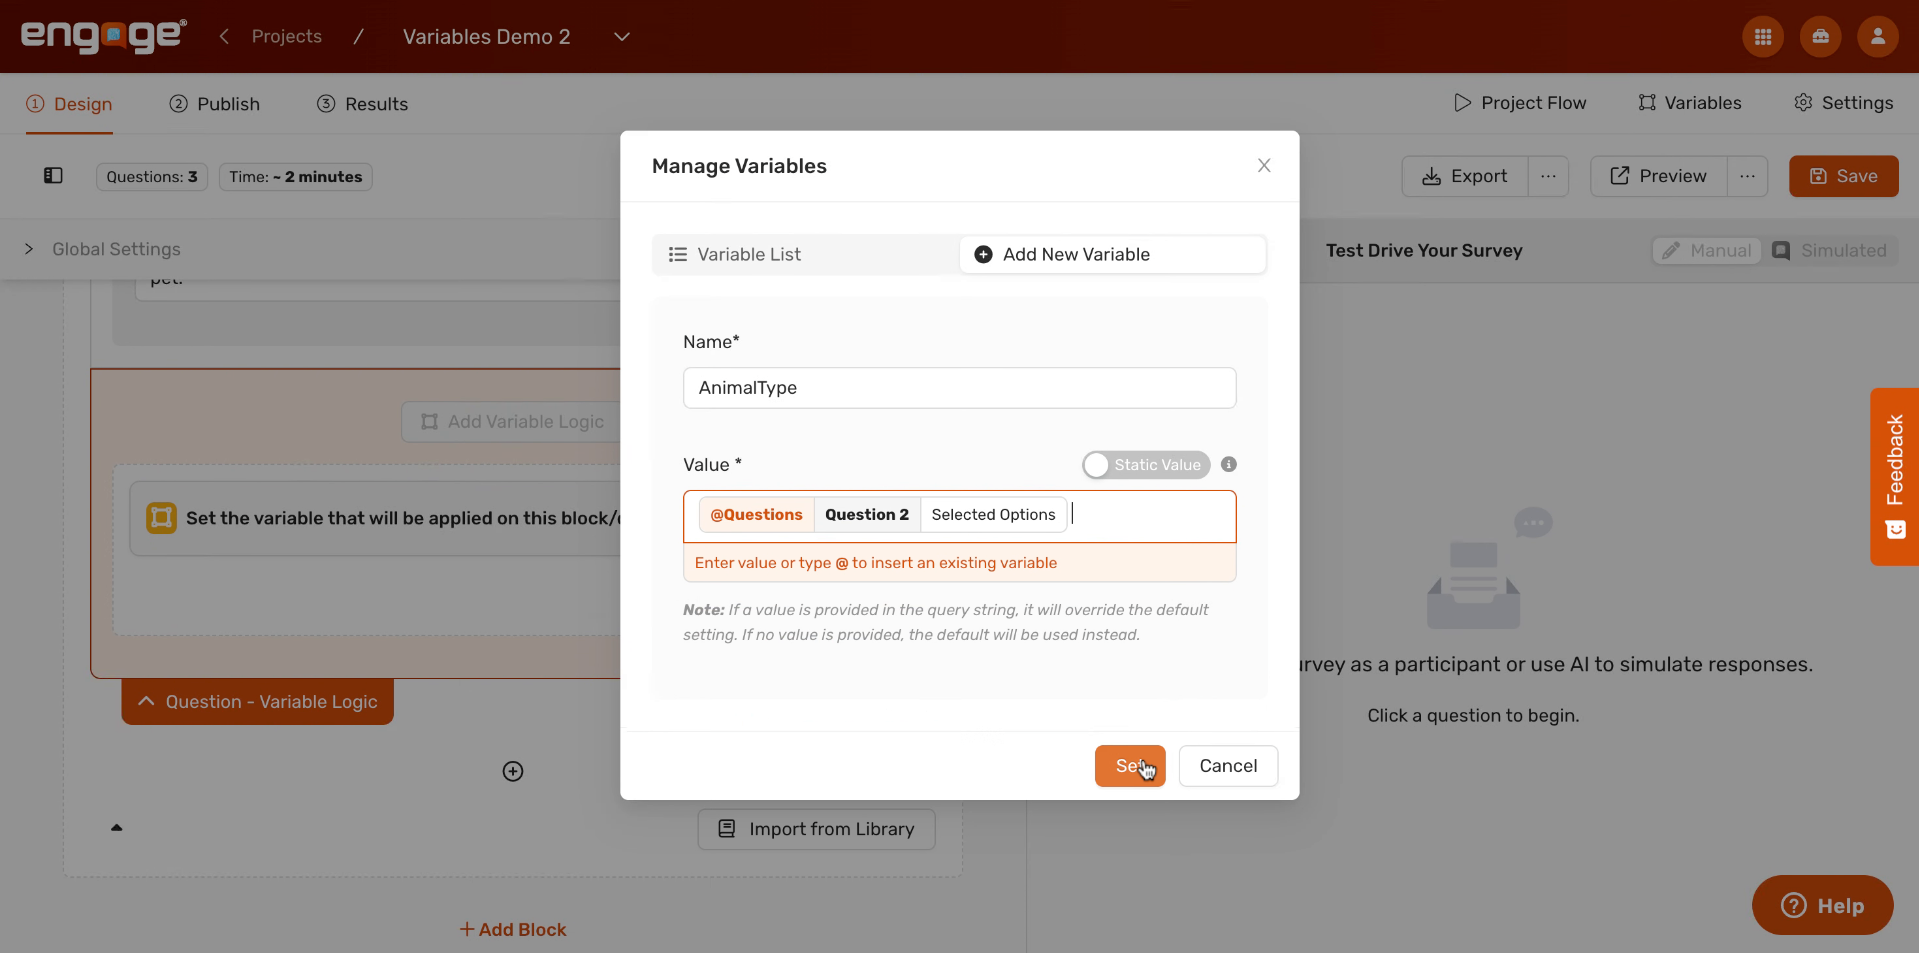
32. Set Variable From Response
You'll now see the value field populated with a reference to Question 2's selected options. Click Set to confirm. The AnimalType variable will now automatically be updated to match each participant's answer.
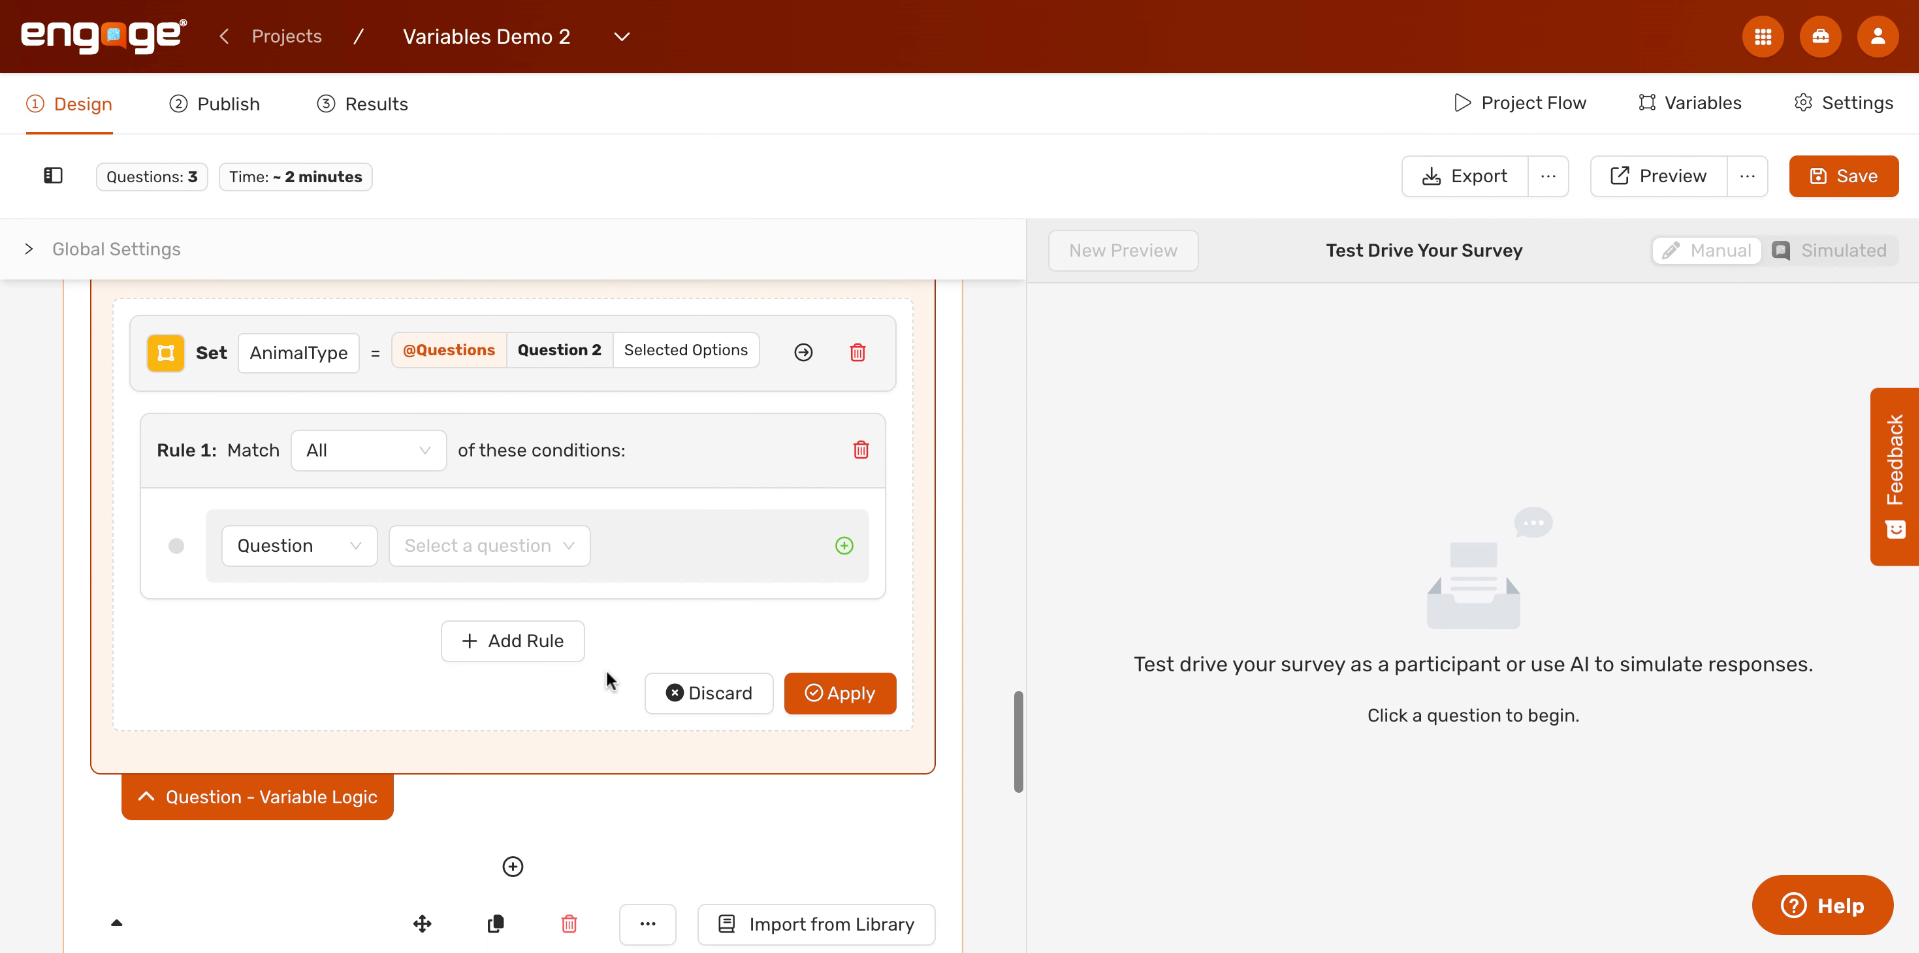
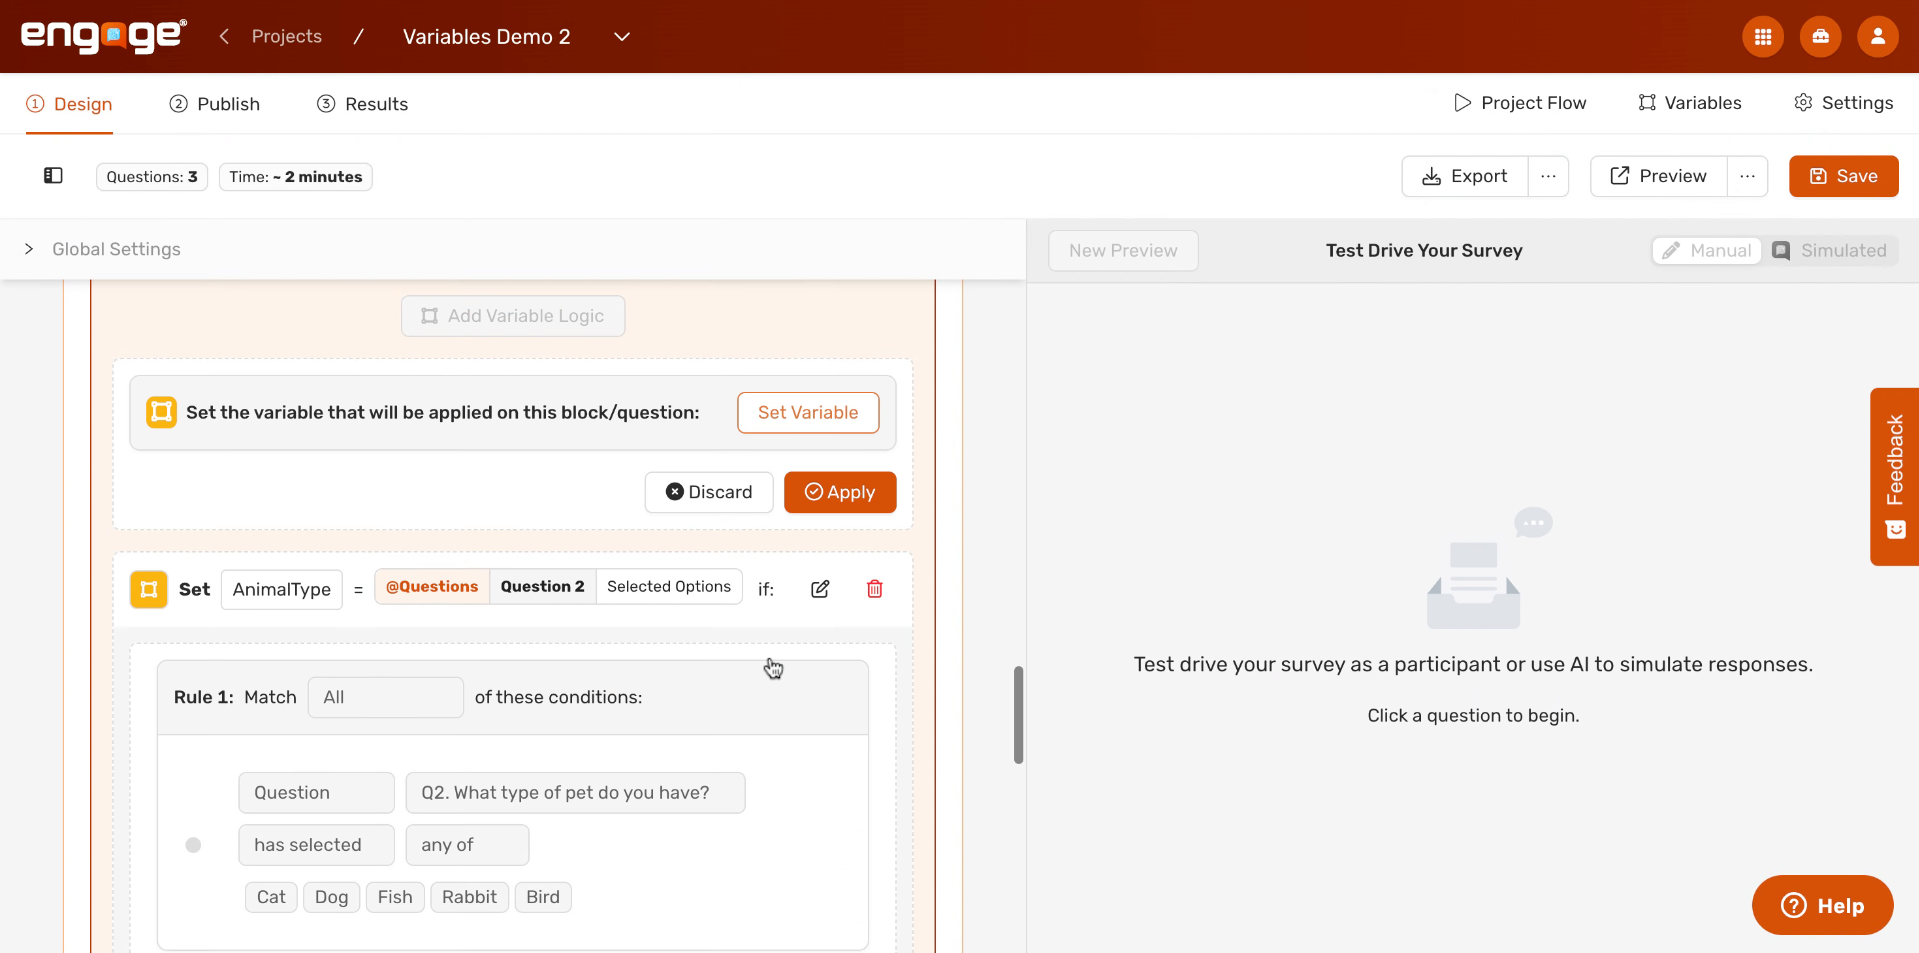
33. Add Rule For Variable
You can optionally add conditions to control when this update fires. Click "Add Rule" if you want the variable to only update under specific circumstances — for example, only if the participant answered "Yes" to Question 1 first.

34. Apply Conditions To Variable
Set up your condition by selecting the relevant question and answer choice, then click Apply to save it to the rule. In our example, we want this variable to be assigned for all answer choices aside from the other answer choice.
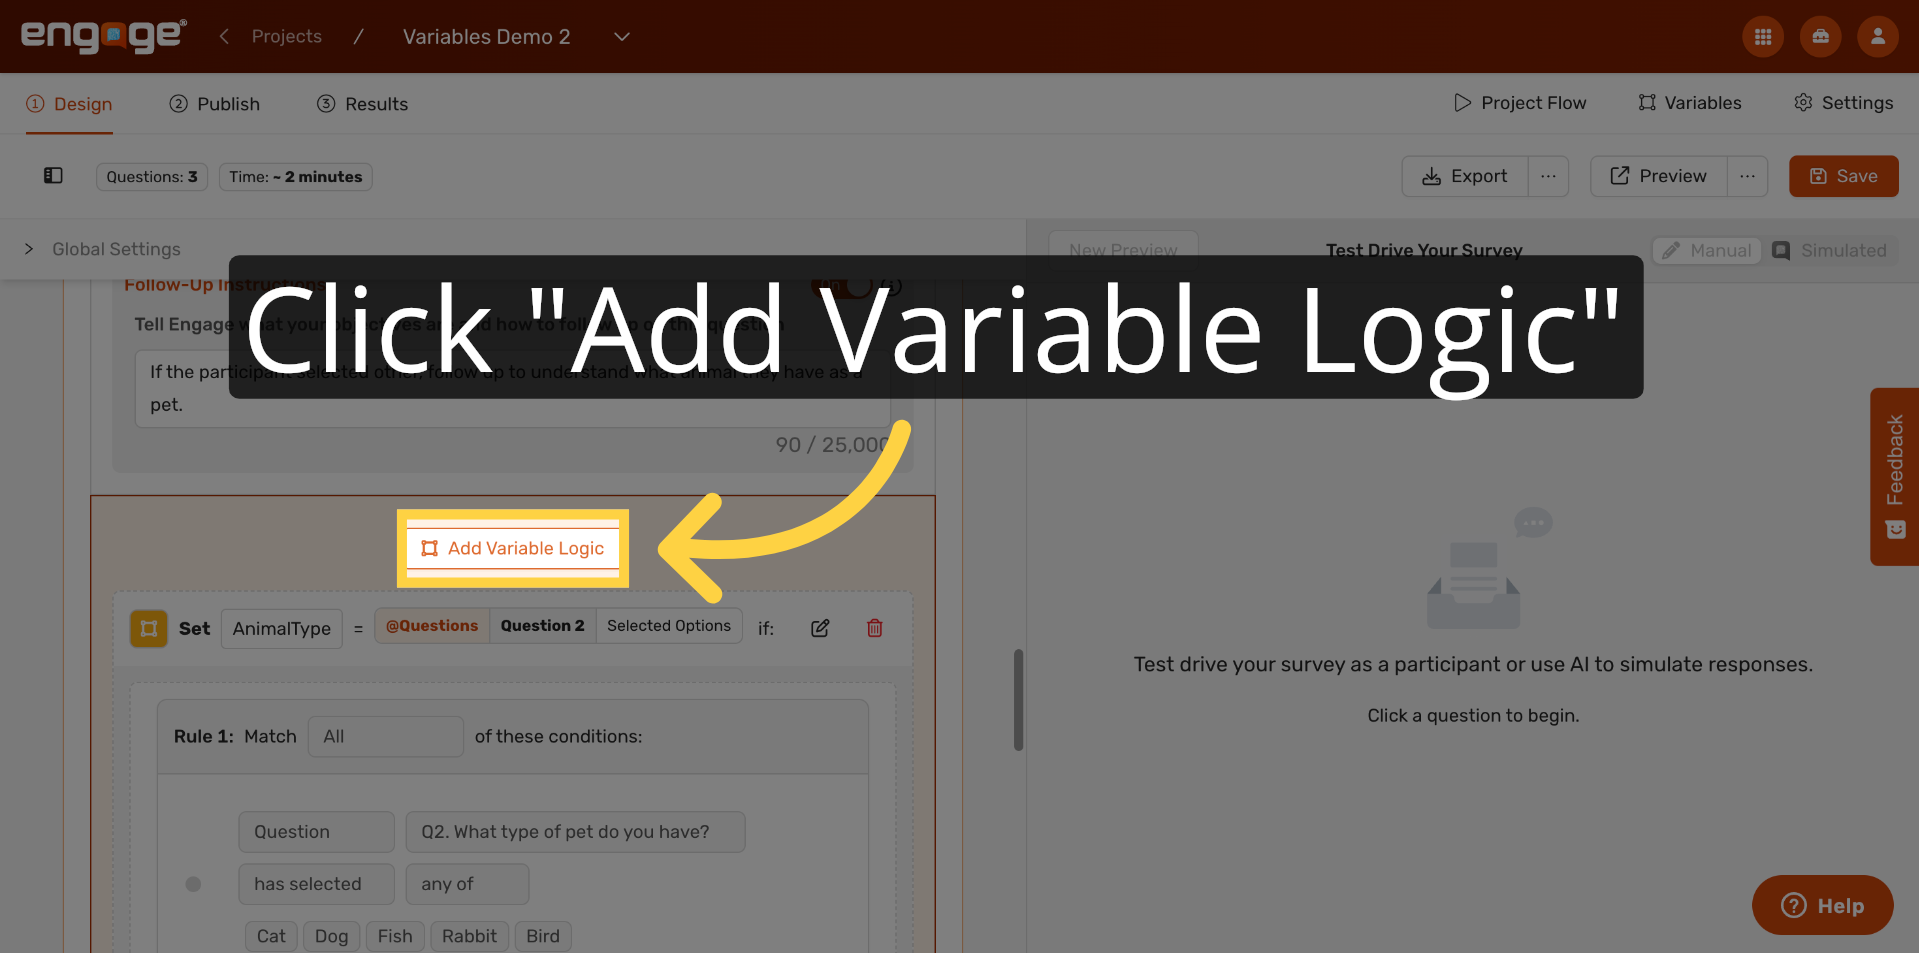
35. Add Variable Logic
You can continue adding more variable logic blocks throughout your survey. Click "Add Variable Logic" wherever you need additional rules — before or after any question in your project.
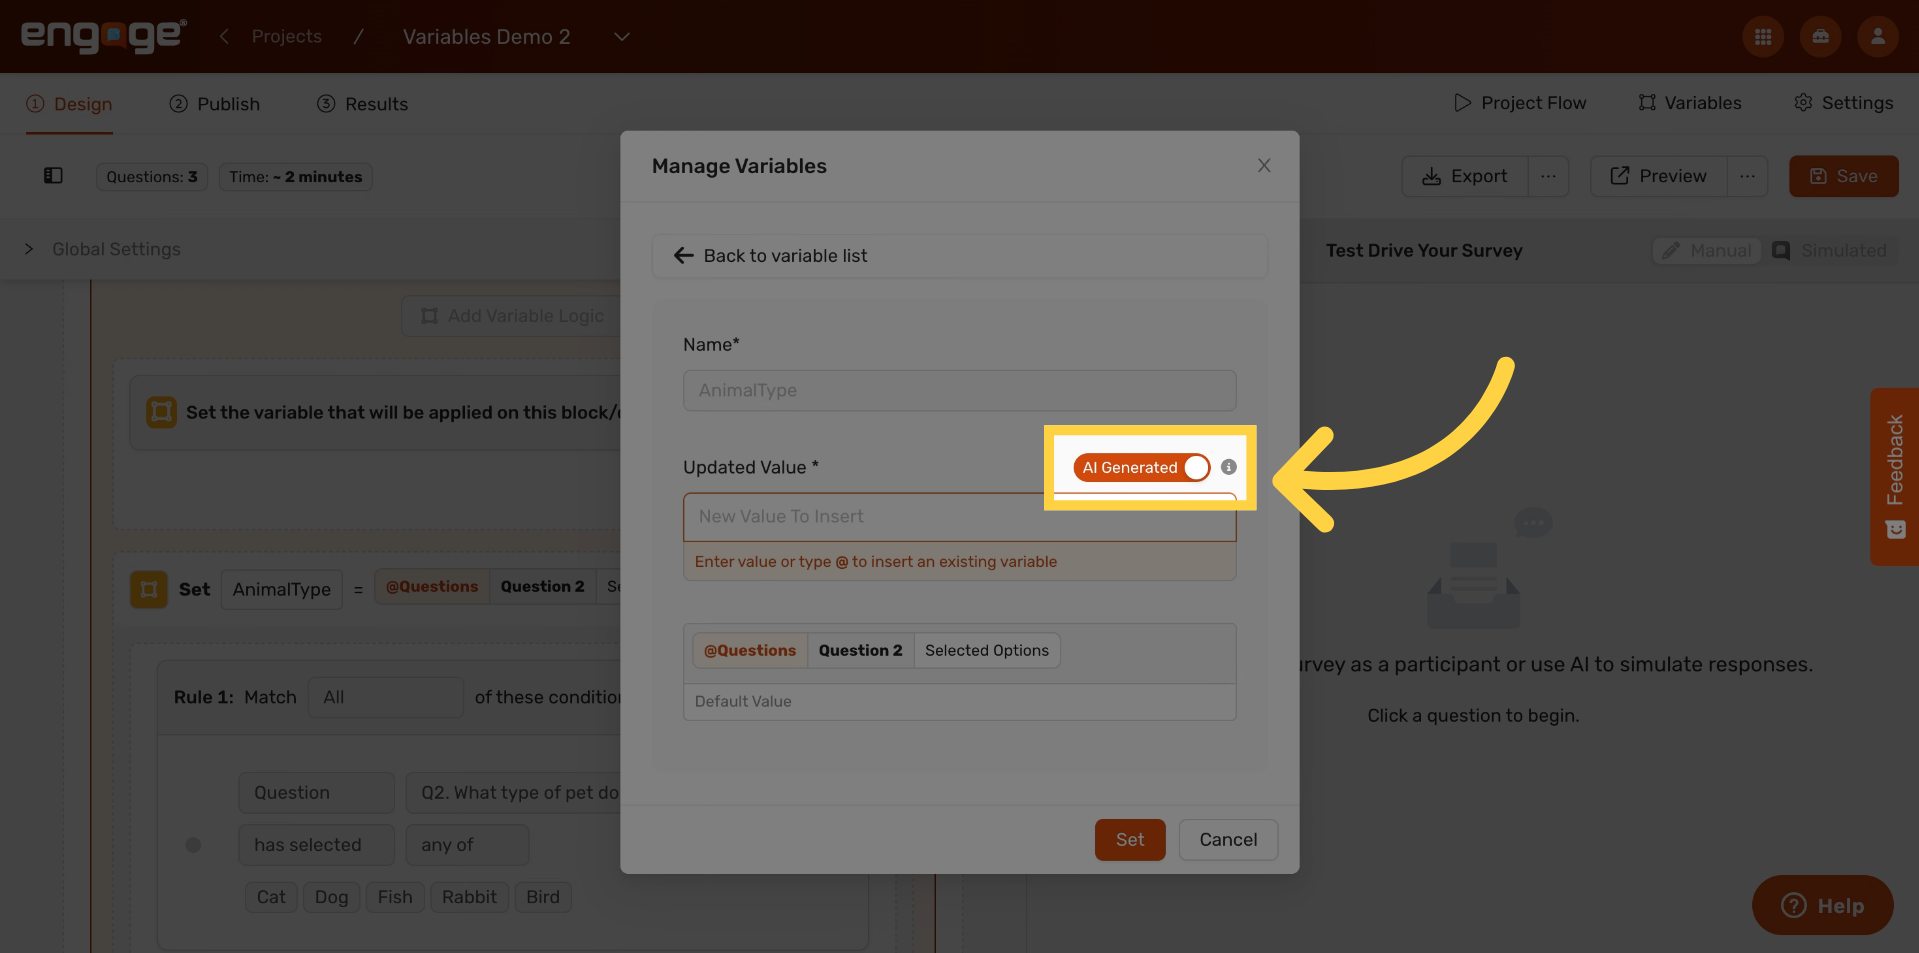
36. Use AI To Evaluate Responses
For open-ended questions, there's a third way to set a variable: using AI. Instead of matching a fixed answer, you can have the AI read the participant's response and assign a value based on its content. Click "Set Variable" to explore this option.
37. Explain AI Variable Update
When you toggle on "AI Generated," a text field appears where you can write instructions for the AI. The AI will read the participant's response and set the variable value based on those instructions.
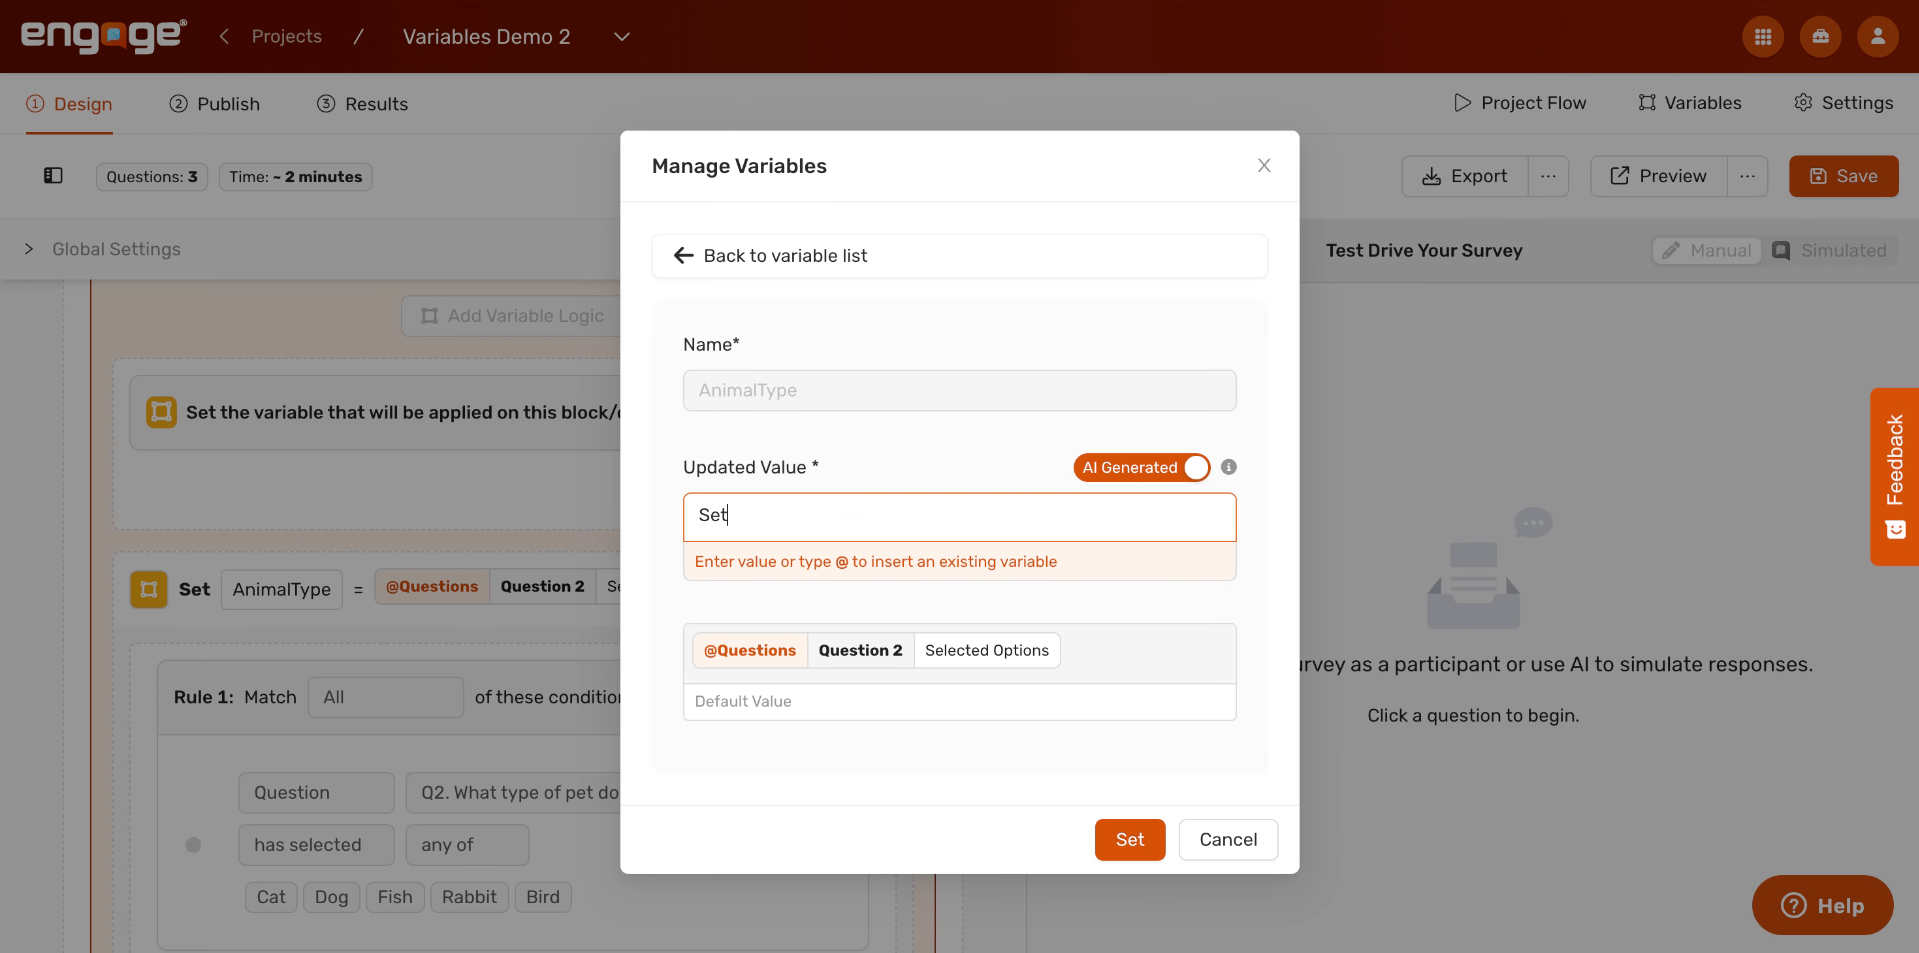
38. Set Variable With AI Instruction
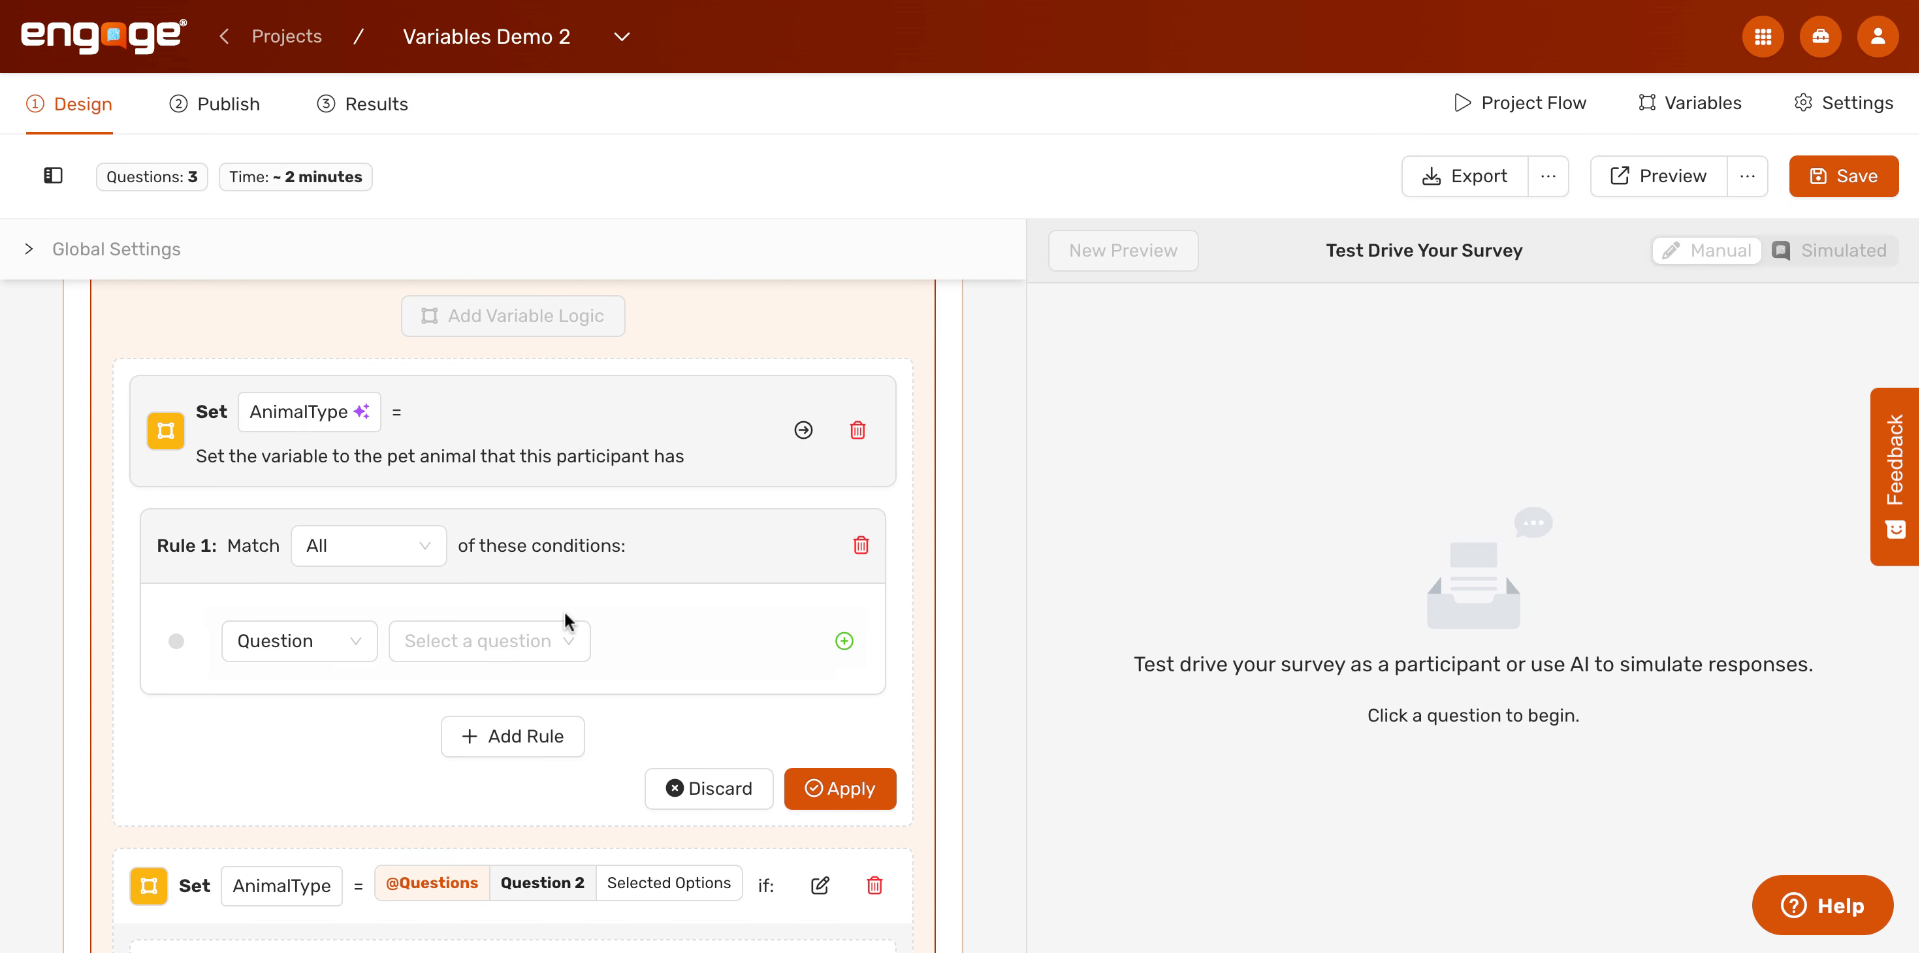
Write a clear instruction, such as: "Set the variable to the type of pet animal that this participant has." The AI will evaluate the response in real time and populate the variable accordingly. Be specific — if you want the value to be one of a defined set of categories, name them explicitly in your instruction.
39. Add Rule For Other Choice
You can combine AI-generated values with conditions, just like with manual rules. In our example, I will use this variable logic when the participant selected other as their answer choice. The AI will then go through the follow up conversation to identfy the pet this participant has.
40. Open Variables Management
At any point, you can return to the Variables panel by clicking "Variables" in the top toolbar. This gives you a full overview of every variable in your project.
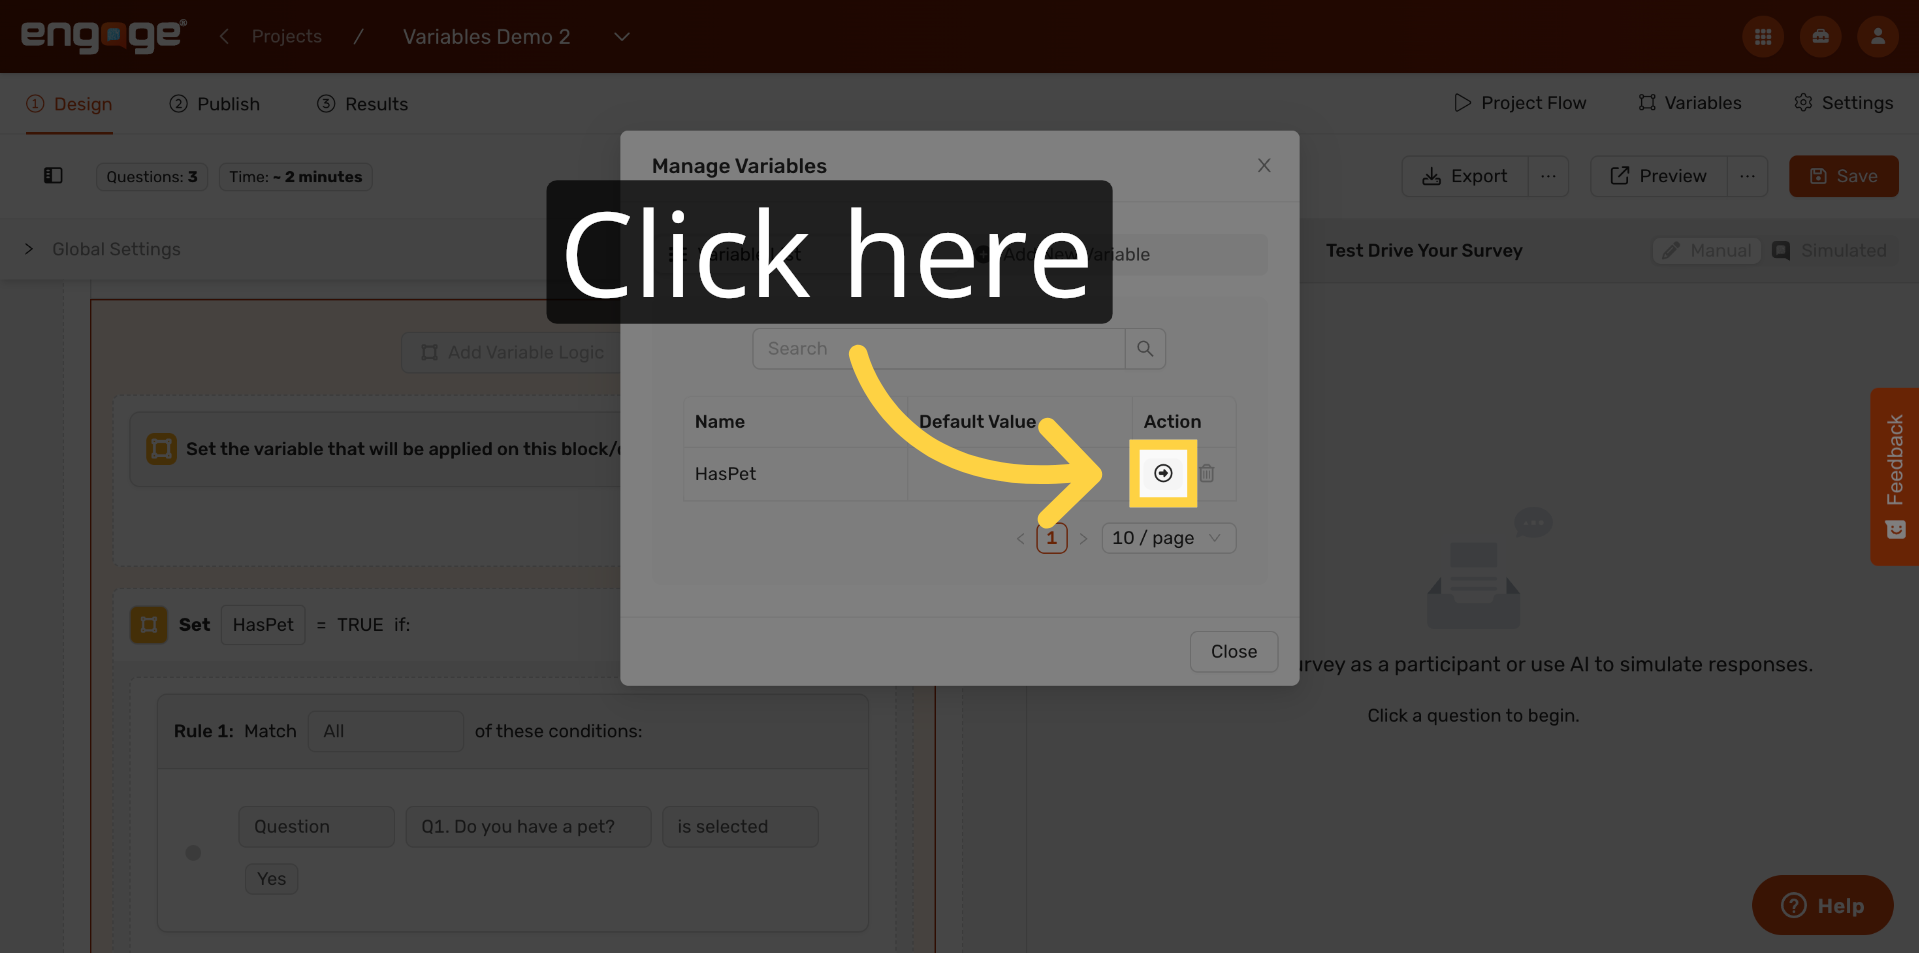
41. Manage Variables And Restrictions
The Variables panel shows each variable's name, its default value, and available actions. From here you can edit or delete any variable, and you'll also see which variables are currently active in your project.
42. Remove Variable From Settings
To delete a variable, click the trash icon next to it in the list. Note that if a variable is being used in any logic rules, you'll want to remove those rules first before deleting the variable.
Thanks you for watching! You've now seen how to create variables, set them using participant responses or AI evaluation, and manage them across your project. Variables are one of the most powerful tools in Engage for building adaptive, personalized survey experiences. For more, check out our related articles on Skip Logic, Display Logic, and AI Evaluation.

Comments
0 comments
Please sign in to leave a comment.